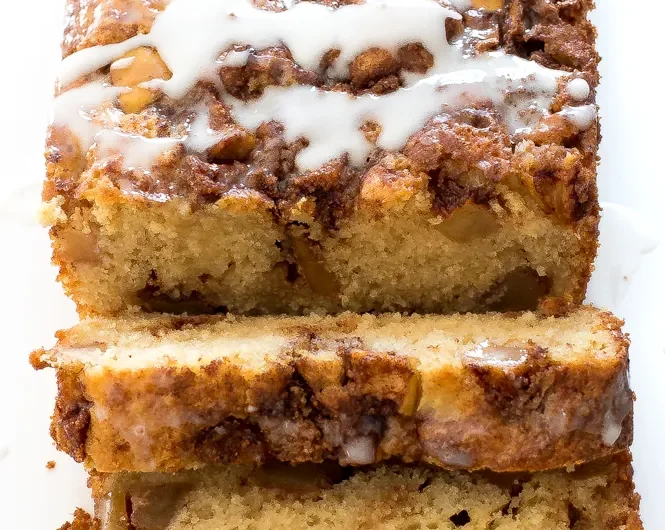
Apple Fritter Bread is a delightful, homemade sweet loaf that’s bursting with cozy cinnamon and apple flavors. Whether you’re enjoying it as a breakfast treat or an indulgent dessert, this bread is a crowd-pleaser for any occasion. Let’s dive into how to make this delectable recipe, the essential tips for success, and some variations you can try.
What Makes Apple Fritter Bread So Special?
This bread combines the flavors of a classic apple fritter with the simplicity of a quick bread. The tender crumb, swirled with a cinnamon-spiced apple filling and topped with a luscious glaze, is a match made in culinary heaven. Here’s why you’ll love it:
- Moist and Flavorful Texture: Thanks to the buttery batter and fresh apples, every bite is rich and soft.
- Easy to Make: With no need for a yeast starter, this quick bread comes together in just a few simple steps.
- Versatile: Serve it warm as a breakfast treat, pair it with coffee for an afternoon snack, or finish a meal with it as dessert.
Key Ingredients for Success
- Apples: Opt for firm, slightly tart apples like Granny Smith or Fuji for the best balance of flavor and texture. Dice them into small, even pieces to ensure they cook evenly.
- Cinnamon: The warming spice is the star of the show, enhancing the natural sweetness of the apples.
- Nutmeg: Just a pinch adds depth and complexity to the batter.
- Butter and Eggs: These give the bread its rich, moist texture.
- Brown Sugar: Adds a subtle molasses flavor to both the batter and the apple filling.
- Powdered Sugar Glaze: A simple mix of powdered sugar and milk creates a sweet finishing drizzle that ties the flavors together.
Tips for the Perfect Apple Fritter Bread
- Use Room Temperature Ingredients: Let your butter and eggs come to room temperature before mixing. This ensures a smooth batter with even distribution of ingredients.
- Don’t Overmix the Batter: Stir just until the dry ingredients are incorporated to avoid a dense texture.
- Layer Strategically: Create defined layers by alternating batter and apple filling. This ensures every slice has a perfect balance of flavors.
- Check for Doneness: Use a toothpick to test the bread. If it comes out mostly clean with a few moist crumbs, the bread is ready.
- Cool Before Glazing: Allow the bread to cool completely to prevent the glaze from melting off.
Variations to Try
- Nutty Crunch: Add chopped pecans or walnuts to the apple filling for a nutty twist.
- Caramel Drizzle: Replace the glaze with a drizzle of homemade caramel sauce.
- Whole Wheat Version: Substitute half of the all-purpose flour with whole wheat flour for a heartier loaf.
- Spiced Up: Add a pinch of ground cloves or ginger to the batter for extra warmth.
- Gluten-Free: Use a gluten-free flour blend to make this recipe accessible for everyone.
Storing and Serving Suggestions
- Storage: Keep the bread in an airtight container at room temperature for up to 3 days, or refrigerate for up to a week.
- Freezing: Wrap the loaf tightly in plastic wrap and aluminum foil before freezing for up to 3 months. Thaw overnight in the fridge and reheat slices in the microwave for a fresh-out-of-the-oven taste.
- Serving Ideas: Serve warm with a pat of butter, alongside a hot cup of coffee or tea. It’s also fantastic with a scoop of vanilla ice cream as a dessert option.


