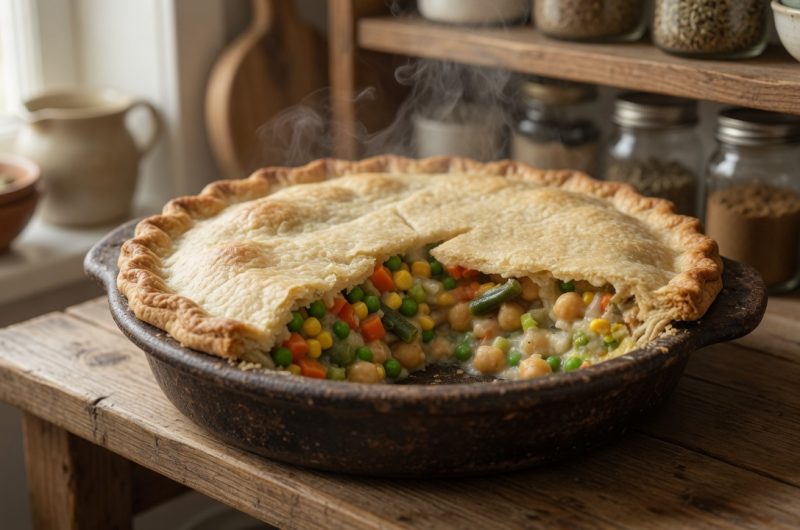
This chickpea and potato pot pie offers a plant-based twist on the classic comfort food dish. The recipe uses wholesome ingredients like chickpeas and potatoes to create a filling that satisfies without any meat. A flaky vegan crust wraps around the creamy vegetable filling to create layers of texture and flavor. The herbs and vegetables blend together in a savory sauce that reminds you of traditional pot pie. This dish works well for family dinners when you want something warm and comforting. Whether you follow a vegan diet or just want to try something different, this pot pie delivers on taste and satisfaction.
Understanding the Main Ingredients
Chickpeas provide protein and a hearty texture that makes this pie filling and substantial. These legumes hold their shape during cooking and absorb the flavors of the herbs and broth. Potatoes add starchiness and create a creamy consistency when combined with the sauce. The carrots bring natural sweetness and a pop of orange color to the filling. Frozen peas contribute another layer of texture and a fresh vegetable taste. Together, these ingredients create a balanced filling that is both nutritious and delicious.
Choosing Your Pie Crust Fat
Vegan butter is essential for making a flaky, tender pie crust without dairy products. This plant-based butter mimics the properties of regular butter in baking. The cold vegan butter creates pockets of steam during baking that make the crust flaky. You can find vegan butter in most grocery stores near the regular butter section. Make sure the vegan butter is very cold when you start making the dough. If the butter warms up too much, the crust will not be as flaky and tender.
Selecting Plant-Based Milk
Unsweetened almond milk works well in this recipe because it has a neutral flavor. The almond milk adds creaminess to the filling without overpowering the other ingredients. You can substitute any plant-based milk you prefer such as soy milk, oat milk, or coconut milk. Just make sure to choose an unsweetened variety so you do not add unwanted sweetness to the savory filling. The plant-based milk combines with the flour to create a thick, creamy sauce similar to traditional pot pie gravy.
Making the Pie Crust Dough
Start by adding the flour and salt to your food processor. Cut the cold vegan butter into small cubes before adding it to the processor. Pulse the mixture several times until it looks like coarse crumbs with some pea-sized pieces of butter remaining. These butter pieces are what create the flaky layers in your crust. Slowly drizzle in the ice water while pulsing until the dough just starts to hold together. Do not overmix the dough or the crust will become tough instead of tender and flaky.
Chilling the Dough
Divide your dough into two equal portions and shape each into a flat disk. Wrap each disk tightly in plastic wrap to prevent it from drying out. Place the wrapped disks in the refrigerator for at least thirty minutes. This chilling time allows the gluten to relax and the butter to firm up again. Cold dough is much easier to roll out than warm dough. You can make the dough up to two days ahead and keep it refrigerated. If you freeze the dough, let it thaw in the refrigerator overnight before using.
Preparing Your Vegetables
Peel the potatoes and cut them into small, even-sized cubes about half an inch. Small pieces cook faster and more evenly than large chunks. Dice the carrots into similar-sized pieces so everything cooks at the same rate. Finely chop the onion so it melts into the sauce rather than creating large chunks. Mince the garlic cloves very small to distribute the flavor throughout the filling. Drain and rinse the canned chickpeas in a colander to remove the thick liquid they are packed in.
Starting the Filling
Heat the olive oil in a large pot over medium heat until it shimmers. Add the chopped onion and cook it for about three minutes until it becomes soft and translucent. Stir in the minced garlic and cook for another thirty seconds until it smells fragrant. Be careful not to burn the garlic as it can turn bitter. This base of sautéed aromatics creates the flavor foundation for your entire filling. The onion and garlic will blend into the sauce and add depth to every bite.
Cooking the Vegetables
Add the diced potatoes and carrots to the pot with the onions and garlic. Sprinkle in the dried thyme and rosemary, stirring to coat the vegetables with the herbs. Cook for two to three minutes to let the herbs release their essential oils. This step makes the herbs more fragrant and flavorful than if you add them later. The vegetables will start to soften slightly on the edges. Stir occasionally to prevent anything from sticking to the bottom of the pot.
Creating the Sauce Base
Sprinkle the all-purpose flour evenly over all the vegetables in the pot. Stir constantly for about one minute to coat every piece with flour. This flour coating will thicken the liquid you add next and create a creamy sauce. Cooking the flour for a minute removes the raw flour taste that can make sauces taste chalky. Make sure no dry pockets of flour remain in the pot. The mixture will look dry and paste-like at this stage, which is exactly what you want.
Adding the Liquids
Slowly pour in the vegetable broth while stirring continuously to prevent lumps from forming. The flour will absorb the liquid and start to thicken immediately. Add the almond milk next, still stirring to keep everything smooth. Bring the mixture to a gentle simmer over medium heat. The liquid will continue to thicken as it simmers. Watch the pot and stir occasionally to prevent the bottom from scorching. The potatoes and carrots will cook in this simmering liquid until they become tender.
Finishing the Filling
Stir the drained chickpeas and frozen peas into the simmering mixture. The peas do not need to be thawed first as they will heat through quickly. Let everything simmer together for about ten minutes until the sauce reaches a thick, gravy-like consistency. The potatoes should be tender enough to pierce easily with a fork. Taste the filling and add salt and pepper as needed. Remember that the filling should be well-seasoned since the crust is plain. Remove the pot from heat and let the filling cool slightly while you prepare the pie crust.
Rolling Out the Bottom Crust
Lightly dust your work surface and rolling pin with flour to prevent sticking. Unwrap one disk of chilled dough and place it on the floured surface. Roll from the center outward, turning the dough a quarter turn after each roll. This technique helps you create an even circle. Roll the dough until it is about two inches larger than your pie dish all around. The dough should be about one-eighth inch thick. Carefully drape the dough over your rolling pin and transfer it to your pie dish.
Fitting the Crust in the Dish
Gently press the dough into the bottom and up the sides of the pie dish. Leave the excess dough hanging over the edges for now. Make sure there are no air pockets between the dough and the dish. If the dough tears, simply press it back together with your fingers. The dough is forgiving and small repairs will not show in the final pie. Refrigerate the lined pie dish while you roll out the top crust. This keeps the bottom crust cold so it bakes up flaky.
Adding the Filling to the Crust
Pour the cooled chickpea and potato filling into the prepared pie crust. Spread the filling evenly so it reaches all the edges of the crust. Leave a small gap at the very top so the filling does not overflow when you add the top crust. The filling should mound slightly in the center. If you have extra filling, you can bake it separately in a small dish. Make sure the filling is not steaming hot when you add it or it could melt the bottom crust before baking.
Preparing the Top Crust
Roll out the second disk of dough using the same technique as the first. The top crust should be just large enough to cover the pie with a little overhang. Carefully transfer the rolled dough over the filled pie. Press the top and bottom crusts together around the edges. Trim away excess dough with kitchen scissors, leaving about half an inch of overhang. Fold the edges under and crimp them together with your fingers or a fork. This sealed edge keeps the filling inside during baking.
Venting the Pie
Use a sharp knife to cut several small slits in the top crust. These vents allow steam to escape during baking so the crust does not become soggy. You can make simple straight cuts or create a decorative pattern. Just make sure there are at least four or five openings for steam. Without these vents, the steam will build up and could cause the crust to puff up unevenly or even burst. The slits also give you a peek at the bubbling filling inside.
Baking Temperature and Time
Preheat your oven to three hundred seventy-five degrees Fahrenheit before baking. Place the assembled pie on a baking sheet to catch any drips. Put the baking sheet with the pie on the middle rack of the oven. Bake for forty to forty-five minutes, checking after forty minutes. The crust should turn a beautiful golden brown color. The filling should be bubbling through the vents. If the edges of the crust brown too quickly, cover them with strips of aluminum foil.
Cooling Before Serving
Remove the baked pie from the oven and place it on a wire rack. Let the pie cool for at least fifteen to twenty minutes before cutting into it. This cooling time allows the filling to thicken and set properly. If you cut the pie while it is too hot, the filling will be very runny. As the pie cools, the sauce firms up and makes serving much easier. The pie can be served warm or at room temperature depending on your preference.
Storing and Reheating
Cover any leftover pot pie with aluminum foil or transfer it to an airtight container. Store it in the refrigerator for up to three days. The crust will soften slightly in the refrigerator but will crisp up again when reheated. To reheat, place individual slices in a three hundred fifty degree oven for about fifteen minutes. The oven method keeps the crust much flakier than the microwave. You can also freeze unbaked or baked pot pie for up to three months wrapped tightly.
Making Individual Pot Pies
You can divide this recipe into smaller individual pot pies using ramekins or small pie dishes. Adjust the baking time to about twenty-five to thirty minutes for smaller pies. Individual portions are perfect for meal prep or when you want personal servings. They also make a nice presentation for dinner parties. The filling and crust amounts in this recipe will make approximately six individual pot pies depending on the size of your dishes.
Adding Extra Vegetables
Feel free to customize the filling with other vegetables you enjoy. Mushrooms add a meaty texture and earthy flavor to the filling. Green beans or corn work well and add different colors. Celery adds crunch and a fresh vegetable taste. Dice any additional vegetables small so they cook evenly with the potatoes and carrots. You may need to adjust the amount of liquid slightly if you add a lot of extra vegetables.
Herb Variations
While thyme and rosemary are classic pot pie herbs, you can experiment with other seasonings. Sage brings a traditional Thanksgiving flavor that pairs well with the vegetables. Fresh herbs taste even better than dried if you have them available. Use about three times more fresh herbs than dried since they are less concentrated. Parsley adds freshness and color when stirred in at the end. A bay leaf simmered in the filling adds subtle depth but remember to remove it before filling the pie.
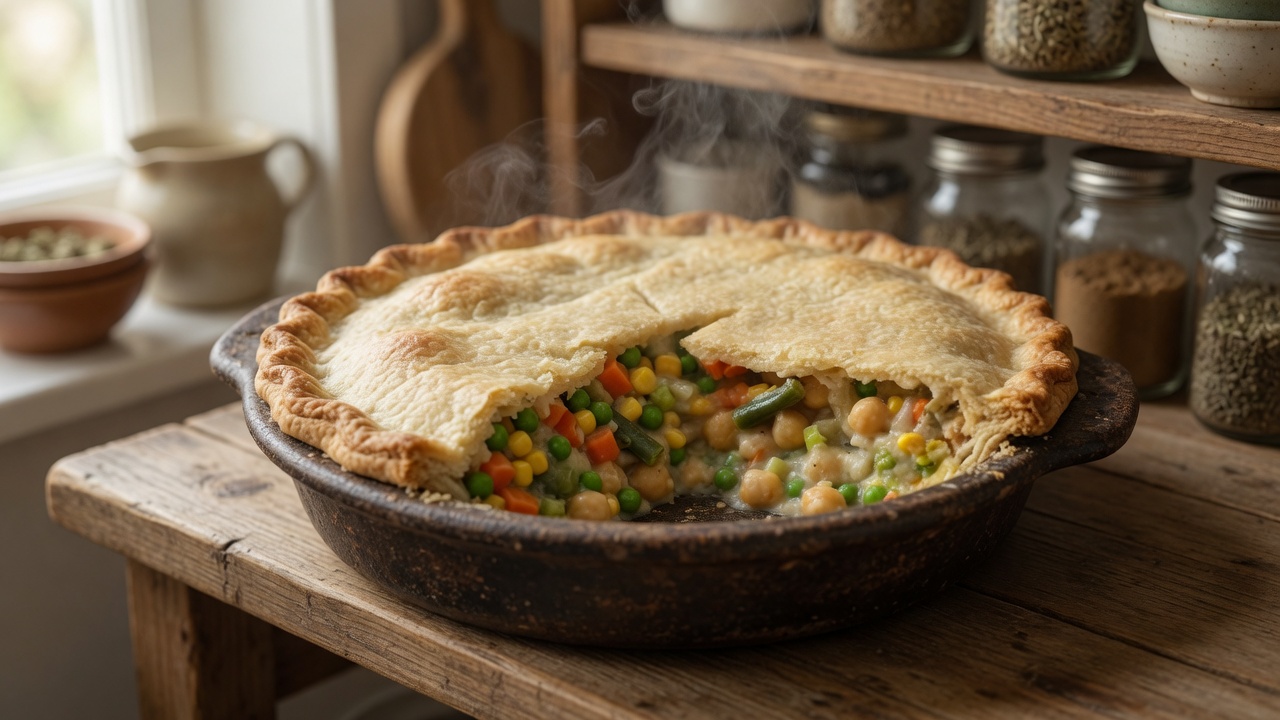
Chickpea and potato pot pie
A comforting vegan pot pie filled with chickpeas, potatoes, carrots, and peas in a creamy herb sauce, all wrapped in a flaky plant-based crust.
30
minutes30
minutes450
kcal45
minutes1
hour45
minutesIngredients
- For the Filling:
1 can (15 oz) chickpeas, drained and rinsed
2 large potatoes, peeled and diced
1 cup carrots, diced
1 cup frozen peas
1 onion, finely chopped
2 cloves garlic, minced
1/4 cup all-purpose flour
3 cups vegetable broth
1 cup unsweetened almond milk (or any plant-based milk)
2 tablespoons olive oil
1 teaspoon dried thyme
1 teaspoon dried rosemary
Salt and pepper to taste
- For the Pie Crust:
2 1/2 cups all-purpose flour
1 cup vegan butter, cold and cubed
1/2 teaspoon salt
1/2 cup ice water
Directions
- Prepare Pie Crust:
Combine flour, salt, and vegan butter in a food processor until coarse crumbs form.
Gradually add ice water, mixing until dough forms. Divide into two disks, wrap, and refrigerate for 30 minutes. - Make Filling:
Heat olive oil in a large pot over medium heat. Sauté onions and garlic until softened.
Add potatoes, carrots, thyme, and rosemary. Cook for 2-3 minutes.
Sprinkle flour over vegetables, stir to coat. Gradually add vegetable broth and almond milk, stirring to avoid lumps.
Add chickpeas and frozen peas. Simmer until thickened. Season with salt and pepper. - Preheat Oven:
Preheat the oven to 375°F (190°C). - Assemble Pot Pie:
Roll out one pie crust, line a pie dish. Fill with chickpea and potato mixture.
Roll out the second pie crust, cover the filling. Seal and crimp edges. Cut slits for steam to escape. - Bake:
Bake in preheated oven for 40-45 minutes or until crust is golden brown. - Serve:
Cool for a few minutes before slicing. Serve warm and enjoy.
Notes
- Leftovers can be refrigerated for up to 3 days. Reheat in the oven for best results.
Nutrition Facts
- Calories: 450kcal
- Fat: 22g
- Sodium: 800mg
- Carbohydrates: 55g
- Fiber: 8g
- Sugar: 4g
- Protein: 10g