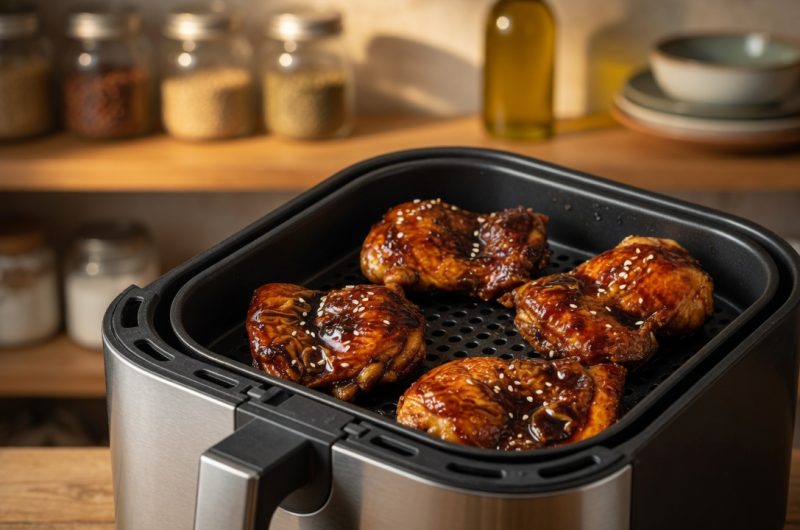
Air fryer teriyaki chicken represents one of the quickest ways to prepare restaurant-quality Asian cuisine at home without extensive cooking knowledge or complicated techniques. This recipe delivers juicy, tender chicken thighs topped with a glossy, sweet and savory teriyaki glaze that rivals takeout versions in both flavor and presentation. The air fryer method eliminates the need for oil-heavy cooking while creating perfectly crispy skin that contrasts beautifully with the moist interior. Traditional teriyaki chicken recipes often require marinating overnight and careful stovetop monitoring, but this streamlined approach produces impressive results in just twenty minutes from start to finish. The combination of low-sodium soy sauce, mirin, sake, and brown sugar creates an authentic teriyaki glaze with deep umami flavors that develop as the sauce simmers gently. Whether you are preparing a weeknight dinner for your family, hosting guests, or simply craving restaurant-quality Asian food, this recipe proves that impressive meals do not require extensive preparation time or specialized equipment.
Understanding Boneless Chicken Thighs and Why They Work Best
Boneless chicken thighs are the ideal choice for this recipe because they contain more fat than breasts, which keeps the meat juicy and tender during cooking. The higher fat content means the chicken thighs remain moist even if slightly overcooked, unlike breasts which can become dry and stringy. Chicken thighs develop better flavor than breasts due to their darker meat and fat marbling, creating more savory, complex taste. The thighs also cook quickly in the air fryer, reaching doneness in fifteen to twenty minutes without requiring extended cooking time. Boneless thighs offer convenience compared to bone-in varieties, which require longer cooking and careful handling. The natural shape of thighs lies relatively flat, allowing even heat distribution during air frying. Choosing quality chicken from reputable sources ensures food safety and better flavor. If boneless thighs are unavailable, bone-in thighs work equally well but require adding five to ten minutes to the cooking time.
Seasoning Chicken Properly Before Air Frying
Seasoning chicken thighs with salt and pepper before cooking brings out the natural flavors of the meat rather than masking them. Salt enhances the chicken’s taste by stimulating taste receptors while also helping the meat retain moisture during cooking. Pepper adds subtle heat and complexity without overpowering the delicate chicken flavor. Seasoning both sides ensures every bite has balanced flavor rather than having one side taste different from the other. Applying seasoning just before cooking prevents the salt from drawing out moisture that would make the skin less crispy. Using freshly ground pepper instead of pre-ground provides superior flavor, as fresh pepper retains more volatile oils. The amount of salt and pepper should be moderate, as the teriyaki glaze adds significant additional saltiness to the finished dish.
Preheating the Air Fryer to the Correct Temperature
Setting the air fryer to three hundred ninety degrees Fahrenheit ensures the cooking chamber reaches proper temperature before chicken is added. This temperature is hot enough to crisp the chicken skin while cooking the interior through without drying it out. Different air fryer models may vary slightly in actual temperature despite displaying the same setting, so monitoring the first batch helps determine if adjustments are necessary. Preheating typically takes three to five minutes depending on your air fryer model. Some air fryer models have automatic preheat indicators that signal when the unit is ready. Skipping the preheating step results in longer cooking times and potentially less crispy skin, so this step, though simple, significantly impacts results.
Air Frying Chicken Thighs for Optimal Texture and Doneness
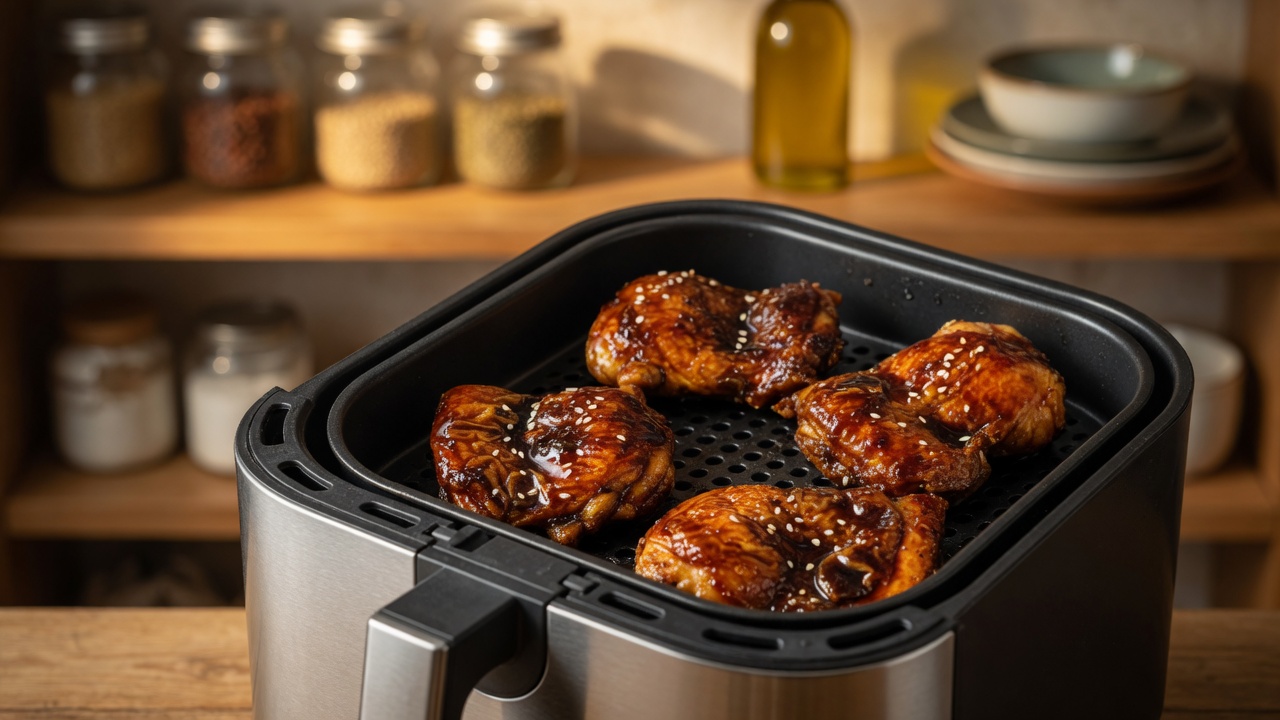
Placing seasoned chicken thighs in the air fryer basket and cooking for fifteen to twenty minutes produces perfectly cooked chicken with golden, crispy skin. The exact cooking time depends on the size of your thighs and your specific air fryer model, so monitoring ensures you achieve doneness without overcooking. Air fryer chicken skin becomes crispy without requiring oil, which is one of the primary advantages of this cooking method compared to traditional pan-frying. The rapid air circulation cooks the chicken evenly, preventing cold spots or uneven browning that can occur in conventional ovens. A meat thermometer inserted into the thickest part of the thigh should register one hundred sixty-five degrees Fahrenheit for safe doneness. If thighs are not quite done after fifteen minutes, adding two to three additional minutes usually completes cooking. Overcooking results in tough, dry chicken, so careful monitoring prevents this common mistake.
Creating Authentic Teriyaki Sauce from Simple Ingredients
The teriyaki sauce combines low-sodium soy sauce, mirin, sake, and brown sugar or honey to create an authentic Japanese-inspired glaze. Low-sodium soy sauce is essential because regular soy sauce would make the finished sauce overwhelmingly salty and unbalanced. Mirin, a sweet rice wine used in Japanese cooking, provides subtle sweetness and helps the sauce achieve a glossy appearance when cooked. Sake, a rice wine, adds complexity and depth that balances the sweetness from sugar or honey. Brown sugar or honey provides sweetness that balances the savory soy sauce while helping the sauce develop a glossy coating. The proportions of these ingredients have been carefully calculated to achieve traditional teriyaki flavor without any single ingredient overwhelming the others. Mixing the sauce ingredients before applying heat allows them to combine properly and develop integrated flavor.
Simmering Sauce Gently to Achieve Proper Thickness
Heating the teriyaki sauce over medium-low heat and allowing it to simmer gently creates the characteristic glossy thickness that defines quality teriyaki. High heat causes the sauce to reduce too quickly and potentially burn, creating bitter flavors that compromise the entire dish. Gentle simmering allows the sauce to reduce slowly while flavors meld together and develop complexity. The sauce naturally thickens as water evaporates from the mixture, so patience is more important than heat intensity. Stirring occasionally prevents burning on the bottom of the pan and ensures even reduction. The sauce reaches proper thickness when it coats a spoon and drips slowly rather than running off immediately. Some sauces reach desired thickness in five to seven minutes, while others take longer depending on how thin the initial liquid is. Under-reduced sauce is thin and watery rather than glossy and coating, so adequate cooking time is essential.
Using Cornstarch Slurry When Sauce Needs Additional Thickening
If the teriyaki sauce does not thicken adequately after several minutes of simmering, a cornstarch slurry provides an effective solution. Mixing equal parts water and cornstarch creates a slurry that can be added to the sauce to increase thickness quickly. Adding the slurry gradually while stirring allows you to control the final thickness without over-thickening. The sauce should continue simmering after the slurry is added to ensure the cornstarch cooks completely and reaches full thickening power. Over-thickening creates a gloopy sauce rather than the desired glossy coating, so adding the slurry gradually and tasting as you go prevents this problem. If the sauce becomes too thick, thinning with small amounts of water restores proper consistency.
Coating Chicken with Glaze for Optimal Flavor Distribution
Once the chicken thighs finish air frying and the teriyaki sauce reaches desired thickness, placing the hot chicken in the pan and coating it thoroughly with sauce is the final step. The heat of the chicken and the hot sauce allow them to combine, with the glaze adhering to the surface and creating an appealing appearance. Coating both sides ensures every bite includes teriyaki flavor rather than having one side unglazed. The residual heat helps the sauce set slightly on the chicken surface, creating a glossy finish. Keeping the chicken in the sauce for just one to two minutes allows coating without overheating or drying the meat.
Cutting and Presenting the Finished Dish
Cutting the glazed chicken thighs into slices or cubes is optional but creates a more elegant presentation and makes eating easier. Slicing into thin pieces allows more surface area to display the glossy glaze. Cubing works well for serving with rice or in grain bowls. Some people prefer serving whole thighs for a more casual presentation. The choice depends on the occasion and personal preference. Using a sharp knife prevents tearing the meat and creates clean, appealing cuts.
Serving Suggestions and Complementary Side Dishes
Teriyaki chicken pairs beautifully with steamed white rice, which absorbs the glaze and provides a neutral base that balances the sweet-savory flavors. Steamed vegetables like broccoli, snap peas, or bok choy add nutrition and textural contrast. Cucumber salad with rice vinegar provides refreshing acidity that cuts through the richness. Sesame seeds sprinkled over the finished dish add nuttiness and visual appeal. Sliced green onions provide fresh, oniony flavor that brightens the dish. Serving on a bed of rice allows the glaze to soak into the rice, adding flavor throughout the entire plate.
Adjusting Sauce Seasoning for Personal Preference
The teriyaki sauce is perfectly balanced using the specified ingredient amounts, but personal taste preferences may warrant adjustments. If the sauce seems too sweet, reducing the sugar or honey slightly creates better balance. If it seems too salty, diluting with a small amount of water adjusts the salt concentration without losing other flavors. Adding a small amount of fresh ginger or garlic to the sauce creates subtle variations while maintaining the essential teriyaki character. These adjustments allow customization while respecting the traditional recipe foundation.
Storage and Reheating for Leftover Teriyaki Chicken
Leftover teriyaki chicken stores well in an airtight container in the refrigerator for up to three days without significant quality loss. The glaze helps preserve moisture, preventing the chicken from drying out during storage. Reheating in the air fryer at three hundred fifty degrees Fahrenheit for three to five minutes restores the chicken’s warmth and crispiness better than microwave reheating. Microwave reheating can make the chicken tough or rubbery, so the air fryer is the preferred method. Serving with fresh rice or vegetables provides a complete meal using leftover components.
Troubleshooting Common Issues with This Recipe
If the chicken skin is not crispy enough, the air fryer temperature may have been too low or the cooking time insufficient. Increasing the temperature by ten degrees or extending cooking time by two to three minutes produces crispier results. If the chicken is dry, it was likely overcooked, so monitoring more carefully prevents this issue. If the teriyaki sauce is too salty, using lower-sodium soy sauce or diluting with water corrects the problem. If the sauce remains too thin after extended simmering, the cornstarch slurry method effectively increases thickness. Understanding these common issues helps troubleshoot problems and improve results with future batches.
Air Fryer Teriyaki Chicken Recipe
Prepare restaurant-quality teriyaki chicken in just twenty minutes using your air fryer. Juicy, tender chicken thighs are cooked until the skin becomes crispy, then coated with an authentic teriyaki glaze made from soy sauce, mirin, sake, and brown sugar.
5
minutes15
minutes20
minutesIngredients
- For the Chicken:
4 boneless chicken thighs
Salt and pepper to taste
- For the Teriyaki Sauce:
3 tablespoons low-sodium soy sauce
3 tablespoons mirin (sweet rice wine)
3 tablespoons sake (rice wine)
3 tablespoons brown sugar or honey
Directions
- Set air fryer to three hundred ninety degrees Fahrenheit and preheat for three to five minutes. Preheating ensures the chicken cooks evenly and the skin becomes crispy.
- Season both sides of the boneless chicken thighs with salt and pepper to taste. Season just before cooking to maintain skin crispiness.
- Place seasoned chicken thighs in the air fryer basket in a single layer. Cook for fifteen to twenty minutes until skin is golden brown and crispy. Chicken is done when internal temperature reaches one hundred sixty-five degrees Fahrenheit.
- While chicken cooks, combine low-sodium soy sauce, mirin, sake, and brown sugar or honey in a pan. Stir ingredients together thoroughly.
- Heat sauce over medium-low heat and bring to a gentle simmer. Allow sauce to cook uncovered, stirring occasionally, until it thickens to desired consistency. Gentle heat prevents burning and allows proper reduction.
- If sauce does not thicken adequately, mix equal parts water and cornstarch to create a slurry. Add slurry gradually to sauce while stirring, then continue simmering until desired thickness is reached.
- Place cooked chicken thighs into the pan with teriyaki sauce. Turn to coat both sides thoroughly with glaze. Leave in sauce for one to two minutes to allow coating.
- Cut teriyaki chicken thighs into slices or cubes if desired for easier serving. Whole thighs can also be served as presented.
- Arrange glazed chicken on serving plates alongside white rice and steamed vegetables of choice. Garnish with sesame seeds and green onions if desired. Serve immediately while still warm.
Notes
- Low-Sodium Soy Sauce: Use low-sodium soy sauce or regular soy sauce diluted with water. Regular full-strength soy sauce makes the teriyaki sauce excessively salty and unbalanced.
- Garnish Ideas: Sesame seeds, sliced green onions, and fresh ginger add visual appeal and flavor enhancement to the finished dish.
- Cooking Time: The total time from start to finish is approximately twenty minutes, making this ideal for weeknight dinners when time is limited.
- Food Safety: Always ensure chicken reaches an internal temperature of one hundred sixty-five degrees Fahrenheit for safe consumption. Use a meat thermometer for accurate measurement.