
If you have ever wondered how to make homemade butter from cream, you will be surprised by how simple the process is using a Thermomix. With only one main ingredient—full-fat whipping cream—you can turn liquid cream into fresh, creamy butter in just minutes. This easy Thermomix butter recipe delivers rich flavor, smooth texture, and complete control over ingredients, making it a rewarding kitchen skill for home cooks and bakers alike.
Homemade butter is not only satisfying to prepare, but it is also practical and economical. When cream is discounted or close to its expiration date, instead of discarding it, you can transform it into preservative-free butter. The result is a pure, natural product that often tastes fresher than many store-bought varieties.
Why Make Butter at Home?
Making butter from scratch may sound old-fashioned, but it is surprisingly relevant in modern kitchens. One of the main reasons people search for homemade butter recipes is cost savings. When full-fat cream is on sale, making butter can be significantly more affordable than buying packaged butter at retail price.
Another reason is ingredient control. Commercial butter may sometimes contain stabilizers or added salt levels that vary by brand. Homemade butter contains exactly what you choose to include—cream and optional salt—nothing more. For anyone interested in clean eating or reducing additives, this simple recipe fits perfectly.
Fresh butter also enhances flavor in baking and cooking. Cakes, cookies, sauces, and sautéed vegetables all benefit from the rich taste of freshly churned butter. Many home bakers notice a difference in texture and aroma when using butter made at home.
The Science Behind Turning Cream into Butter
Understanding how cream becomes butter helps you appreciate how easy the process truly is. Cream contains fat suspended in liquid. When whipped vigorously, the fat molecules begin to clump together. As mixing continues, the fat separates from the liquid, forming solid butter grains. The remaining liquid is fresh buttermilk.
The Thermomix simplifies this natural process by providing consistent mixing speed. Instead of hand-churning for long periods, the machine agitates the cream efficiently. You will even hear a change in sound when the separation happens, signaling that butter has formed.
Ingredients You Need for Thermomix Butter
This recipe stands out because of its simplicity. You only need three items.
Full-fat whipping cream (600 mls) is essential. The higher the fat content, the better your butter yield. Ice-cold water (1500 g total) is used for rinsing the butter after separation. Salt (½ teaspoon, optional) can be added for flavor and preservation.
Using high-quality cream ensures a better flavor and smoother texture in the final product.
Step 1: Whipping the Cream in the Thermomix
Insert the butterfly whisk attachment into your Thermomix bowl. Add the full-fat whipping cream and set the machine to speed 4. Within one to four minutes, you will observe distinct stages. First, the cream becomes soft whipped cream. Next, it reaches stiff peaks. Soon after, it appears grainy.
Then, suddenly, the mixture separates. Solid butter forms, and liquid buttermilk collects at the bottom. The sound of the blades changes noticeably, confirming that butter has developed.
Step 2: Separating the Buttermilk
Once separation occurs, strain the contents through the simmering basket or a sieve. The liquid collected is fresh buttermilk. This by-product can be saved and used in pancakes, waffles, muffins, or other baking recipes.
Removing the buttermilk at this stage is important for improving the shelf life of the butter.
Step 3: Washing the Butter
Washing the butter is a critical step that many beginners overlook. Add 500 g of ice-cold water to the butter and mix briefly. Strain again. Repeat this rinsing process until the water runs clear.
This step removes remaining buttermilk, which can cause butter to spoil more quickly. Proper rinsing improves freshness, flavor, and storage stability.
Step 4: Adding Salt (Optional)
If you prefer salted butter, add ½ teaspoon of salt after the final rinse. Mix briefly to distribute the salt evenly throughout the butter. Salt enhances flavor and can slightly extend shelf life.
For unsalted butter, simply skip this step.
Step 5: Removing Excess Water and Shaping
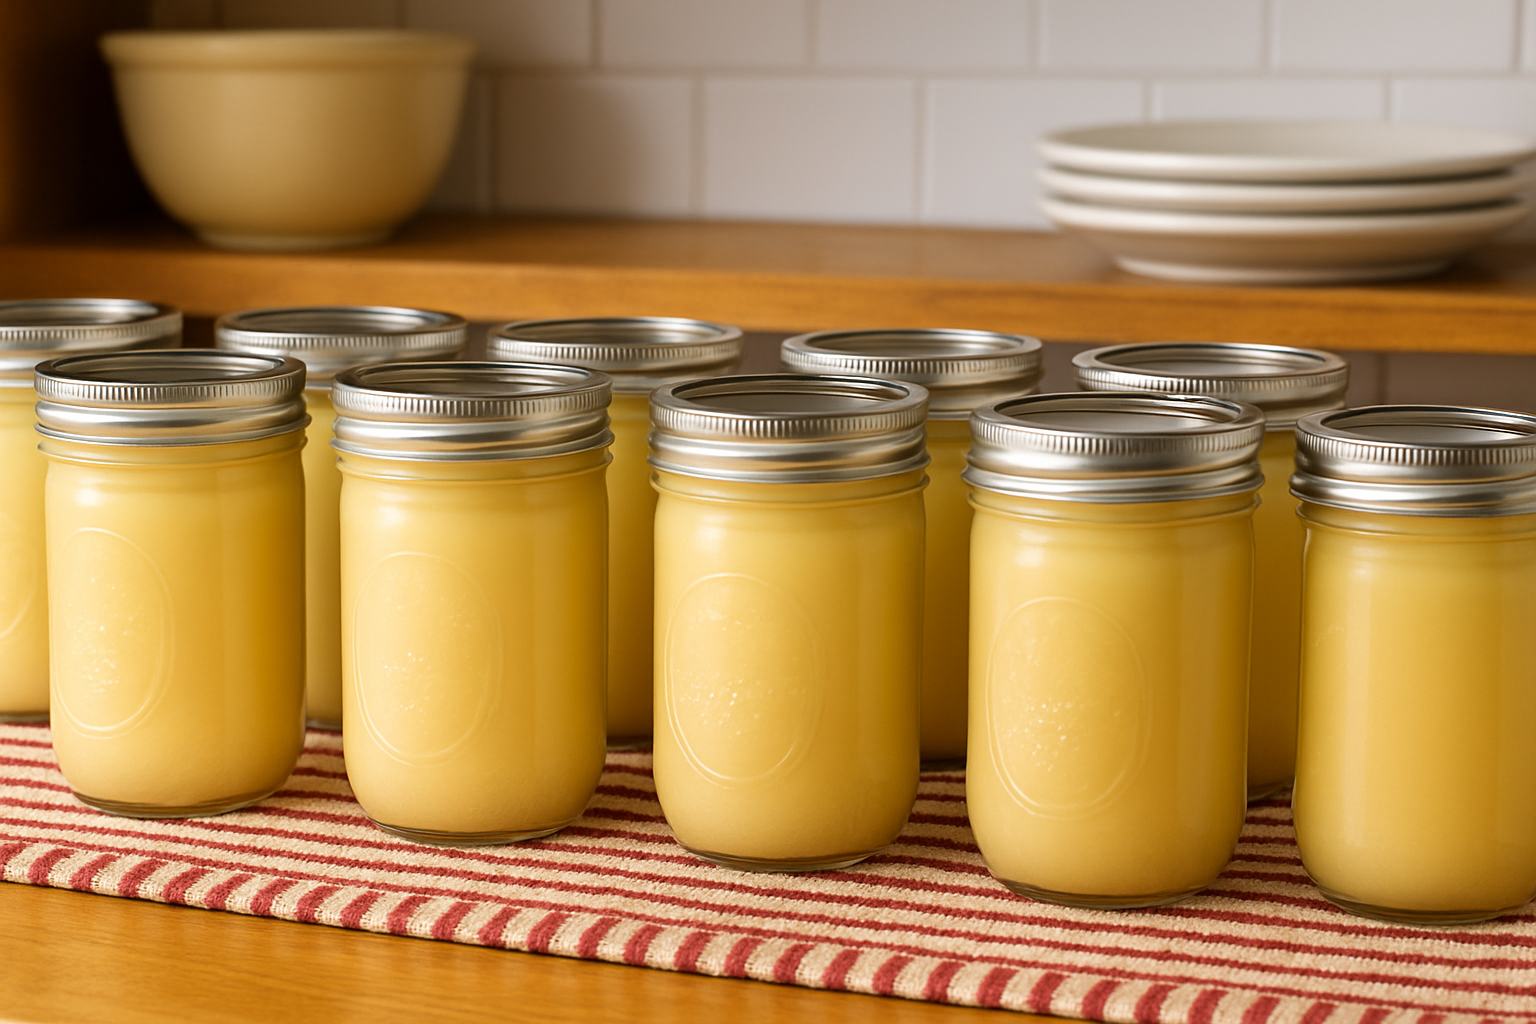
After the final rinse, gently squeeze the butter with your hands to remove excess moisture. Shape it into a log, block, or ball according to your preference. Proper moisture removal ensures longer freshness and better texture.
Why Washing Butter Extends Shelf Life
Residual buttermilk contains moisture and proteins that can accelerate spoilage. By rinsing thoroughly with ice-cold water, you eliminate these elements. The result is butter that lasts longer and tastes cleaner.
Skipping this step may cause the butter to develop off-flavors more quickly, so rinsing is strongly recommended.
Storage Guidelines for Homemade Butter
Unsalted homemade butter is best used within a few days when refrigerated. Salted butter can last two to three weeks in the refrigerator. For long-term storage, freeze the butter for up to three months.
Wrap it tightly in plastic wrap and place it in an airtight container to prevent freezer burn.
Can You Freeze Homemade Butter?
Yes, freezing butter is simple and effective. Shape and wrap the butter securely before placing it in a freezer-safe container. When ready to use, thaw in the refrigerator to maintain texture.
Freezing allows you to take advantage of discounted cream and store butter for later use.
Choosing the Best Cream for Butter Making
Always use full-fat whipping cream for best results. Higher fat content yields more butter and better texture. Fresh cream works best, and if possible, avoid ultra-pasteurized varieties for optimal flavor.
Cold cream speeds up the separation process and improves consistency.
How Long Does the Process Take?
The entire butter-making process takes approximately 20 minutes, including whipping, separating, rinsing, and shaping. The actual churning stage may take only one to four minutes.
This makes Thermomix butter one of the quickest homemade dairy projects you can attempt.
Ways to Use Homemade Butter
Fresh butter elevates everyday meals. Spread it over warm toast, melt it into mashed potatoes, or use it in baking cakes and cookies. Stir it into pasta sauces or sauté vegetables for added richness.
You can also experiment with compound butters by adding garlic, herbs, or honey after shaping.
Flavored Butter Ideas
Garlic and parsley butter works beautifully on bread, grilled steak, seafood, or corn on the cob. Herb butter made with rosemary or thyme adds aroma to roasted dishes. Honey butter provides a sweet spread for breakfast toast or biscuits.
Once you master basic butter, these variations become simple and enjoyable.
Why the Thermomix Makes Butter Effortless
Using the Thermomix removes guesswork. The machine controls speed precisely and churns efficiently. There is no need for manual effort or traditional butter churns.
Cleanup is straightforward, and the process is consistent every time. For anyone with a Thermomix, this is one of the easiest homemade kitchen projects.
Texture and Flavor of Homemade Butter
Homemade butter has a smooth, creamy mouthfeel and a clean dairy flavor. Many people find it tastes fresher and lighter than store-bought butter. The texture is soft and spreadable once brought to room temperature.
Its pure flavor enhances both sweet and savory recipes.
Expected Yield from 600 mls of Cream
From 600 mls of full-fat cream, you can expect approximately 210 grams of butter. Yield may vary depending on fat content. The remaining liquid is fresh buttermilk, which can be used in other recipes.
Homemade Butter in the Thermomix
Make the perfect homemade butter from cream in the Thermomix with these easy steps.
1
servings20
minutes20
minutesIngredients
600 mls full-fat whipping cream
1500 g ice-cold water
½ teaspoon salt (optional)
Directions
- Insert butterfly whisk. Add cream.
Mix 1–4 minutes / Speed 4 until cream separates. - Remove butterfly whisk. Strain buttermilk using simmering basket.
- Return butter to bowl (without whisk).
Add 500 g ice-cold water.
Mix 5 seconds / Speed 4.
Strain and discard liquid. - Repeat rinsing until water runs clear (about 3 times).
- Add salt after final rinse (optional) and mix briefly.
- Tip butter into simmering basket and squeeze out excess water.
- Shape into log or ball. Wrap tightly and refrigerate.
Notes
- Storage Guide
Unsalted: Use within a few days
Salted: Keeps 2–3 weeks in fridge
Freezer: Up to 3 months
