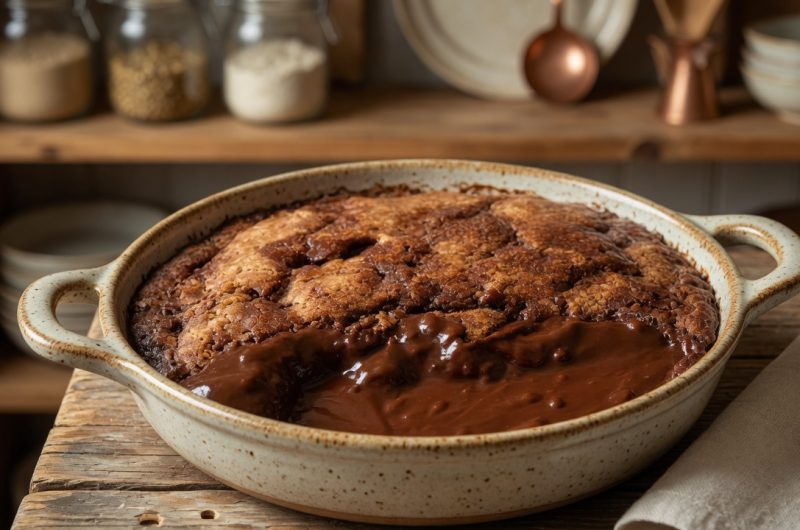
Chocolate cobbler represents a dessert that combines multiple textures and flavors into one remarkable creation that appeals to anyone who loves chocolate. This dish merges the concept of chocolate pudding with elements reminiscent of lava cake, creating something that feels both familiar and exciting. The magic of chocolate cobbler lies in how the batter transforms during baking—the top becomes fluffy and cake-like while the bottom develops into a rich, fudgy sauce that pools around the cake. The contrast between these textures creates an eating experience that’s far more interesting than eating either component separately. Understanding what makes this dessert special helps you appreciate the technique involved and why the specific instructions matter for achieving the perfect result. Whether you’re a seasoned baker or someone new to the kitchen, chocolate cobbler offers the satisfaction of creating an impressive, restaurant-quality dessert at home.
Why Simple Ingredients Create Remarkable Results
The ingredient list for chocolate cobbler includes basic baking staples that most home cooks keep on hand, yet these simple components combine to create something genuinely impressive. All-purpose flour provides the structure that allows the batter to rise and develop the fluffy top layer. Baking powder acts as the leavening agent that creates the airy texture characteristic of cobbler. Unsweetened cocoa powder delivers the deep chocolate flavor that defines this dessert—using unsweetened rather than sweetened powder allows you to control sugar levels and intensify chocolate taste. Whole milk contributes creaminess to the batter while unsalted butter adds richness without contributing salt that would compete with chocolate flavor. Granulated sugar provides necessary sweetness while the combination of brown and granulated sugar in the topping creates caramelization as the cobbler bakes. The simplicity of these ingredients means anyone can gather everything needed without searching specialty stores or making substitutions.
Selecting Quality Cocoa Powder for Superior Chocolate Flavor
Cocoa powder quality significantly impacts the final dessert’s chocolate intensity and overall flavor profile. Unsweetened cocoa powder comes in two main types: natural and Dutch-processed. Natural cocoa powder has a lighter color and more acidic, fruity chocolate flavor, while Dutch-processed cocoa has a darker color and smoother, more mellow chocolate taste. For chocolate cobbler, either type works well, though many people prefer Dutch-processed for its richer appearance and smoother flavor. The cocoa powder quality matters tremendously—premium cocoa powders cost more but deliver noticeably better chocolate flavor than budget alternatives. Storing cocoa powder in an airtight container away from heat and light preserves its quality and prevents it from absorbing odors from surrounding foods. Using fresh cocoa powder rather than a container that’s been sitting in your pantry for years ensures you get the best chocolate flavor possible in your finished cobbler.
Understanding the Two-Layer Baking Process
The magic of chocolate cobbler happens during baking when two distinct layers form despite all ingredients being mixed together initially. The batter layer on top bakes into a fluffy, cake-like texture as air bubbles created by baking powder expand with heat. Simultaneously, the cocoa powder and sugar mixture on the bottom, combined with hot water, transforms into a rich chocolate sauce that pools beneath the cake layer. This transformation occurs because the sugar dissolves in the hot water, creating a liquid that’s heavier than the batter, causing it to sink to the bottom. The batter floats on top of this liquid layer, preventing them from thoroughly mixing even though you deliberately don’t stir them together. Understanding this chemical process helps you appreciate why the instruction not to stir after adding hot water is crucial—stirring would prevent the layers from forming properly.
Preparing Your Baking Dish and Equipment
Proper preparation of your baking dish and equipment ensures the cobbler bakes evenly and prevents potential problems during cooking. Using nonstick spray or greasing and flouring a square baking dish prevents the cobbler from sticking, making it easier to serve and enjoy. Placing the baking dish on a rimmed baking sheet serves multiple purposes—it catches any potential overflow of chocolate sauce, protects your oven from spills, and makes moving the hot cobbler from oven to counter safer and easier. Using a square baking dish rather than round or rectangular allows more even heat distribution and makes portioning the finished cobbler simpler. Having all equipment ready before you begin mixing ensures you’re not scrambling when the batter is ready to go into the oven. A nine by nine-inch square baking dish represents the standard size for this recipe, though slightly larger or smaller dishes work if you adjust baking time accordingly.
Mixing the Batter with Proper Technique
Creating the batter requires whisking together dry ingredients separately before combining with wet ingredients, which ensures even distribution and prevents lumps. Combining all-purpose flour, baking powder, salt, granulated sugar, and unsweetened cocoa powder in a bowl and whisking thoroughly ensures the leavening agent and cocoa powder distribute evenly throughout the flour. This dry mixture forms the foundation for everything that follows. Adding whole milk, melted unsalted butter, and vanilla to the dry ingredients and stirring just until combined creates a smooth batter without overmixing. Overmixing develops gluten, which makes the cobbler tough rather than fluffy. The batter should be smooth and pour-able but still have a slight thickness that allows it to spread evenly in the baking dish. Once the batter is ready, spreading it evenly in the prepared baking dish ensures the top layer bakes uniformly.
Creating the Topping That Becomes Chocolate Sauce
The topping transformation represents the most interesting aspect of chocolate cobbler—what starts as a dry mixture of sugars and cocoa powder becomes a luscious chocolate sauce as it bakes. Combining brown sugar and granulated sugar creates a topping that caramelizes slightly during baking while contributing complexity beyond pure sweetness. Adding unsweetened cocoa powder to the sugar mixture intensifies chocolate flavor in the resulting sauce. Sprinkling this mixture evenly over the batter ensures that the chocolate sauce forms uniformly throughout rather than creating thick and thin spots. This step requires care to distribute the mixture without accidentally stirring or mixing it into the batter below, which would compromise the layering process. The hot water poured over this mixture dissolves the sugars and cocoa powder, creating the liquid that becomes the fudgy sauce layer, though the actual dissolving and sauce formation happens during baking rather than immediately.
Pouring Hot Water Without Disturbing Layers
The technique of pouring hot water over the topping mixture represents a critical step that requires gentleness and patience. Before pouring, ensure the water is hot but not boiling—approximately one hundred ninety to two hundred degrees Fahrenheit works well. Pouring slowly and carefully over the topping mixture allows the water to permeate the sugar and cocoa powder without creating splashes or causing the mixture to disperse unevenly. Some bakers pour the water in a thin stream along the back of a spoon to further reduce splashing and ensure gentle distribution. The water seems to sit on top of the batter initially, but this is actually correct—the mixture will settle and create the sauce layer as the cobbler bakes. Resisting any urge to stir or mix at this point is crucial because disturbing the layers prevents the proper separation that creates the cobbler’s signature texture and sauce.
Baking Temperature and Time for Perfect Results
Baking chocolate cobbler at three hundred fifty degrees Fahrenheit provides the right balance between cooking the batter through and allowing the topping to caramelize and create sauce. The baking time of approximately forty minutes allows the center to set slightly—you’re looking for the top to be set but the center to still appear slightly wiggly when you gently shake the pan. This slight wiggle indicates that the bottom sauce layer remains fudgy and hasn’t completely set into cake, which is exactly what you want. Overbaking results in a cobbler where the sauce layer has solidified too much, losing the luscious quality that makes this dessert special. Underbaking means the center remains too wet and doesn’t hold together when you spoon it into bowls. Using an oven thermometer occasionally verifies your oven’s actual temperature, since many home ovens run hotter or cooler than the dial indicates, which affects baking time.
Allowing Proper Cooling Before Serving
Cooling chocolate cobbler for fifteen to twenty minutes before serving serves multiple important purposes. This resting period allows the layers to firm up slightly, making the cobbler easier to serve without falling apart completely. The sauce thickens as it cools, developing the perfect consistency for spooning over cake while remaining decadent and fudgy. The flavors continue developing as the cobbler cools, improving overall taste compared to eating it immediately from the oven. Serving too hot results in molten chocolate that’s extremely difficult to portion cleanly, while slightly cooled cobbler maintains its texture and presentation. The cobbler is still warm and comfortable to eat after cooling, but no longer dangerously hot. Some people prefer their cobbler at room temperature or even chilled, which works fine and simply creates a different texture experience.
Serving Suggestions and Accompaniments
The way you serve chocolate cobbler significantly affects the overall eating experience and enjoyment. Vanilla ice cream melting over warm cobbler creates a luxurious combination where the cold sweetness contrasts beautifully with warm chocolate. Freshly whipped cream adds lightness and richness simultaneously while complementing chocolate flavor. Drizzling hot fudge sauce over the cobbler intensifies the chocolate experience for true chocolate lovers. Salted caramel sauce creates interesting flavor contrast between sweet and salty while adding richness. Simple powdered sugar dusting adds visual appeal and subtle sweetness without overwhelming the dish. Serving with beverages like hot coffee or cold milk provides complementary drinks that cleanse the palate between bites. The presentation method you choose can make the difference between a nice dessert and a truly memorable eating experience.
Storage and Reheating for Maximum Enjoyment
Properly stored chocolate cobbler remains fresh and delicious for up to three days, making it suitable for advance preparation or enjoying leftovers. Covering leftovers tightly with plastic wrap or aluminum foil prevents them from drying out and absorbing odors from other foods in the refrigerator. Storing in an airtight container works equally well if you prefer that method. Reheating individual servings in the microwave for thirty to forty-five seconds restores warmth without overcooking or drying out the cobbler. Some people prefer reheating in a low oven to maintain texture more carefully, though this takes longer than microwave reheating. The cobbler can be enjoyed cold directly from the refrigerator if you prefer, creating a completely different but equally enjoyable texture experience. Freezing works for longer storage—wrap cooled cobbler tightly and freeze for up to two months, then thaw in the refrigerator and reheat gently before serving.
Customizing Your Cobbler with Creative Variations
While the classic chocolate cobbler recipe is wonderful as written, several variations allow you to customize it based on preferences and available ingredients. Adding espresso powder to the batter intensifies chocolate flavor by amplifying cocoa notes without adding additional chocolate. Substituting hot brewed coffee or hot cocoa for the water creates deeper chocolate flavor in the sauce layer. Incorporating chopped maraschino cherries adds fruity brightness that contrasts beautifully with deep chocolate. Some people add a splash of almond extract along with vanilla for subtle complexity. Sprinkling sea salt on top before baking adds sophistication through salt-chocolate flavor pairing. These modifications allow you to maintain the essential cobbler structure while creating versions that reflect your personal taste preferences and explore chocolate flavor possibilities.
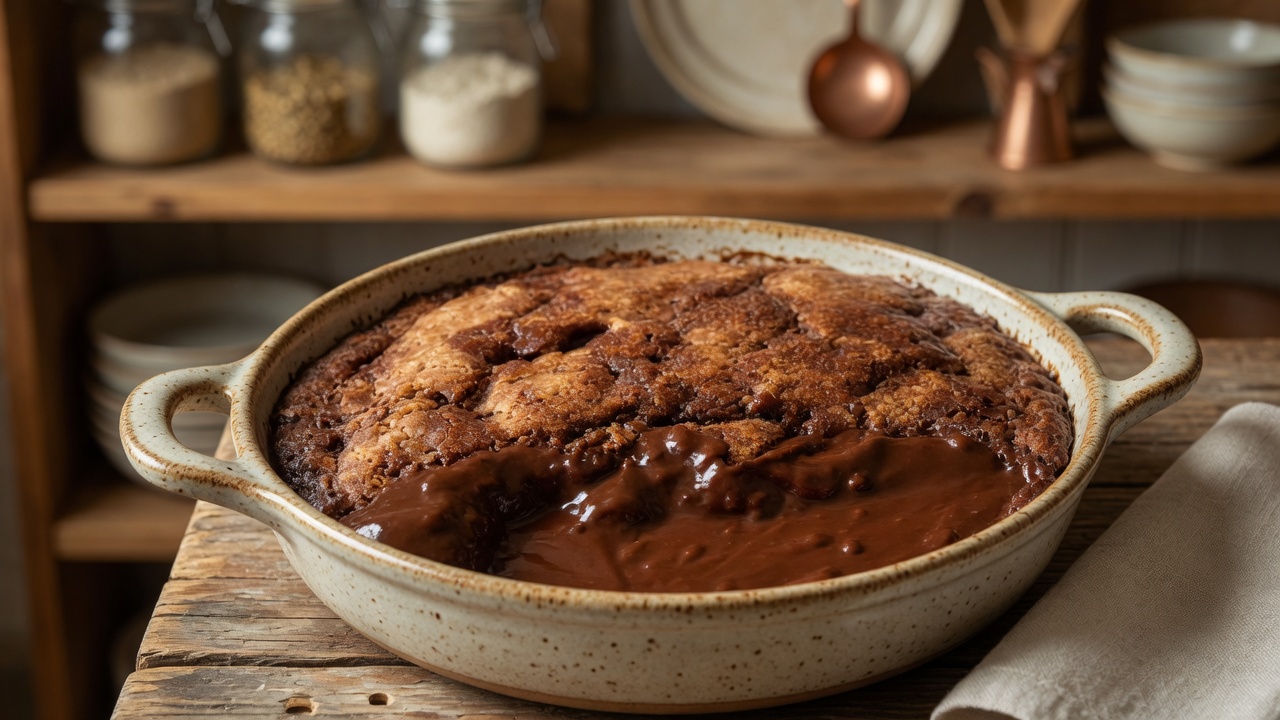
Chocolate Cobbler
Perfect for chocolate lovers seeking impressive homemade desserts that don’t require complicated techniques or specialty ingredients. Serve warm with vanilla ice cream, whipped cream, or your favorite chocolate sauce for the ultimate indulgent treat that satisfies every chocolate craving.
8
servings5
minutes40
minutes279
kcal45
minutesIngredients
- For the Batter:
1 cup all-purpose flour, spooned and leveled
1 teaspoon vanilla
2 teaspoons baking powder
1/2 teaspoon salt
1/2 cup granulated sugar
2 tablespoons unsweetened cocoa powder
1/2 cup whole milk
1/4 cup unsalted butter, melted
- For the Topping:
3/4 cup packed brown sugar
1/4 cup granulated sugar
1/4 cup unsweetened cocoa powder
1 1/2 cups very hot water (almost to a boil but not quite)
- For Serving:
Vanilla ice cream
Directions
- Preheat oven to 350°F. Coat an 8×8-inch square baking dish with nonstick spray and place it on a rimmed baking sheet.
- In a mixing bowl, whisk together flour, baking powder, salt, granulated sugar, and cocoa powder. Stir in milk, melted butter, and vanilla until combined and smooth.
- Spread the batter into the prepared baking dish.
- Combine brown sugar, granulated sugar, and cocoa powder; sprinkle over batter – use it all! (DO NOT STIR.)
- Slowly pour hot water over the top without disturbing the sugar layer (DO NOT STIR.)
- Bake until the middle is mostly set but still slightly wiggly, about 40 minutes.
- Remove from oven and let sit for about 15 minutes to set a bit.
- Serve warm portions in bowls with chocolate sauce from the pan spooned on top and a scoop of vanilla ice cream!
Nutrition Facts
- Calories: 279kcal
- Fat: 7g
- Cholesterol: 17mg
- Sodium: 15mg
- Potassium: 231mg
- Carbohydrates: 54g
- Protein: 3g