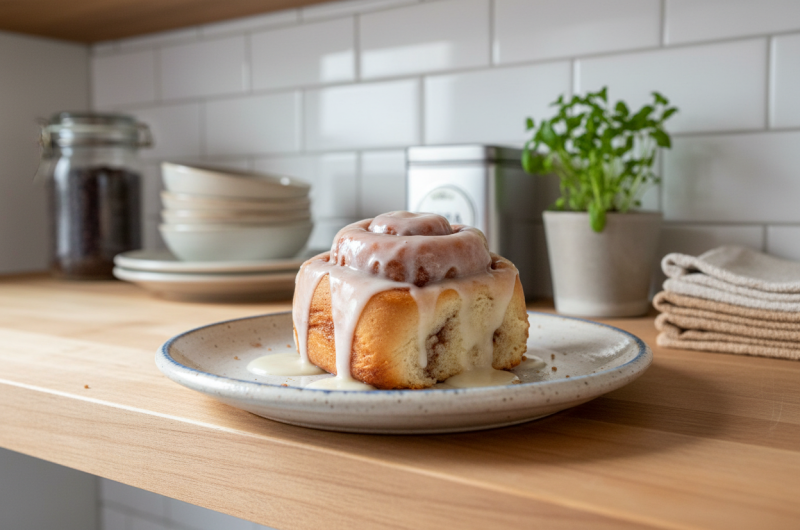
Sourdough cinnamon rolls represent a sophisticated twist on the classic breakfast pastry, combining the tangy complexity of sourdough fermentation with the comforting warmth of cinnamon and brown sugar. These soft, chewy rolls topped with cream cheese frosting appeal to people seeking homemade baked goods that deliver both flavor and impressive texture. The extended overnight fermentation develops subtle sourdough notes that distinguish these rolls from standard cinnamon rolls made with commercial yeast. Using an active sourdough starter as the primary leavening agent creates a unique flavor profile that becomes more interesting the longer the dough ferments. The combination of baking soda and baking powder with sourdough starter creates the perfect rise without requiring excessive commercial yeast. These rolls work beautifully for special breakfasts, weekend brunches, or as gifts for sourdough-loving friends and family. Understanding how sourdough fermentation affects dough development helps you appreciate why these rolls taste noticeably better than versions made without fermentation.
Why Overnight Fermentation Develops Superior Flavor
The overnight bulk fermentation allows yeast and bacteria in the sourdough starter to ferment the dough completely, creating complex flavors impossible to achieve with shorter fermentation times. During fermentation, wild yeast and lactic acid bacteria metabolize the flour’s sugars and proteins, creating organic acids and subtle aromas that develop gradually over ten to twelve hours. The extended fermentation also allows gluten to relax and develop naturally, creating tender crumb structure without aggressive kneading. The flavor compounds that develop during overnight fermentation cannot be rushed—this is why commercial yeast breads typically lack the complexity of sourdough creations. The dough becomes noticeably softer and more extensible after overnight fermentation, making it easier to shape without tearing. The fermentation process also improves digestibility by breaking down flour components and reducing anti-nutrients. Understanding fermentation science helps you appreciate why patience produces superior results in sourdough baking.
Selecting Sourdough Starter Type and Condition
The sourdough starter you use—whether unfed discard or active starter—significantly affects the dough’s fermentation and final flavor. Unfed discard, the portion typically discarded during regular starter maintenance, contains viable yeast and bacteria despite not being recently fed. Using unfed discard allows you to use what would otherwise be wasted while still achieving excellent fermentation. Active starter that’s recently been fed and is at peak activity creates slightly faster fermentation but produces similar final results. The key is ensuring the starter contains viable yeast and bacteria capable of fermentation. A healthy starter should show bubbles and rise noticeably within four to twelve hours of feeding. If using very old discard, ensuring there’s sufficient active culture may require testing with a small amount of dough first. The starter’s hydration level affects dough consistency, so adjusting flour or liquid slightly ensures proper dough texture.
Understanding Buttermilk’s Role in Dough Texture
Buttermilk contributes tanginess that complements sourdough’s natural sour notes while creating tender crumb through its acidity. The lactic acid in buttermilk reacts with baking soda, creating lift and helping achieve proper rise. Buttermilk also provides moisture that creates soft, pillowy rolls without making the dough excessively wet. Regular milk combined with lemon juice or vinegar can substitute for buttermilk if needed—the acidity is what matters. The buttermilk should be cold when added to the dough to prevent premature gluten development. The combination of buttermilk’s acidity with sourdough’s tanginess creates more complex flavor than either would provide alone. Using quality buttermilk rather than thin, low-fat versions produces better results because the fat content contributes to richness.
The Chemistry of Baking Soda and Baking Powder
Baking soda and baking powder added during the second phase of mixing provide additional lift that complements the fermentation from sourdough starter. Baking soda reacts immediately with the dough’s acids (from buttermilk and sourdough), creating carbon dioxide that helps the rolls rise. Baking powder provides a second rise during baking when the dough enters the hot oven. Using both leavening agents creates more complete rise than either alone, producing light, airy rolls. The amount of each leavening agent affects the final rise—too much creates excessively risen rolls that collapse while too little produces dense rolls. Adding these leavening agents after overnight fermentation prevents them from reacting prematurely and losing their lifting power. The timing of leavening agent addition ensures they remain active until the rolls reach the oven.
Choosing the Right Pan for Even Cooking
Using a nine-inch springform pan creates optimal conditions for even baking and moisture retention. The springform design allows you to easily remove the rings after baking without disturbing the rolls. The pan’s diameter creates rolls that are close together but not crowded, allowing even heat circulation. Glass or ceramic springform pans conduct heat slightly differently than metal—both work, though metal typically produces slightly crispier exteriors. The pan’s depth matters—a standard springform provides adequate space for rolls to rise without overflowing. Some people prefer square baking pans which also work well, though the shape slightly affects how the rolls arrange and bake. The pan should be generously buttered to prevent sticking while helping the rolls develop appetizing golden exteriors. Parchment paper can line the pan bottom for extra insurance against sticking.
Creating the Perfect Cinnamon-Sugar Filling
The filling’s success depends on proper distribution of melted butter, cinnamon, and brown sugar throughout the dough. Brushing melted butter evenly across the rolled dough creates a layer that helps the filling adhere while contributing richness. The cinnamon-sugar mixture should be sprinkled evenly rather than creating thick, concentrated areas. The ratio of cinnamon to sugar affects the final flavor—more cinnamon creates pronounced spice while less creates subtle warmth. Using freshly ground cinnamon rather than pre-ground cinnamon provides superior flavor and aroma. Brown sugar, with its molasses content, creates deeper flavor and slightly moister texture than granulated sugar. Some people prefer darkly packed brown sugar which contains more molasses while others prefer lightly packed for less intense molasses flavor. The filling should cover the entire surface to ensure every roll contains flavorful cinnamon-sugar in every bite.
Rolling and Cutting for Uniform Rolls
Rolling the dough into an even rectangle ensures uniform rolls that bake evenly. The dough should be thin enough to roll easily but thick enough to create rolls with multiple layers. Rolling from one long edge and working toward the opposite edge creates long rolls that can be cut into eight equal pieces. Each roll should be approximately the same size to ensure uniform baking time and appearance. Using a sharp knife or a piece of unflavored dental floss creates clean cuts without squishing the dough. Dull knives compress the dough, potentially making the rolls dense. The cut rolls should be arranged in the prepared pan with slight space between them—they’ll expand slightly as they rise but shouldn’t be crowded. Allowing the rolls to rise briefly after cutting and before baking creates more complete rise.
Understanding the Second Rise Before Baking
A brief rise before baking allows the rolls to puff slightly and develop additional flavor. The rise time depends on kitchen temperature—a warm kitchen may require only thirty to forty minutes while a cool kitchen might need longer. The rolls should appear noticeably puffed but shouldn’t have risen so much that they’re touching sides of the pan. Finger poke test—pressing gently with your finger should create an indentation that springs back slowly—indicates readiness for baking. Over-risen rolls may collapse during baking or create dense texture. Under-risen rolls bake into denser, less fluffy results. The goal is rolls that have risen noticeably but still have room to expand further during baking.
Baking Temperature and Time for Golden Perfection
Baking at three hundred seventy-five degrees Fahrenheit creates golden-brown exteriors while cooking the interior completely. The baking time of approximately twenty-five to thirty minutes is approximate because oven temperatures vary. The finished rolls should be golden brown on top and sound slightly hollow when tapped. Inserting a toothpick into the center should reveal moist but not wet dough. Rolls baked at slightly lower temperature may require additional time and won’t brown as much. Rolls baked at higher temperature brown faster but may not cook through completely. Using an oven thermometer occasionally verifies your oven’s actual temperature since many home ovens run hotter or cooler than indicated. Some bakers tent the rolls loosely with foil if they’re browning too quickly before the interior finishes baking.
Creating Cream Cheese Frosting for Perfect Finish
The frosting combines melted butter, powdered sugar, vanilla extract, and milk into a smooth, pourable consistency. Room-temperature cream cheese blends smoothly with other ingredients without creating lumps. The frosting should be whisked thoroughly to ensure even distribution of all components. The consistency should be thick enough to coat the rolls but thin enough to spread or drizzle evenly. If too thick, adding milk one tablespoon at a time thins the frosting. If too thin, adding more powdered sugar thickens it. Applying the frosting while the rolls are still warm allows it to soften slightly and penetrate the rolls. Some people prefer frosting at room temperature for a thicker coating that stays on the surface rather than soaking into the rolls. The choice depends on personal preference regarding frosting density and distribution.
Storage and Make-Ahead Options
Properly stored rolls remain fresh at room temperature for two to three days. Storing in airtight containers or wrapping in plastic wrap prevents drying. Refrigerating extends shelf life to approximately one week, though rolls may become slightly denser as they age. Freezing unbaked, shaped rolls allows you to bake fresh rolls whenever desired. Wrap shaped, unfrosted rolls individually in plastic wrap and freeze in an airtight container for up to three months. Thaw at room temperature and bake when ready. Some people prefer freezing fully baked, unfrosted rolls for convenience. Thawed frozen rolls can be warmed in the oven and frosted. The flexibility of freezing options means you can prepare rolls in advance for breakfast without early-morning baking.
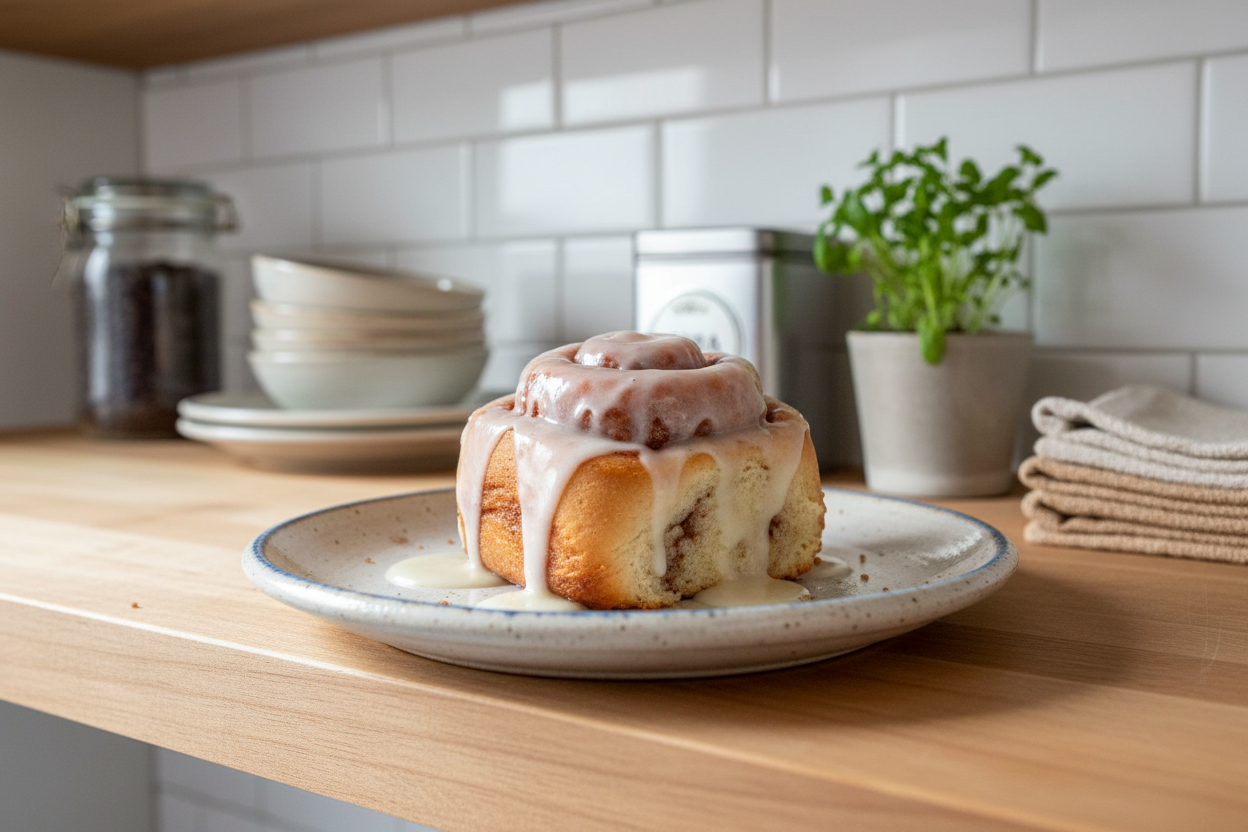
Sourdough Cinnamon Rolls
Delight in the perfect combination of cream cheese frosting and cinnamon with every bite of these mouthwatering rolls.
12
rolls20
minutes35
minutes334
kcal10
hours55
minutesIngredients
8 tablespoons (113 g) cold butter
2 ½ cups (300 g) all-purpose flour
⅓ cup (100 g) sourdough starter discard
1 cup (240 g) buttermilk
1 tablespoon + 1 teaspoon (25 g) honey
¾ teaspoon (4 g) fine sea salt
1 teaspoon baking powder
½ teaspoon baking soda
- Cinnamon-Sugar Filling:
¾ cup (150 g) light brown sugar
2 teaspoons ground cinnamon
4 tablespoons (56 g) melted butter
- Cinnamon Roll Glaze:
1 tablespoon (14 g) melted butter
1 cup (120 g) powdered sugar
1 teaspoon (5 g) vanilla extract
2 tablespoons (30 g) milk
Directions
- The Night Before:
- Mix dough ingredients and let rest overnight. Prepare cinnamon sugar filling and glaze.
- The Next Morning:
- Add leavening agents to the dough. Roll out the dough and add filling. Cut into rolls and arrange in a baking vessel. Bake until golden brown. Glaze warm rolls.
Notes
- Adjustments provided for warmer kitchens.
- No kitchen scale? Use the scoop and level technique for flour measurement.
- For a lighter glaze, adjust powdered sugar and milk ratio.
- Alternative baking vessels can be used.
Nutrition Facts
- Total number of serves: 1
- Calories: 334kcal
- Fat: 13g
- Cholesterol: 33mg
- Sodium: 231mg
- Carbohydrates: 51g
- Fiber: 1g
- Sugar: 33g
- Protein: 4g