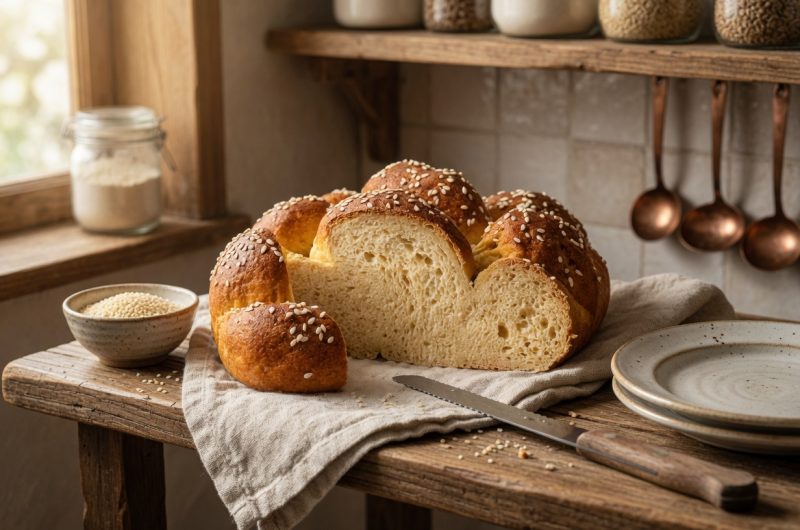
Creating authentic gluten-free challah bread that achieves the pillowy softness and beautiful braided structure of traditional wheat-based versions challenges home bakers, but this recipe proves that exceptional results are entirely achievable with proper ingredients and technique. The combination of psyllium husk, tapioca starch, millet flour, and oat flour creates a dough that handles beautifully during braiding without tearing or cracking that commonly frustrates gluten-free bakers. The slightly sweet, rich flavor develops from eggs, oil, and sugar, creating a bread that tastes authentic rather than noticeably gluten-free. Understanding how each ingredient contributes to the final texture and flavor helps home bakers make informed substitutions and troubleshoot problems. The total preparation and baking time of two hours thirty minutes makes this recipe accessible for weekend baking without requiring advance planning. Whether you are gluten-free by necessity or simply exploring alternative baking, this challah recipe delivers impressive results that satisfy even experienced bread bakers.
Understanding Psyllium Husk and Creating the Gel Base
Psyllium husk serves as the foundation for this gluten-free dough, providing binding action and structure that gluten normally provides in wheat-based bread. Mixing psyllium husk with lukewarm water creates a gel within thirty to forty-five seconds as the soluble fiber absorbs liquid and forms a cohesive mass. This gel-forming property is essential for creating dough that holds together during braiding without the excessive stickiness that causes cracking. Using whole or rough psyllium husk rather than powder creates superior texture and structure, though the powder version works acceptably in smaller quantities. The gel’s viscosity helps trap air during mixing, contributing to the bread’s final lightness. Temperature matters: lukewarm water activates the gel-forming process more efficiently than cold water. Understanding this foundational step helps troubleshoot problems if the dough seems too wet or sticky.
The Role of Tapioca Starch in Creating Tender Crumb
Tapioca starch forms the primary starch component of this gluten-free flour blend, contributing to the bread’s tender, light crumb structure while adding slight chewiness. The starch granules gelatinize during baking, absorbing water and expanding to create the characteristic open structure of quality bread. Measuring tapioca starch accurately is important because too much creates gummy texture while insufficient amounts result in dense, crumbly bread. Equal-weight substitutes including cornstarch, potato starch, or arrowroot starch work acceptably, each producing slightly different texture characteristics. The two hundred fifteen grams measurement should be weighed carefully for consistency.
Millet Flour’s Contribution to Flavor and Structure
Millet flour, measuring one hundred thirty-five grams, provides subtle nutty flavor and structure that prevents the bread from tasting bland or overly starchy. The mild, slightly sweet flavor complements the richness of eggs and oil, creating a balanced taste profile. Finely milled millet flour incorporates more smoothly than coarse varieties, creating uniform texture. Brown rice flour serves as an equal-weight substitute for those preferring different flavor or unable to source millet flour. The extra millet flour for dusting the work surface prevents sticking while adding minimal additional flour to the dough.
Oat Flour’s Role in Adding Wholesome Texture
Eighty grams of oat flour contributes wholesome grain flavor and helps create a slightly more substantial crumb than starch-only doughs would produce. The protein in oat flour provides additional structure, contributing to the bread’s ability to hold its shape during braiding and baking. Equal-weight substitutes of sorghum flour, light buckwheat flour, or white teff flour work acceptably, each adding distinctive flavor notes. Oat flour should be specifically milled for baking rather than ground whole oats, which create grittier texture.
The Importance of Instant Yeast in Reliable Rising
Eight grams of instant yeast provides reliable leavening without requiring activation in water as active dry yeast does. Instant yeast dissolves quickly into the dry ingredients, distributing throughout evenly for consistent rising. If using active dry yeast, the larger ten-gram quantity should be activated separately with sugar and water before combining with other ingredients. This activation step ensures the yeast is viable and actively working before mixing with the complete dough. Using the correct yeast type and quantity prevents under-proofing or over-proofing that affects final bread quality.
Baking Powder and Xanthan Gum Working Together for Structure
Baking powder, at eight grams, provides additional leavening that works quickly, contributing to the bread’s rise both during proofing and initial baking. Seven grams of xanthan gum replaces gluten’s binding function by providing viscosity that holds the dough together without the characteristic gluten network. Together, these leavening and binding agents create the structure necessary for beautiful braids that hold their shape during proofing and baking. The interaction between baking powder and yeast provides multiple points of leavening, contributing to the bread’s light texture.
Sugar, Salt, and Flavor Development
Fifty grams of caster or superfine sugar adds subtle sweetness appropriate for bread rather than creating a sweet dessert loaf. The sugar also feeds yeast, promoting fermentation and flavor development during rising. Seven grams of salt balances sweetness and enhances all flavors, preventing the bread from tasting flat. These ingredients work together to create the traditional challah flavor profile that distinguishes this bread from simple gluten-free loaves.
Eggs and Oil Contributing Richness and Moisture
One whole egg and two egg yolks add richness, color, and binding power that create the characteristic golden interior and exterior of authentic challah. The yolks contribute additional fat and richness, creating the luxurious mouthfeel expected in quality bread. Forty grams of neutral-tasting oil provides additional moisture and tenderness while contributing to the bread’s slightly rich flavor. These ingredients combine to create the distinctive challah character that makes this bread special.
The Critical Kneading Step for Smooth Dough
Kneading the dough for four to five minutes using a stand mixer or six to eight minutes by hand ensures all ingredients incorporate evenly while developing a smooth, cohesive dough. This extended kneading time is crucial for gluten-free dough, as it allows the binding agents to fully hydrate and distribute throughout. Using a rubber spatula to scrape the bowl sides prevents pockets of unmixed flour from creating dry spots in the final bread. The final dough should be slightly sticky but manageable on a lightly floured surface.
Understanding the Dough’s Texture and Stickiness
Gluten-free dough naturally feels stickier than wheat-based dough because psyllium and xanthan create viscosity without gluten’s elasticity. Resisting the temptation to add extra flour prevents the final bread from becoming dense and dry. If the dough seems unmanageably sticky, refrigerating for one hour firms it without compromising the final texture. The right consistency allows beautiful braiding while maintaining the soft crumb expected in quality bread.
Dividing and Rolling Dough into Braiding Strands
Dividing the dough into four equal portions of approximately two hundred fifty grams each ensures evenly sized strands that braid beautifully. Rolling each portion into a rectangle, then folding and rolling into a log creates the strand shape needed for braiding. Achieving a tapered shape with narrower ends creates a more elegant final braid. The fifteen to sixteen inch length provides adequate strand for beautiful braiding without excessive thinness.
The Four-Strand Braiding Technique
The four-strand braiding pattern of over-under-over creates the characteristic twisted appearance of traditional challah. Starting with the strand farthest to the right and weaving toward the left ensures consistent, even braiding. Braiding from top to bottom, then rotating and finishing the other end produces the most attractive result. Gluten-free dough requires gentler handling than wheat dough, but proper technique prevents tearing or cracking. Tucking the ends underneath creates a polished, finished appearance.
Proofing in a Warm Environment for Proper Rising
Placing the braided loaf in a warm spot for one to one hour fifteen minutes allows the dough to double in size through yeast fermentation and gas production. Creating a warm, slightly humid environment by placing boiling water in a turned-off oven facilitates optimal rising. Lightly covering the dough prevents surface drying while allowing gentle air circulation. Proper proofing is essential for developing the light, open crumb characteristic of quality bread.
Egg Wash and Topping for Golden Appearance
Brushing the proofed challah with egg wash before baking creates the characteristic deep golden-brown exterior. Optional sesame seeds add visual interest and subtle nutty flavor. The egg wash should be applied gently to the risen dough using a soft brush or pastry brush to avoid deflating the carefully braided structure. The combination of egg wash and optional toppings creates the distinctive challah appearance.
Baking Temperature and Time for Perfect Results
Preheating the oven to three hundred seventy-five degrees Fahrenheit and positioning the rack to the lower-middle ensures even baking from bottom and top simultaneously. Baking for twenty-eight to thirty minutes produces a deep golden-brown crust while the interior finishes cooking. If the loaf browns too quickly, covering with aluminum foil shields it from excessive browning. The toothpick doneness test, checking the center for any raw dough, ensures complete baking.
Cooling and Storage for Maintaining Quality
Transferring the baked challah immediately to a wire rack prevents condensation from forming underneath, which would create a soggy bottom crust. The bread tastes best fresh on the day of baking but stores acceptably at room temperature in a closed container for three to four days. Toasting or reheating on days three and four refreshes the bread and prevents staleness. Proper storage extends the enjoyment of this special bread across multiple days.
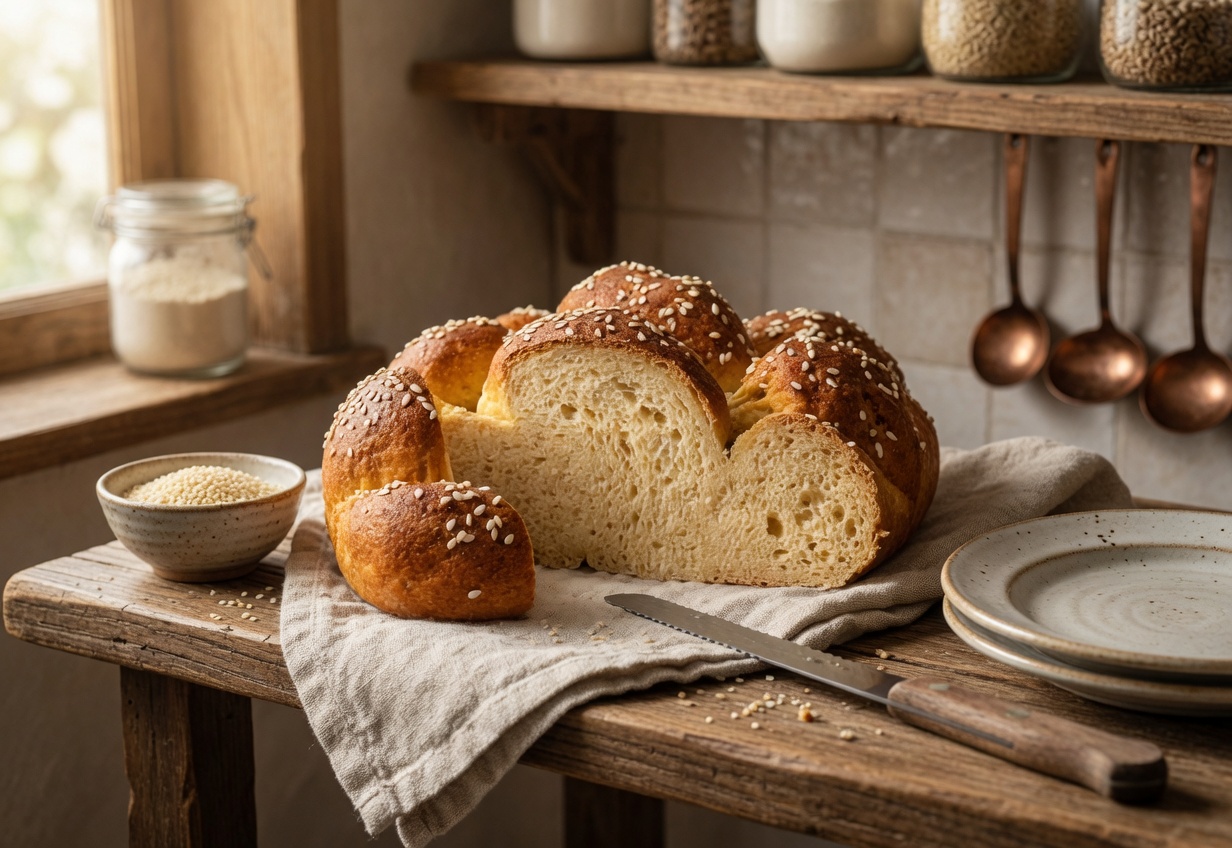
Gluten Free Challah Bread
Perfect for Shabbat celebrations, holidays, or special occasions, this gluten-free challah impresses with its tender crumb and distinctive braided structure. Enjoy warm with butter or toasted the next day for continued enjoyment.
1
hour1
hour30
minutes2
hours30
minutesIngredients
- For the Dough:
20 grams (4 tablespoons) whole or rough psyllium husk
345 grams (1 and 1/4 cups plus 3 tablespoons) lukewarm water
215 grams (1 and 3/4 cups plus 2 tablespoons) tapioca starch
135 grams (1 cup) millet flour, plus extra for dusting work surface
80 grams (3/4 cup plus 2 tablespoons) oat flour
50 grams (1/4 cup) caster or granulated sugar
8 grams (2 and 1/2 teaspoons) instant yeast
8 grams (2 teaspoons) baking powder
7 grams (2 and 1/2 teaspoons) xanthan gum
7 grams (1 and 1/4 teaspoons) salt
1 large egg, at room temperature
2 large egg yolks, at room temperature
40 grams (3 tablespoons) sunflower oil or other neutral-tasting oil
- For Assembly and Baking:
1 large egg, whisked, for egg wash
1 to 2 tablespoons sesame seeds, for topping (optional)
Directions
- In a bowl, mix the psyllium husk and lukewarm water together. After thirty to forty-five seconds, a gel will form. Set aside. In a large bowl or stand mixer bowl, whisk together the tapioca starch, millet flour, oat flour, sugar, instant yeast, baking powder, xanthan gum, and salt until evenly distributed.
- Add the whole egg, two egg yolks, and sunflower oil to the psyllium gel. Mix thoroughly to combine. Make a well in the center of the dry ingredients and add the psyllium gel-egg mixture. Using a stand mixer fitted with the dough hook or kneading by hand, mix until all ingredients are incorporated.
- Continue kneading for four to five minutes using a stand mixer or six to eight minutes by hand. Use a rubber spatula to scrape the sides and bottom of the bowl occasionally, preventing unmixed flour pockets. The dough should be smooth but slightly sticky.
- Turn the dough out onto a lightly floured surface and shape into a ball. Divide into four equal portions, each approximately two hundred fifty grams. Keep the portions covered with plastic wrap or a clean towel while working.
- Take one portion and shape into a ball. Roll out into a rough rectangle approximately eight by five inches. Fold the dough over itself along the wider end and press to seal. Continue folding and sealing to create an eight-inch log. Pinch the seam to seal completely.
- Using your hands, roll the log back and forth to create a rope approximately fifteen to sixteen inches long. Create a slightly tapered shape with narrower ends. Repeat this process with the remaining three portions of dough.
- Place all four dough ropes on a large sheet of parchment or baking paper. You will braid on the paper to simplify transfer to the baking sheet. Braid using the four-strand pattern: always start with the strand farthest to the right and weave it toward the left using the pattern over-under-over. Continue this pattern, always starting with the rightmost strand, until fully braided. Tuck the ends underneath for a polished appearance.
- Using the parchment paper, transfer the braided loaf to a large baking sheet. Trim the parchment paper as needed. Lightly cover with plastic wrap and allow to proof in a warm spot for one hour to one hour fifteen minutes until doubled in size. If your kitchen is cool, place a cup of boiling water in a turned-off oven to create a warm proofing environment.
- Once the challah has doubled in size, adjust the oven rack to the lower-middle position and preheat to three hundred seventy-five degrees Fahrenheit. Gently brush the proofed challah with whisked egg wash. Sprinkle with sesame seeds if desired.
- Bake for twenty-eight to thirty minutes until the crust is deep golden brown. If browning too quickly, cover loosely with aluminum foil. Check doneness by inserting a toothpick into the center; it should come out clean or with just a few moist crumbs, not raw dough.
- Immediately transfer the baked challah to a wire cooling rack. This prevents condensation from forming underneath. Allow to cool completely before slicing.