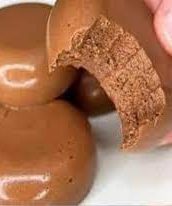
Molasses cookies are a nostalgic classic, bringing together warm spices, deep molasses flavor, and a perfectly soft and chewy texture. These homemade molasses cookies bake up thick, rich in flavor, and just the right balance of sweetness and spice. If you’re looking for the best old-fashioned molasses cookies, this recipe is foolproof and easy to follow.
Why You’ll Love These Cookies
- Perfectly Soft & Chewy – The combination of butter and shortening gives these cookies a tender crumb and ideal thickness.
- Deep, Rich Flavor – Molasses and a blend of warm spices create a cozy, aromatic treat.
- Easy to Make – Simple ingredients, quick prep, and a straightforward process make this recipe great for bakers of all levels.
- Make-Ahead Friendly – The dough can be refrigerated for up to 24 hours or frozen for later use.
- Great for Gifting & Holidays – These cookies are a holiday favorite and make a fantastic homemade gift.
Key Ingredients & Substitutions
Molasses – The Heart of the Recipe
The molasses you choose makes a big difference in the final flavor.
- Light molasses (Fancy molasses): Mild in flavor and perfect for soft and sweet cookies.
- Dark molasses (Cooking molasses): Richer, with a slightly bitter edge, for a stronger molasses taste.
- Blackstrap molasses: Highly concentrated and too intense for cookies—avoid using it in this recipe.
Butter & Shortening – The Secret to Softness
- Why Use Both? Butter adds great flavor, while shortening helps the cookies hold their shape and stay soft.
- Substitutions: You can use all butter for extra flavor (cookies may spread more) or all shortening for a fluffier texture.
Spices – The Warmth Factor
A blend of cinnamon, ginger, and cloves gives these cookies their signature warmth. Adjust the spice levels to your preference:
- More ginger for extra kick.
- Reduce cloves if you prefer a milder taste.
- Add nutmeg or allspice for extra depth.
Baking Soda – The Essential Leavening Agent
Baking soda helps the cookies rise and gives them a tender texture. Be sure to measure it accurately for the perfect consistency.
Step-by-Step Instructions for Perfect Molasses Cookies
Step 1: Cream the Fats and Sugar
- In a large mixing bowl, beat together room-temperature butter, shortening, and sugar until light and fluffy. This step incorporates air and helps the cookies bake up soft and thick.
Step 2: Add Wet Ingredients
- Mix in molasses and a lightly beaten egg until smooth and well combined.
Step 3: Prepare the Dry Ingredients
- In a separate bowl, whisk together flour, baking soda, cinnamon, ginger, cloves, and salt.
Step 4: Combine Wet & Dry Ingredients
- Gradually mix the dry ingredients into the wet mixture on low speed until a soft dough forms.
Step 5: Chill the Dough
- Cover the dough with plastic wrap and chill for at least 1 hour (or up to 24 hours). This helps the cookies hold their shape and enhances the flavors.
Step 6: Shape & Coat the Cookies
- Roll dough into 1 1/2-inch balls and coat each ball in granulated sugar for a slight crunch on the outside.
Step 7: Bake to Perfection
- Preheat your oven to 350°F (175°C).
- Place dough balls 3 inches apart on an ungreased baking sheet.
- Bake for 13-15 minutes until puffy and set. Cookies will slightly deflate as they cool.
Step 8: Cool & Enjoy
- Let cookies rest for 1 minute on the baking sheet before carefully transferring them to a wire rack.
Baking Tips for Success
- Measure ingredients accurately – especially flour. Use the scoop and level method or a kitchen scale for precision.
- Don’t skip chilling the dough – this prevents spreading and ensures a thicker cookie.
- Bake a test cookie first – oven temperatures vary, so adjust baking time if needed.
- Remove cookies promptly – overbaking leads to dry cookies. They should look soft and slightly underbaked when removed.
Storage & Freezing Tips
- Room Temperature: Store in an airtight container for up to 10 days.
- Freezing: Freeze baked cookies for up to 2 months. For unbaked dough, shape into balls, freeze on a baking sheet, then transfer to a freezer bag for future baking.
Easy Measurement Trick: Water Displacement Method for Shortening
Measuring shortening can be messy. Instead, use the water displacement method:
- Fill a liquid measuring cup with cold water up to 1/4 cup less than your needed amount.
- Add shortening until the water level rises to the correct total measurement.
- Drain the water, and you have the perfect amount of shortening.


