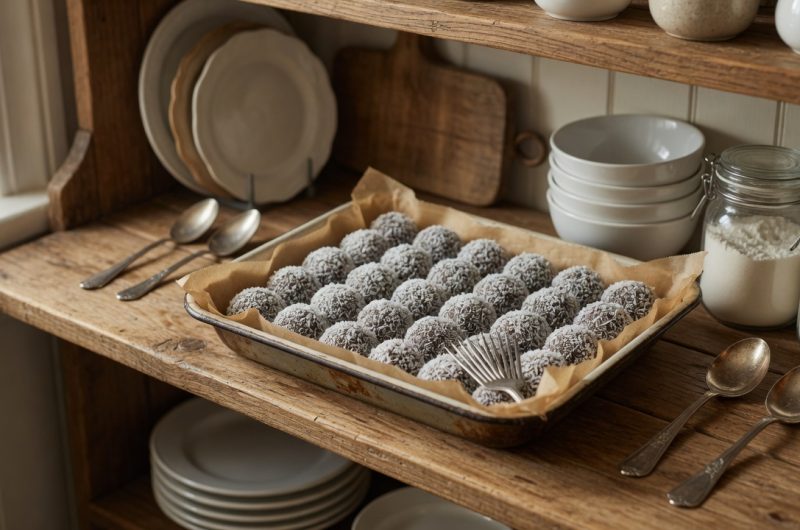
Chocolate coconut snowballs are one of Newfoundland’s most beloved confections and have become cherished treats during the Christmas season while also being enjoyed year-round in countless homes across the region and beyond. This delightful no-bake treat combines rich chocolate and coconut flavors to create a dessert that is simple, sweet, and absolutely irresistible to anyone who loves classic holiday flavors. Whether you are preparing for a festive gathering with family and friends, need a last-minute dessert for a potluck, or just find yourself craving a quick sweet treat on an ordinary Tuesday afternoon, these snowballs are the perfect go-to option that requires minimal effort but delivers maximum flavor and satisfaction. The beauty of this recipe lies in its simplicity and the fact that you do not need any special baking skills or equipment to create professional-looking treats that taste like they came from a fancy bakery. Once you learn how to make these snowballs, you will find yourself preparing them again and again because they are so easy and so delicious.
Understanding What No-Bake Really Means in Dessert Preparation
The term “no-bake” is sometimes misunderstood to mean that absolutely no cooking is involved, but what it actually means is that you do not need to use your oven to create the finished product. These chocolate coconut snowballs do require some stovetop preparation to melt and mix the ingredients together, but the minimal cooking time combined with the simplicity of the process makes it well worth the minimal effort. The beauty of no-bake desserts is that you can prepare them even on the hottest days of summer without heating up your entire kitchen with oven temperature, which makes them ideal for warm weather entertaining or anytime you want a cool treat without the extra heat. No-bake recipes are also wonderful when you have unexpected guests because they come together quickly and can be prepared and ready to serve in under an hour from start to finish. Many people find no-bake treats appealing because they feel less intimidating than traditional baked goods, since you do not have to worry about timing in the oven or whether something is fully cooked through or overdone.
Exploring Other No-Bake Recipes in Your Dessert Collection
If you love the simplicity and delicious results of quick no-bake recipes, you should definitely explore other easy-to-make options that are perfect for holiday gatherings or anytime entertaining. Chocolate Marshmallow Bars combine fluffy marshmallows with rich chocolate for a treat that tastes indulgent but comes together easily without baking. Coconut Candy Drops offer a similar coconut experience but with different flavor combinations and textures that provide variety in your dessert rotation. Peanut Butter Crispies deliver the nostalgia of childhood treats with peanut butter flavor combined with crispy rice cereal for a satisfying texture that appeals to both children and adults. Each of these recipes brings its own unique charm and appeal to the table, making them excellent additions to your dessert repertoire and giving you multiple no-bake options to choose from depending on your mood and what ingredients you have on hand.
Gathering the Essential Ingredients for Chocolate Coconut Snowballs
Creating perfect chocolate coconut snowballs requires specific ingredients that work together to create the right texture and flavor balance that makes these treats so special. Butter serves as the foundation for binding all the other ingredients together, and you can use either salted or unsalted butter depending on your preference and what you have available in your kitchen. Make sure your butter is softened to room temperature before you begin, because soft butter will melt quickly and evenly when you apply gentle heat on the stovetop. Granulated white sugar provides the sweetness and also helps create the right texture when mixed with the other ingredients, and regular granulated sugar works best for this recipe because it dissolves smoothly into the butter. Whole milk provides a creamy texture and adds richness to the mixture, helping to bind all the dry ingredients together into a cohesive dough that holds together well when you form it into balls. Unsweetened, medium-shredded coconut is absolutely key to getting the right texture and flavor balance.
Understanding Why Coconut Quality and Type Matter
The type and quality of coconut you choose for this recipe makes a significant difference in how your finished snowballs turn out. Unsweetened, medium-shredded coconut is the ideal choice because it provides the perfect balance of texture and appearance in the finished treat. Sweetened coconut varieties should be avoided because they can overpower the dessert and make it taste overly sugary and one-dimensional, losing the nice balance between the chocolate and coconut flavors. If you use coconut that is shredded too finely, it will create a texture that is too uniform and pasty, lacking the pleasant texture that makes snowballs appealing and interesting to eat. Flaked coconut, which is larger and more irregular in shape, can make the rolling process difficult because the pieces do not hold together as well when you are trying to form them into neat balls. Medium-shredded coconut is the ideal option that provides excellent structure while still being fine enough to create a pleasant eating experience with a slightly chewy texture.
Selecting the Right Chocolate Cake Mix for Your Recipe
Boxed chocolate cake mix serves as the base for the rich, chocolatey flavor that defines these snowballs, and you have a wonderful variety of flavors to choose from depending on your preferences. Dark Chocolate Fudge cake mix delivers an intense, deeply chocolatey flavor for those who really love chocolate and want it to be the star of the show. Devil’s Food cake mix offers a classic chocolate flavor that is rich and complex without being overpowering, and it works beautifully in this recipe because the flavor profile is well-balanced. Swiss Chocolate cake mix provides a smooth, refined chocolate flavor that many people find very appealing, and it tends to have a slightly different taste than the other options because of its specific formulation. Most boxes of cake mix weigh around fifteen ounces, though slight variations between brands are normal and will not significantly affect the recipe or the final results. You should use the cake mix straight from the box without baking it, since the flour in the mix provides structure to your snowballs.
Preparing the Base Mixture on Your Stovetop
The first step in making your chocolate coconut snowballs is to prepare the base mixture by combining butter, sugar, and milk in a medium saucepan. Place the saucepan on the stovetop over medium heat and allow the butter to melt slowly and gently while you stir the mixture occasionally. Continue stirring until the butter has melted completely and the sugar has dissolved into the mixture, which should take about five to seven minutes depending on how much butter you are using. It is important to avoid bringing this mixture to a boil because boiling can cause sugar crystallization, which would create a grainy texture rather than the smooth, creamy consistency you are aiming for. You want the mixture to be hot enough to melt the ingredients and blend them together smoothly, but not so hot that it boils vigorously. Once the butter is melted and the sugar is fully dissolved, you can remove the pan from the heat and set it aside to cool slightly before combining it with the dry ingredients.
Combining the Dry Ingredients in a Large Bowl
While your butter mixture is cooling slightly, you should prepare the dry ingredients in a separate large mixing bowl to keep everything organized and ready for when you combine everything together. In your large bowl, whisk together three and a half cups of shredded coconut, the entire box of chocolate cake mix without baking it, and the quick oats. The quick oats provide structure and help keep the snowballs moist and chewy rather than becoming hard and dense as they sit in storage. Make sure to reserve one cup of the shredded coconut separately for rolling the finished snowballs, since you will need fresh coconut on the outside for the authentic snowball appearance. Whisking the dry ingredients together ensures they are evenly distributed throughout the mixture, which means each bite of your finished snowballs will have consistent flavor and texture.
Mixing Everything Together for the Perfect Texture
Once your butter mixture has cooled for a minute or two and your dry ingredients are ready, pour the melted butter mixture over the dry ingredients in your large bowl. Using a sturdy wooden spoon or sturdy spatula, begin mixing everything together thoroughly until it is well combined throughout. The mixture will be sticky and gooey at this point, which is exactly the texture you want because it means the ingredients are properly combined and will hold together when you form them into balls. Mix until there are no visible dry patches of cake mix or coconut remaining, and everything has a uniform appearance and consistency. This mixing step is important because it distributes the moisture evenly throughout the mixture, ensuring that each snowball will have the same texture and flavor.
Chilling the Dough to Achieve the Right Consistency
Once you have finished mixing all your ingredients together, transfer the bowl to the refrigerator and let it chill for at least two hours to allow the mixture to firm up and become easier to handle. The chilling time is essential because it allows the fats in the butter to solidify slightly, creating a dough that holds together better when you are forming it into balls. If you try to form snowballs with warm mixture, they will fall apart in your hands and will not hold their shape properly. After two hours of chilling, the mixture should be firm enough to scoop and roll without falling apart, but still soft enough to shape without being difficult to work with. If you find that the mixture is still too soft after two hours, you can return it to the refrigerator for an additional thirty minutes to an hour.
Forming and Coating Your Snowballs
Once your mixture has chilled sufficiently, you are ready to form it into snowballs and coat them with the reserved shredded coconut for the signature snowy appearance. Use a small cookie scoop or even a regular spoon to portion out the mixture, creating pieces that are roughly the same size so your finished snowballs look uniform and professional. Roll each portion between your hands to form it into a smooth ball shape, applying gentle pressure but not squeezing too hard, which could make them dense and compact. Once you have formed a ball, immediately roll it in the reserved cup of shredded coconut, turning it so the coconut covers the entire surface and creates that authentic snowball appearance. If the coconut is not sticking well, you can lightly dampen your hands or the snowball with just a tiny bit of water to help the coconut adhere better.
Storing Your Snowballs for Maximum Freshness
Once you have finished forming and coating all your snowballs, you need to store them properly to maintain their freshness and keep them ready to eat whenever you want them. Store the snowballs in an airtight container in the refrigerator where they will keep for about one to two weeks, remaining fresh and delicious throughout that time. These snowballs can also be frozen for up to three months if you want to make them ahead of time and have them ready for unexpected guests or for enjoying throughout the holiday season. Freezing is perfect for make-ahead planning because you can prepare a large batch when you have time and energy, then simply thaw them in the refrigerator a few hours before serving. When storing in the freezer, make sure they are in an airtight container and consider placing parchment paper between the layers to prevent them from sticking together.
Why Chocolate Coconut Snowballs Remain a Holiday Favorite
The combination of chocolate and coconut delivers a nostalgic flavor that appeals to people of all ages and reminds many of cherished childhood memories and holiday traditions from years past. Their no-bake nature makes them an ideal choice for busy holiday seasons when you do not have much time for complicated recipes but still want to serve delicious homemade treats. The fact that they are freezer-friendly means you can prepare them weeks in advance, which removes stress from your holiday planning and allows you to enjoy the season rather than spending all your time in the kitchen. These snowballs work beautifully on dessert tables at parties and gatherings because they are attractive, easy to eat, and require no plates or forks since people can pick them up and eat them by hand.
Customizing Your Snowballs With Personal Touches
While the classic chocolate coconut combination is delicious exactly as written, these snowballs are incredibly versatile and welcome creative variations that allow you to personalize them to suit your taste preferences. You can add chopped nuts such as pecans or walnuts to the mixture for additional texture and flavor, stirring them in before chilling. Dried fruits like chopped cranberries, raisins, or chopped dried cherries add bursts of flavor and tartness that complement the rich chocolate beautifully. A dash of vanilla extract mixed into the butter mixture adds depth and enhances the overall flavor profile without overpowering the chocolate and coconut. Some people enjoy adding a pinch of sea salt to the chocolate mixture to enhance the flavor and create a sweet and salty combination that is very appealing.
Tips for Successfully Making Snowballs Every Time
When you are making your chocolate coconut snowballs, make sure your butter is truly softened to room temperature before you begin, because this ensures it will melt smoothly without creating clumps. Do not skip the chilling step, as this is what makes the mixture workable and prevents your snowballs from falling apart as you form them. Use medium-shredded coconut rather than sweetened or finely shredded varieties for the best texture and appearance in your finished product. Work quickly when forming snowballs if your kitchen is warm, because warm mixture becomes soft and difficult to shape. If your hands are getting sticky while rolling, try dampening them slightly with water or keeping a small bowl of water nearby for periodic hand-washing. Make sure each snowball is evenly coated with coconut for a professional appearance.
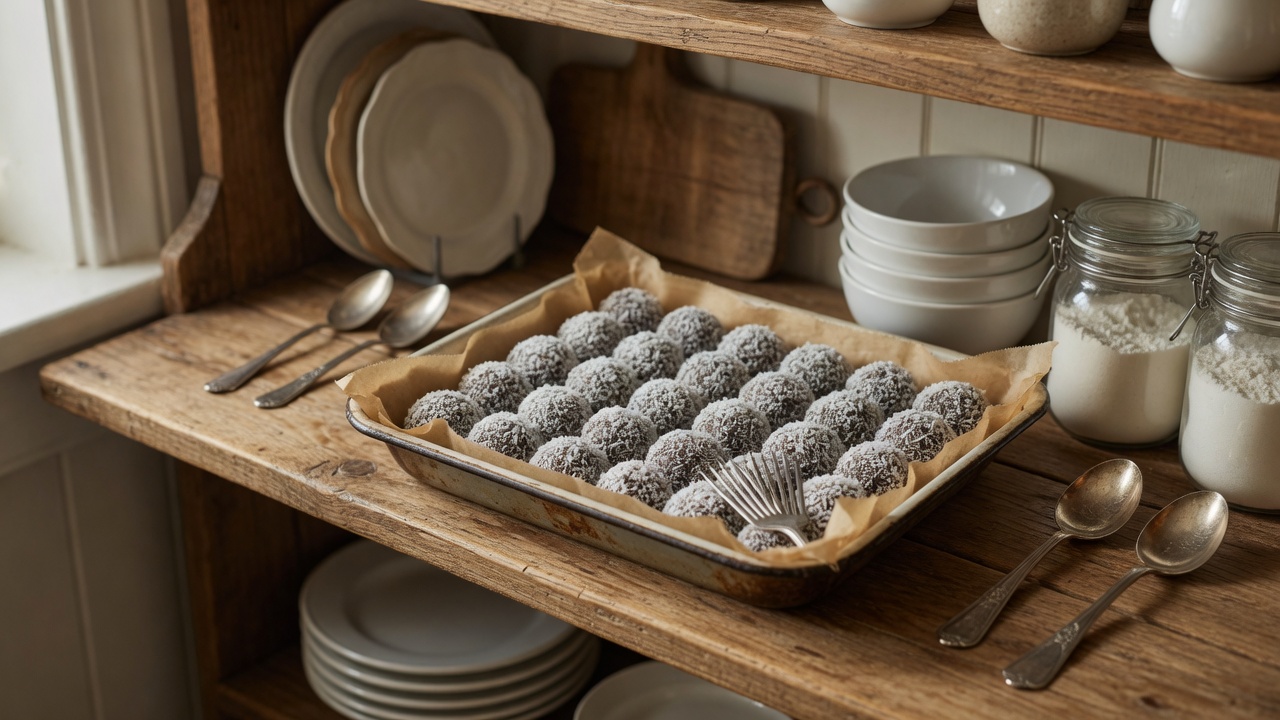
No-Bake Chocolate Coconut Snowballs
Enjoy your delightful homemade snowballs, bursting with chocolate and coconut flavor!
48
servings20
minutes154
kcal2
hours20
minutesIngredients
½ cup butter, softened
1 cup sugar
1 cup whole milk
4 ½ cups unsweetened shredded coconut (reserve 1 cup for coating)
3 ½ cups quick oats
15-ounce boxed chocolate cake mix
Directions
- In a saucepan, heat butter, sugar, and milk over medium heat. Stir until the butter melts and sugar dissolves. Remove from heat.
- In a large bowl, combine 3 ½ cups shredded coconut, oats, and cake mix.
- Pour the melted mixture into the dry ingredients and stir until fully incorporated. The mixture will be sticky.
- Chill the mixture in the refrigerator for at least 2 hours.
- Scoop out portions of the chilled mixture and roll into balls.
- Coat each ball in the reserved coconut by rolling them in a shallow dish.
- Store the snowballs in the refrigerator or freeze them for later enjoyment.
Nutrition Facts
- Total number of serves: 48
- Calories: 154kcal
- Fat: 9g
- Saturated Fat: 7g
- Cholesterol: 6mg
- Sodium: 96mg
- Potassium: 105mg
- Carbohydrates: 17g
- Fiber: 2g
- Sugar: 9g
- Protein: 2g
- Calcium: 25mg
- Iron: 1mg