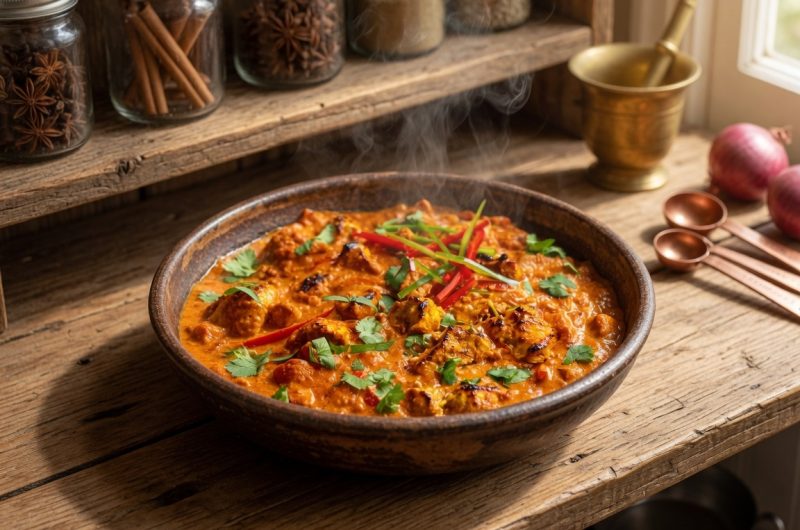
There is a reason chicken tikka masala remains one of the most searched and ordered curry dishes across the world. The combination of tender, spiced chicken pieces bathed in a creamy tomato sauce hits every note people look for in comfort food. This version brings together a well-balanced marinade, a properly built sauce base, and a finishing touch of cream and almonds that gives the gravy its signature silky texture. Whether you are cooking for a family dinner or meal prepping for the week, this recipe gives you full control over spice levels, richness, and texture without needing any specialty equipment.
What Makes Homemade Curry Better Than Takeout
Making chicken tikka masala at home means you decide exactly how much salt, cream, and spice goes into your plate. Restaurant versions often rely on heavy cream and sugar to mask inconsistent spice blends, while a homemade batch lets you taste each layer of coriander, cumin, and garam masala clearly. You also get to control the heat level, swap dairy for lighter alternatives, and grill the chicken exactly the way you like it, whether that means a smoky char from the broiler or a more gentle bake.
Step 1: Preparing the Marinade for Tender, Flavorful Chicken
The foundation of any good chicken tikka masala is the marinade, and this step should never be rushed. Combine Greek yogurt with ground coriander, turmeric, cumin, paprika, a mild chili powder, and a small amount of cinnamon. The yogurt does double duty here since its acidity breaks down the muscle fibers in the chicken while the live cultures help keep the meat moist during cooking. Once the spices are mixed in, add minced garlic, grated ginger, fresh lemon juice, salt, and black pepper, then stir everything together until the chicken pieces are fully coated.
Why Marinating Time Matters
Letting the chicken rest in the fridge for at least two to three hours makes a noticeable difference in the final dish. During this resting period, the yogurt and spices penetrate deeper into the meat, which means every bite carries flavor instead of just the surface. If you have the time, marinating overnight produces even better results, since the acids have more time to tenderize the chicken without turning it mushy. Avoid marinating for longer than 24 hours, as the lemon juice can eventually start to change the texture of the meat in an undesirable way.
Step 2: Building a Flavorful Base Sauce
A great curry sauce starts long before the tomatoes go into the pan. Begin by softening chopped onions in a mixture of butter and oil over medium heat, stirring occasionally until they turn a light golden color. This slow cooking step draws out the natural sweetness of the onions, which balances the acidity of the tomatoes later in the recipe. Once the onions have softened, stir in minced garlic and grated ginger and let them cook for another minute or two until the kitchen fills with a warm, fragrant aroma.
Layering the Spice Blend
With the onion, garlic, and ginger base ready, it is time to add the dry spices that give this dish its identity. Garam masala, ground coriander, cumin, paprika, and a touch of cinnamon should be stirred into the pan and toasted briefly in the fat left behind from the onions. Toasting the spices for thirty seconds to a minute wakes up their essential oils and prevents the sauce from tasting flat or raw. Once the spices become fragrant, stir in a couple of tablespoons of tomato puree to deepen the color and add a concentrated tomato flavor to the base.
Adding Red Bell Peppers for Extra Nutrition
While traditional chicken tikka masala recipes do not usually include vegetables, chopped red bell peppers make a welcome addition for those who want extra color, sweetness, and nutritional value in their meal. The peppers soften slightly during cooking while still holding a bit of bite, which contrasts nicely against the smooth sauce. This step is entirely optional, so feel free to leave it out if you prefer to keep the dish closer to its classic roots.
Step 3: Simmering the Tomato Base Until Rich and Thick
Once your spice base is ready, pour in a can of chopped tomatoes along with a splash of water to loosen the mixture slightly. Bring everything to a gentle simmer and let it cook uncovered for fifteen to twenty minutes, stirring occasionally to prevent sticking. This extended simmering time allows the tomatoes to break down fully and the flavors to meld together into a cohesive sauce rather than tasting like separate ingredients. You will notice the sauce thickening and darkening slightly as the water content reduces, which is exactly the texture you want before moving to the next step.
Getting the Right Consistency
If the sauce becomes too thick during simmering, add a small amount of water or chicken stock to loosen it back up. On the other hand, if it seems too watery after twenty minutes, simply let it simmer a few minutes longer uncovered so the extra liquid can evaporate. The goal is a sauce that coats the back of a spoon without being overly runny, since this thickness will hold up well once the cream and grilled chicken are added later.
Step 4: Grilling the Chicken for Smoky Flavor
While the sauce simmers away, turn your attention to cooking the marinated chicken. Threading the pieces onto skewers and grilling them over a barbecue gives the most authentic smoky char, similar to what you would find at an Indian restaurant using a tandoor oven. If a barbecue is not available, spreading the chicken pieces on a baking sheet and cooking them under a hot broiler works just as well, producing lightly charred edges that add depth to the finished dish.
Checking That the Chicken Is Fully Cooked
Regardless of which cooking method you choose, always brush the chicken lightly with oil before it hits the heat to prevent it from drying out. Cooking times will vary depending on the size of the chicken pieces and the intensity of your heat source, so the best way to confirm doneness is to slice into the thickest piece and check that the meat is white and opaque all the way through with no pink remaining. Undercooked chicken should never be added to the sauce, so take the extra minute to check before moving forward.
Step 5: Combining the Sauce and Chicken
Once your tomato base has simmered down and the chicken is fully cooked, it is time to bring the dish together. Stir double cream, ground almonds, and a small amount of brown sugar into the simmering sauce. The cream adds richness and smooths out the texture, the ground almonds contribute a subtle nutty flavor while helping to thicken the sauce naturally, and the brown sugar rounds out the acidity from the tomatoes with a touch of sweetness. Mix these three ingredients in gradually, tasting as you go to find the right balance for your palate.
Finishing the Dish
Add the grilled chicken pieces directly into the sauce and stir gently to make sure every piece gets coated evenly. Let the mixture simmer on low heat for a few more minutes, just long enough to heat the chicken through and allow the flavors from the char to blend into the sauce. Avoid boiling the sauce vigorously at this stage, since high heat can cause the cream to separate and affect the smooth texture you have worked to build throughout the cooking process.
Adjusting the Recipe to Your Taste
Making It Spicier
If you prefer a curry with more heat, add hot chili powder or finely chopped fresh red chilies while sautéing the spice blend in step two. Starting with a small amount and tasting as the sauce simmers gives you better control than dumping in a large quantity at once. You can also serve extra chili flakes or fresh sliced chilies on the side so everyone at the table can adjust their own portion to taste.
Making It Lighter
For a lower calorie version of this dish, swap the full-fat Greek yogurt for a low-fat version and replace the double cream with a lighter cream alternative or even coconut milk. If you want to cut dairy fat further, you can skip the cream entirely and let the ground almonds provide the richness and body the sauce needs. The flavor will shift slightly but still deliver a satisfying, well-spiced curry.
Adding Extra Texture
A sprinkle of toasted nuts or crispy fried onions right before serving adds a pleasant crunch that contrasts with the smooth sauce and tender chicken. Toasted flaked almonds work particularly well here since they echo the ground almonds already in the sauce, while fried onions bring a slightly sweet, caramelized bite that pairs nicely with the warm spices throughout the dish.
Serving Suggestions for Chicken Tikka Masala
This curry pairs naturally with steamed basmati rice, which soaks up the sauce without competing with its flavor. Warm naan bread on the side is also a popular choice for scooping up every last bit of sauce from the plate. For a lighter meal, serve the chicken tikka masala over cauliflower rice or alongside a simple cucumber salad to balance the richness of the cream-based sauce.
Storage and Reheating Notes
Leftover chicken tikka masala keeps well in an airtight container in the refrigerator for up to three days. When reheating, warm the curry gently on the stove over low heat, stirring occasionally and adding a splash of water or stock if the sauce has thickened too much overnight. This dish also freezes reasonably well for up to two months, though the texture of the cream sauce may change slightly upon thawing, so stir thoroughly while reheating to bring it back together.
Preparing Ingredients Ahead of Time
If you want to save time on a busy weeknight, marinate the chicken the night before and store it covered in the fridge until you are ready to cook. The onion and spice base can also be prepared a day in advance and refrigerated, then reheated gently while you grill the chicken, cutting your active cooking time significantly on the day you plan to serve the dish.
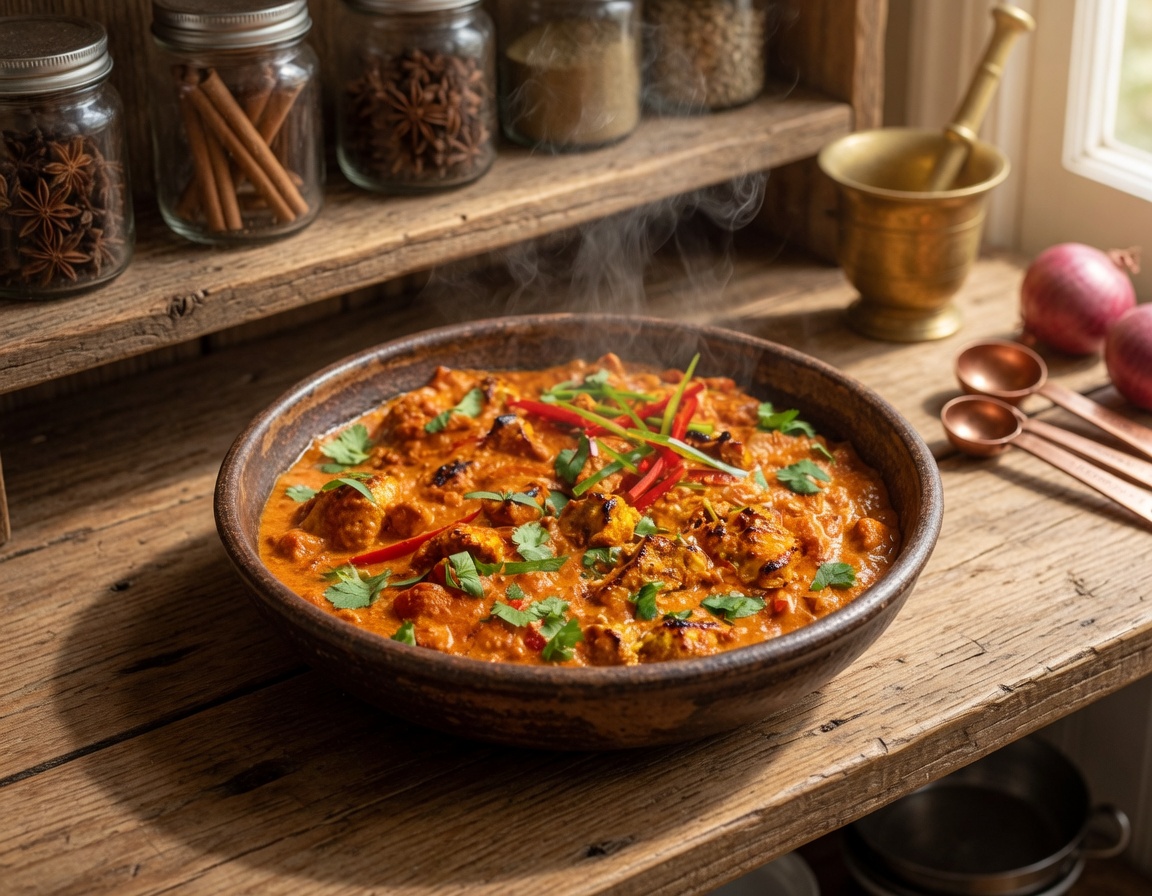
Perfect Chicken Tikka Masala
Tender chunks of marinated and chargrilled chicken are cooked in a creamy, mildly spiced sauce infused with garlic, ginger, and a blend of fragrant spices. This dish is a hit with both kids and adults.
4
servings20
minutes40
minutes565
kcal1
hourIngredients
- For the Chicken Marinade:
3 chicken breasts, cut into bite-sized pieces
120 ml (1/2 cup) full-fat Greek or natural yogurt
2 cloves garlic, finely minced
1 tbsp freshly grated ginger
Juice of half a lemon
1 tsp ground coriander
1/2 tsp turmeric powder
1/2 tsp ground cumin
1 tsp paprika
1/2 tsp mild chili powder (or hot chili powder for extra spice)
1 pinch ground cinnamon
1/2 tsp salt
1/2 tsp black pepper
2 tbsp vegetable oil (for brushing the chicken before grilling)
- For the Masala Sauce:
1 tbsp vegetable oil
1 tbsp unsalted butter
1 onion, finely chopped
3 cloves garlic, minced
2 tsp freshly grated ginger
1 tsp garam masala
2 tsp ground coriander
2 tsp paprika
1 tsp ground cumin
1/2 tsp ground cinnamon
2 tbsp tomato puree
1 red bell pepper, deseeded and sliced
400 g (14 oz) can of chopped tomatoes
120 ml (1/2 cup) water
180 ml (3/4 cup) heavy cream
3 tbsp ground almonds
1 tbsp brown sugar
- For Serving:
Boiled rice
1 tbsp freshly chopped coriander (cilantro)
Finely chopped fresh chilies (optional)
Directions
- In a large bowl or resealable bag, combine the yogurt, garlic, ginger, lemon juice, coriander, turmeric, cumin, paprika, chili powder, cinnamon, salt, and pepper.
- Add the chicken pieces to the marinade, ensuring each piece is fully coated.
- Cover and refrigerate for 2-3 hours to allow the flavors to penetrate the chicken.
- About 35-40 minutes before serving, heat the oil and butter in a large skillet over medium heat until the butter melts.
- Add the chopped onion and cook for 4-5 minutes until softened.
- Stir in the garlic, ginger, garam masala, ground coriander, paprika, cumin, cinnamon, and tomato puree. Cook for 2-3 minutes to release the spices’ aroma.
- Add the bell pepper, canned tomatoes, and water. Bring the mixture to a boil, then reduce the heat and let it simmer for 15-20 minutes, stirring occasionally. Tip: This is a good time to start cooking your rice.
- Preheat your grill or broiler.
- Spread the marinated chicken on a baking sheet and brush with the vegetable oil.
- Grill for 8-10 minutes until slightly charred on the outside and fully cooked inside. For even cooking, flip larger pieces halfway through.
- Stir the cream, ground almonds, and sugar into the sauce. Mix well and simmer for another 5 minutes.
- Add the grilled chicken to the sauce, ensuring each piece is coated. Cook for an additional 5 minutes to heat through.
- Serve hot over boiled rice, garnished with fresh coriander and optional chilies for added spice.
Notes
- Notes and Tips:
Cooking the Chicken: Use skewers for grilling if desired. Soak wooden skewers in water for an hour to prevent burning.
Chicken Options: Chicken thighs are juicier but require more preparation. Marinating chicken breasts helps retain moisture during grilling.
Make Ahead: Marinate the chicken up to a day in advance. You can also prepare the sauce a day ahead and refrigerate it. When ready, grill the chicken and reheat the sauce.
Freezing Instructions: Cool the dish completely, then freeze in an airtight container for up to 2 months. Defrost in the refrigerator overnight and reheat thoroughly before serving.
Nutrition Facts
- Total number of serves: 4
- Calories: 565kcal
- Fat: 38g
- Saturated Fat: 22g
- Cholesterol: 179mg
- Sodium: 558mg
- Potassium: 012mg
- Carbohydrates: 15g
- Fiber: 3g
- Sugar: 7g
- Protein: 43g
- Calcium: 109mg
- Iron: 2mg