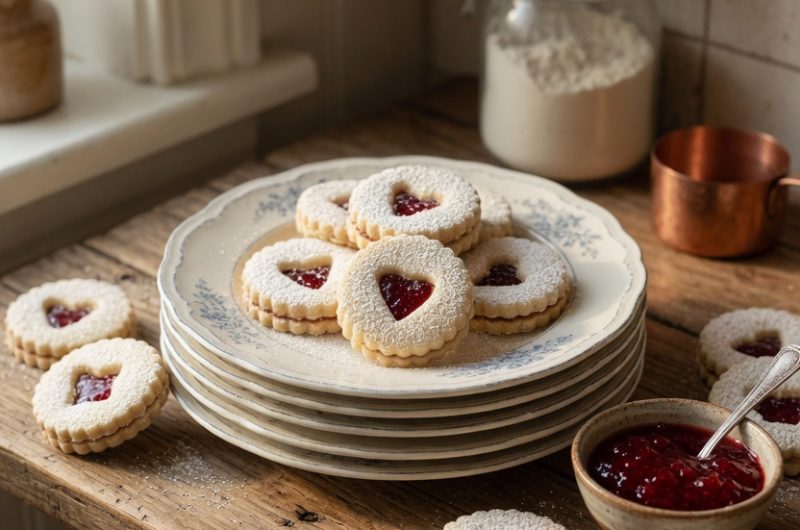
Hanukkah and other winter holidays bring to mind classic treats like latkes and doughnuts, but sometimes adding a modern twist to traditional recipes can create entirely new festive favorites that become beloved family traditions. Fig Linzer Cookies are a creative and innovative take on traditional Austrian sugar cookies, featuring a delightful combination of warm spices, bright citrus notes, and a luscious homemade fig filling. While these beautiful cookies draw clear inspiration from classic Austrian Linzer cookies, this particular version has been thoughtfully tailored to be versatile enough for any holiday celebration or special occasion throughout the year. Creating these elegant sandwich cookies at home is an achievable goal for bakers of all skill levels when you follow this detailed step-by-step guide. The result is a sophisticated treat that impresses guests while remaining manageable to prepare.
Understanding What Fig Linzer Cookies Really Are
Traditionally, Linzer cookies are esteemed Austrian delicacies made with almond flour and raspberry jam, carefully modeled after the famous Linzer tart that originates from Linz, Austria. This modern Fig Linzer Cookie recipe creatively swaps out the almonds and jam for an orange-spiced dough paired with a homemade fig filling, creating a sophisticated cookie that is equal parts nostalgic and innovative. The combination creates flavor complexity that elevates these cookies beyond simple sugar cookies. The texture contrast between the delicate, crispy cookie shell and the soft, sweet fig filling creates an appealing eating experience. These cookies showcase how traditional recipes can be adapted and reimagined while maintaining their essential character and appeal.
Discovering the Inspiration Behind This Recipe
The idea for these particular cookies stems from the beloved flavors of fig hamantaschen, a popular Jewish treat traditionally served during Purim celebrations. By combining a similar fig filling with a delicate cookie dough base, this recipe successfully bridges traditional and contemporary holiday desserts in a way that honors both. The warm spices and citrus zest connect to Middle Eastern and Mediterranean baking traditions while the cookie format makes them accessible and fun to eat. The inspiration demonstrates how cultural food traditions can influence and inspire new creations. Understanding these connections deepens your appreciation for the treats you bake.
Preparing Dry Ingredients for Maximum Texture
Sifting and whisking together the dry ingredients—all-purpose flour, baking soda, salt, cinnamon, and a pinch of nutmeg—ensures the ingredients are evenly distributed and properly aerated throughout. Sifting breaks up any lumps and incorporates air into the flour, which contributes directly to the delicate, tender texture of the finished cookies. This step takes only a few minutes but makes a noticeable difference in the final result. Proper aeration of dry ingredients prevents dense, heavy cookies. Taking time with this foundational step sets you up for success.
Customizing Spices to Match Your Preferences
The spices in these cookies can be adjusted to suit your personal taste and preferences perfectly. If you prefer more warmth and depth, adding a touch of ground ginger or cardamom creates additional complexity. Some bakers enjoy adding a small pinch of black pepper for subtle heat that enhances other flavors. You might also increase the cinnamon slightly if you particularly love that warm spice flavor. Experimenting with spice ratios helps you develop cookies that suit your specific taste. Taking notes about adjustments helps you recreate favorite variations.
Creaming Butter and Sugar for Light, Fluffy Cookies
In this crucial step, creaming unsalted butter with sugar until the mixture becomes light, fluffy, and pale in color is essential for creating cookies with the proper texture. Using a stand mixer makes this process efficient and reliable, though a hand mixer works equally well if you prefer more hands-on control. The creaming process incorporates air into the butter through vigorous beating, which contributes to lift during baking. The mixture should increase significantly in volume and appear almost frosting-like when properly creamed. This step typically takes three to five minutes with an electric mixer on medium speed.
Incorporating Orange Zest at the Perfect Time
Halfway through the creaming process, mixing in freshly grated orange zest ensures the bright citrus flavor distributes evenly throughout the dough. Fresh orange zest provides vibrant citrus notes that perfectly complement the figs and warm spices without overwhelming them. Using fresh zest rather than dried is important because fresh zest contains essential oils that provide superior flavor. Grating the zest directly before use ensures maximum flavor impact. The timing of when you add zest matters because adding it too early can cause it to dry out during extended mixing.
Adding Eggs One at a Time for Proper Incorporation
Adding egg yolks one at a time and ensuring each is fully blended before adding the next prevents curdling and ensures proper incorporation into the creamed butter and sugar. This gradual addition allows the eggs to emulsify properly with the fat, creating a smooth, homogeneous dough. Rushing this step or adding all eggs at once can result in a separated, curdled mixture that does not bake properly. Each egg takes about one minute to incorporate fully when mixed on medium speed. The dough should remain smooth and uniform in appearance throughout this process.
Finishing With Milk for Proper Dough Consistency
Mixing in a splash of milk in the final stages ensures the dough has the right moisture content and cohesiveness. The milk helps bind the ingredients together while adding necessary moisture for proper hydration. The dough should be smooth and hold together when pressed, without being overly sticky or dry. The right consistency is crucial because it affects how the dough handles during rolling and cutting. If the dough seems too dry, add milk one teaspoon at a time until it reaches proper consistency.
Understanding Why Dough Texture Matters
Proper dough texture ensures cookies that are tender but sturdy enough to sandwich the fig filling without breaking or crumbling. Dough that is too dry produces cookies that crumble easily when filled. Dough that is too wet produces cookies that spread too much during baking and lose their shape definition. Achieving the right balance ensures you get cookies with crisp edges and tender centers. Testing the dough by pinching a small amount helps you assess whether additional adjustments are needed.
Rolling and Chilling the Dough Properly
Place the dough between two sheets of parchment paper and roll it out evenly to about one-eighth inch thick using a rolling pin. The parchment paper prevents sticking and makes cleanup easy. Transfer the rolled dough on its parchment paper to a baking sheet and refrigerate for at least one hour. The chilling period is essential for success because it solidifies the butter in the dough, preventing excessive spreading during baking. Cold dough holds shape better and produces sharper, more defined cookies with clean edges.
Understanding the Importance of Chilling Dough
Chilling the dough solidifies the butter and allows the gluten to relax, which prevents excessive spreading during baking and ensures the cookies maintain their intended shapes. This step is particularly important for delicate cookies with intricate designs or cutouts. Properly chilled dough produces cookies with crispy, defined edges. The chilling period also develops flavor as the ingredients have time to meld together. Rushing this step by baking without proper chilling often results in cookies that spread too much and lose their shape definition.
Cutting Out Cookie Shapes With Precision
Once the dough is chilled, cut out your desired shapes using cookie cutters of your choice. For the top cookies that will have the fig filling visible through them, carefully create a small cutout in the center using a smaller cookie cutter or knife. Work quickly to keep the dough cold, as warm dough becomes sticky and difficult to handle. If the dough starts to warm up and becomes difficult to work with, simply pop it back in the refrigerator for ten to fifteen minutes to re-chill. Organized, efficient work prevents wasting dough and ensures consistent results.
Creating the Luscious Fig Filling at Home
This luscious fig filling comes together easily with just a few simple ingredients and basic cooking technique. Combine halved dried figs with rum, water, orange zest, cinnamon, and salt in a small saucepan. Simmer the mixture gently until the figs are completely soft and most of the liquid has been absorbed. Process the softened fig mixture with honey in a food processor until it achieves a smooth consistency. The resulting filling should be spreadable but not runny, with a deep, rich flavor.
Adjusting Fig Filling Consistency Perfectly
If the filling seems too thick after processing, add water one teaspoon at a time while pulsing the food processor until you achieve spreadable consistency. The filling should hold its shape but spread easily onto cookies without tearing the dough. Too-thick filling can break cookies when spreading, while too-thin filling may leak out between the cookies. Testing the consistency by spreading a small amount on a scrap of dough helps you determine if adjustments are needed. Achieving the right consistency ensures beautiful, properly assembled cookies.
Baking Cookies to Golden Perfection
Bake the cookies at three hundred fifty degrees Fahrenheit for eight to ten minutes until the edges are lightly golden brown but the centers remain pale. Watch carefully during baking to avoid over-browning. Chilling the cut shapes before baking ensures they retain their intricate designs and do not spread excessively. The cookies should feel firm but not hard when removed from the oven. They continue to firm up as they cool on the baking sheet.
Cooling Cookies Properly Before Assembly
Allow the baked cookies to cool on the baking sheet for about five minutes before transferring them to a wire cooling rack to cool completely. This initial cooling on the sheet allows them to firm up enough to handle without breaking. Complete cooling on the rack prevents condensation and ensures they are fully set before filling. Attempting to fill warm cookies may cause the filling to melt and run. Properly cooled cookies hold their shape when filled and assembled.
Assembling Sandwich Cookies With Care
Once cooled completely, spread a teaspoon or two of fig filling onto the bottom cookies using a small spatula or butter knife. Top with the cookies that have cutouts, creating beautiful sandwich cookies that showcase the fig filling through the openings. Press gently to ensure good adhesion between the layers. The cookies should hold together firmly without the filling squishing out excessively. Properly assembled cookies are elegant and professional-looking.
Creating and Applying Optional Glaze
Make the glaze by whisking together confectioners’ sugar, ground cinnamon, and freshly squeezed orange juice in a small bowl. Whisk until smooth and adjust the consistency as needed—the glaze should be thick enough to hold its shape but thin enough to spread smoothly. Before assembling the cookies, glaze only the top cookies and allow the glaze to dry completely before stacking with the bottom cookies. This prevents the glaze from transferring to other cookies. Decorating the glazed tops with sprinkles, chopped nuts, or mini chocolate chips adds extra visual appeal and festive flair.
Customizing Cookie Shapes for Different Occasions
These cookies can be adapted for any holiday by using themed cookie cutters that match your celebration. Holiday-specific shapes make the cookies even more special and appropriate for the occasion. The same recipe and filling work beautifully regardless of the shape you choose. Using multiple cookie cutters allows you to create variety within a single batch. Customers and guests appreciate the thoughtfulness of holiday-themed cookies.
Creating a Dairy-Free Version
Substituting vegan butter and non-dairy milk like almond milk creates a parve version suitable for those observing kosher dietary laws or following dairy-free diets. Vegan butter behaves similarly to dairy butter in baking, though it may require slight adjustments to chilling times. Non-dairy milk provides the same binding function as dairy milk in this recipe. Creating dairy-free versions expands who can enjoy your cookies. Testing is worthwhile to ensure the texture and flavor meet your standards.
Proper Storage Methods for Maximum Freshness
Store assembled cookies in an airtight container in the refrigerator to maintain freshness for up to one week. The cool temperature preserves the cookies better than room temperature storage. Placing parchment paper between layers prevents cookies from sticking together. Properly stored cookies maintain their texture and prevent the filling from drying out. Labeling containers with the date helps you track freshness and know when cookies should be consumed.
Exploring Alternative Filling Options
Absolutely, you can use different fillings if you prefer alternatives to fig. Raspberry jam, apricot preserves, or even Nutella make excellent substitutes for the fig filling while maintaining the spirit of the recipe. Different fillings create different flavor profiles and can be matched to different occasions. Some people prefer the tartness of jam while others prefer the richness of chocolate spreads. Experimenting with different fillings allows you to create multiple variations from one basic cookie dough recipe.
Troubleshooting Dough That Breaks Apart
If your dough breaks apart during rolling or cutting, this typically happens when the dough warms up excessively. Refrigerate the dough for ten minutes before continuing to work with it. Keeping your workspace cool and working quickly prevents overwarming. If the dough continues to be problematic, adding one tablespoon more milk helps improve cohesiveness. Working in a cool kitchen also helps prevent dough from becoming too warm. Taking breaks to chill dough is normal and necessary for success with delicate dough.
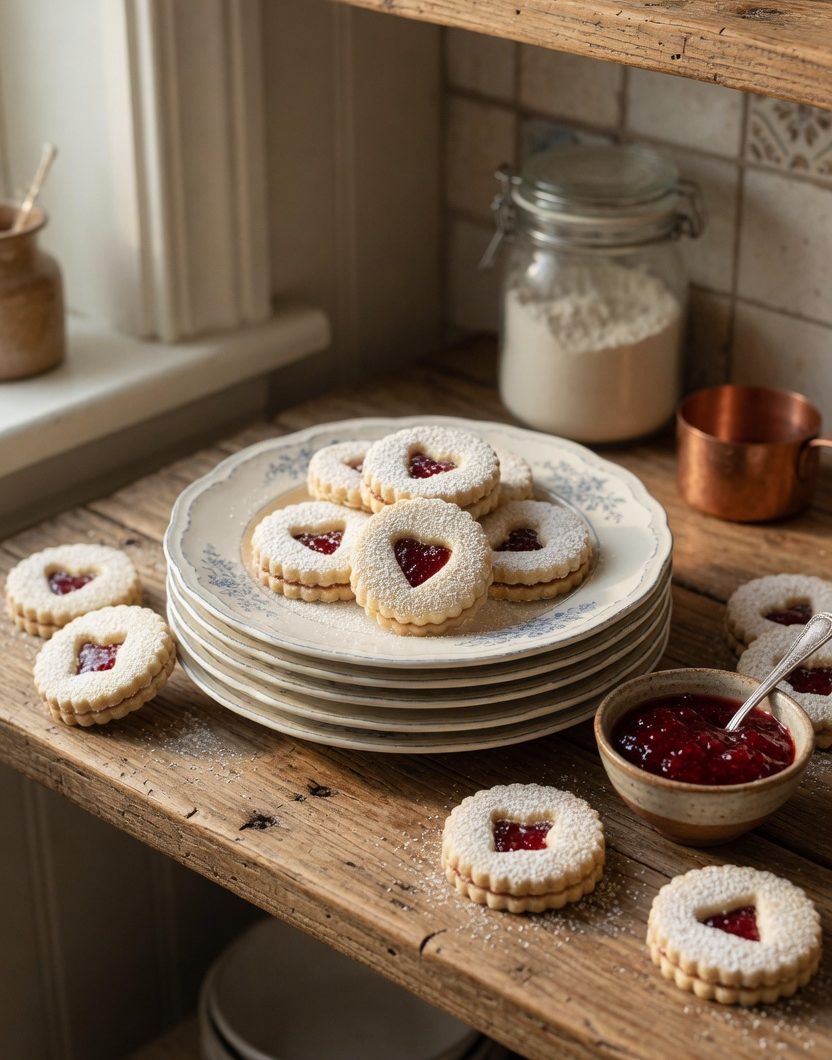
Perfect Hanukkah Linzer Cookies
Enjoy these festive Fig Linzer Cookies as a delightful addition to your holiday celebrations!
20
servings15
minutes9
minutes300
kcal1
hour30
minutesIngredients
For the Cookie Dough:
200g all-purpose flour (1½ cups + 2 tbsp)
½ tsp baking soda
⅛ tsp salt
¼ tsp cinnamon
Pinch of nutmeg
100g unsalted butter (7 tbsp)
100g sugar (½ cup)
½ tsp orange zest
2 large egg yolks
5g milk (1 tsp)
- For the Fig Filling:
7 oz dried figs, stems removed
2 tbsp rum or orange liqueur (or water)
3 tbsp water
½ tsp orange zest
½ tsp cinnamon
⅛ tsp salt
1 tbsp honey
- For the Glaze:
½ cup confectioners’ sugar
⅛ tsp cinnamon
1-2 tbsp freshly squeezed orange juice
Directions
- Prepare the Dough: Sift flour, baking soda, salt, cinnamon, and nutmeg.
Cream butter and sugar, then add orange zest. Mix in egg yolks one at a time, followed by milk.
Combine dry ingredients with wet until a dough forms. Chill for 1 hour. - Make the Filling: Simmer figs, rum, water, orange zest, cinnamon, and salt until soft. Process with honey until smooth.
- Bake the Cookies: Preheat oven to 350°F. Roll dough, cut shapes, and bake for 8-10 minutes.
- Assemble and Decorate: Spread fig filling on bottom cookies, top with cutout cookies. Glaze tops with a mix of confectioners’ sugar, cinnamon, and orange juice. Decorate as desired.
Nutrition Facts
- Calories: 140kcal
- Fat: 5g
- Saturated Fat: 1g
- Polyunsaturated Fat: 1g
- Monounsaturated Fat: 2g
- Cholesterol: 20mg
- Sodium: 107mg
- Potassium: 91mg
- Carbohydrates: 23g
- Fiber: 1g
- Sugar: 14g
- Protein: 2g
- Vitamin A: 209mcg
- Vitamin C: 1mg
- Calcium: 23mg
- Iron: 1mg