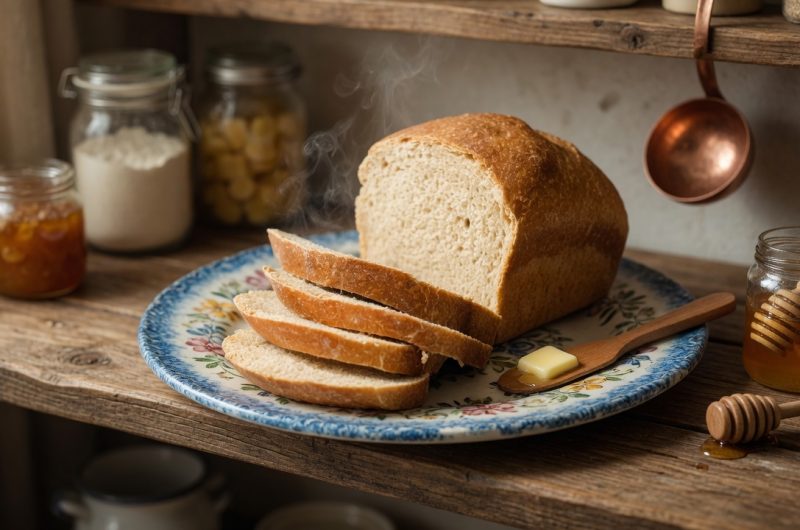
Sourdough sandwich bread offers a softer texture compared to traditional crusty sourdough loaves while still delivering that signature tangy flavor. This bread works perfectly for everyday sandwiches, toast, and even French toast. The naturally fermented dough creates a tender crumb that holds up well to spreads and fillings without falling apart. Unlike artisan sourdough with its thick crust, this version bakes in a standard loaf pan to create uniform slices. The long fermentation process develops complex flavors while keeping the bread soft enough for children and adults who prefer a gentler texture.
Getting Your Sourdough Starter Ready
A strong, active sourdough starter is the foundation of successful sandwich bread. Your starter should be fed and bubbly before you begin mixing the dough. Look for a starter that has doubled in size and shows plenty of bubbles throughout, not just on top. The starter should smell pleasantly sour and yeasty rather than harsh or overly acidic. If your starter has been refrigerated, feed it at least once or twice before using it in this recipe. Room temperature starters that are fed regularly produce the most reliable results for bread that rises properly and develops good flavor.
Choosing Between Butter and Coconut Oil
Butter adds rich flavor and helps create a tender crumb in sourdough sandwich bread. Use softened butter that has been cut into small cubes for easy mixing into the dough. The butter should be soft enough to press with your finger but not melted or greasy. For a dairy-free version, coconut oil works as a substitute and adds a subtle sweetness. Make sure the coconut oil is in its softened state, similar to room temperature butter. Melted fats can interfere with gluten development and change the texture of your finished bread.
Understanding Flour Amounts and Hydration
The amount of flour needed in this recipe varies depending on your sourdough starter’s hydration level. A starter fed with equal parts flour and water creates a different consistency than one with more or less water. Start with the lower amount of flour listed and add more gradually until the dough reaches the right consistency. The dough should be soft and slightly sticky but should pull away from the bowl sides after kneading. Too much flour creates a dry, dense loaf, while too little leaves you with dough that spreads instead of rising up.
Why Water Temperature Matters
Water temperature plays an important role in sourdough bread baking. Room temperature water, around seventy degrees, creates the best environment for the sourdough starter to work. Water that is too hot kills the beneficial bacteria and wild yeast in your starter, preventing the dough from rising. Cold water slows down fermentation too much, extending your timeline significantly. Avoid using chlorinated tap water if possible, as chlorine can harm the wild yeast. Filtered or bottled water gives more consistent results if your tap water is heavily treated.
The Windowpane Test for Proper Kneading
Kneading develops the gluten structure that gives bread its texture and helps it rise properly. The windowpane test tells you when the dough has been kneaded enough. Pinch off a small piece of dough and gently stretch it between your fingers into a thin square. Properly kneaded dough stretches thin enough to see light through it without tearing. If the dough breaks before becoming translucent, continue kneading for a few more minutes and test again. A stand mixer typically needs about ten minutes of kneading on medium speed to reach this point.
Recognizing Properly Proofed Dough
The first rise, called bulk fermentation, takes between eight and twelve hours depending on your kitchen temperature. Warmer kitchens speed up fermentation while cooler rooms slow it down. The dough should roughly double in size and feel puffy and airy when gently poked. Over-proofed dough becomes wet and loose, spreading out instead of holding its shape. Under-proofed dough feels tight and dense, producing bread with a heavy texture. Watch the dough rather than strictly following the clock, as every kitchen and starter behaves differently based on conditions.
Preventing Over-Fermentation Problems
Over-fermented dough loses its structure and becomes difficult to work with. The dough will feel very wet and sticky, almost like thick batter instead of bread dough. This happens when fermentation goes too long or the environment is too warm. While over-fermented dough still contains live yeast, it struggles to rise in the oven because the gluten structure has broken down. If this happens, you can still bake the bread, but expect a denser loaf. Alternatively, shape the dough into cubes and bake them as croutons to avoid waste.
Shaping Loaves for Even Rising
Proper shaping creates tension on the dough surface, helping it rise upward instead of spreading sideways. Divide the risen dough into two equal portions for standard loaf pans. Roll each portion into a rectangle roughly the same width as your loaf pan. Starting from the short end, roll the dough tightly like a jellyroll, pinching the seam closed. Place the shaped dough seam-side down in greased loaf pans. The tight roll creates structure that supports the dough as it rises and bakes, producing a nice dome top on your finished loaves.
The Importance of the Second Rise
After shaping, the dough needs another rise to regain volume and develop strength. This second rise typically takes two to four hours at room temperature. The shaped loaves should roughly double in size and feel light and puffy when gently touched. Skipping or cutting short this rise produces dense bread with poor texture. The timing varies based on room temperature and how active your starter is. In a warm kitchen, two hours might be enough, while a cool room could require the full four hours or slightly more.
Adding an Egg Wash for Color
Brushing the loaf tops with egg wash before baking creates a beautiful golden-brown crust. Beat one egg with a tablespoon of water or milk and brush it gently over the risen loaves just before they go in the oven. The egg proteins brown during baking, giving your bread a professional bakery appearance. This step is optional and does not affect the taste or texture, only the visual appeal. If you prefer a softer crust, skip the egg wash and the top will bake to a lighter color.
Baking Temperature and Timing
Bake your shaped and risen loaves at three hundred seventy-five degrees Fahrenheit for approximately forty-five minutes. The bread is done when the tops are golden brown and the loaves sound hollow when tapped on the bottom. An instant-read thermometer inserted into the center should read around one hundred ninety degrees. If the tops brown too quickly before the bread is fully baked, tent them loosely with aluminum foil for the remaining baking time. Every oven runs slightly differently, so check your bread a few minutes before the timer goes off.
Why Cooling Completely Matters
Resist the temptation to slice into your bread immediately after removing it from the oven. The interior continues cooking from residual heat even after you take it out. Cutting into hot bread produces gummy slices that compress and stick to your knife. Let the loaves cool in the pans for about ten minutes, then turn them out onto a wire rack. Allow them to cool completely, which takes at least an hour. The texture sets properly during cooling, and you will get clean, even slices when the bread reaches room temperature.
Room Temperature Storage Methods
Sourdough sandwich bread stays fresh at room temperature for up to five days when stored properly. Let the bread cool completely before storing to prevent condensation from making it soggy. Place the loaves in airtight containers or resealable plastic bags, removing as much air as possible. Bread boxes also work well for storage and help maintain the right humidity level. Avoid refrigerating bread as this actually speeds up staling and makes the texture dry and crumbly. Room temperature storage in an airtight container gives the best texture and flavor.
Freezing Bread for Long-Term Storage
Freezing extends the life of your sourdough sandwich bread for three to six months. Slice the bread before freezing so you can remove individual slices as needed. Place the sliced loaf in a freezer-safe bag, pressing out excess air before sealing. You can also wrap whole loaves tightly in plastic wrap and then in aluminum foil. Frozen bread thaws at room temperature in a few hours, or you can toast individual slices directly from frozen. Properly wrapped frozen bread tastes nearly as fresh as the day you baked it.
Fixing Common Starter Problems
An inactive or weak starter is the most common reason for bread that does not rise properly. Your starter should double in size within four to eight hours of feeding at room temperature. If it takes longer or barely rises, feed it daily for a week to strengthen it before baking. Discard half the starter before each feeding to maintain the right ratio of yeast to food. A healthy starter smells pleasantly sour and shows lots of bubbles throughout. If your starter smells like nail polish remover or has a pink or orange tinge, discard it and start fresh.
How Room Temperature Affects Rising
The temperature of your kitchen directly impacts how quickly your dough rises. In a kitchen around seventy-five degrees, expect the first rise to take about ten hours. Cooler kitchens around sixty-five degrees might need twelve to fourteen hours for the same rise. Very warm kitchens above eighty degrees can complete the first rise in six to eight hours. Find a warm spot in your home if your kitchen runs cool, such as near a heating vent or on top of the refrigerator. Consistent temperature produces the most predictable results.
Using Sourdough Bread for Sandwiches
This soft sourdough bread works perfectly for all types of sandwiches from simple peanut butter and jelly to elaborate deli creations. The slices hold their shape without tearing when spread with condiments or layered with moist ingredients like tomatoes. The tangy flavor complements both sweet and savory fillings without overwhelming them. The bread toasts beautifully for grilled cheese sandwiches or breakfast toast. Pack these sandwiches for lunches knowing the bread will stay soft and fresh throughout the day without becoming soggy or falling apart.
Making Toast and French Toast
Sourdough sandwich bread creates exceptional toast with a crispy exterior and soft interior. The natural sugars from the fermentation caramelize during toasting, creating deeper flavor than regular bread. Slice the bread to your preferred thickness and toast until golden brown. For French toast, the sturdy texture holds up well to egg mixture without becoming mushy. The slight tanginess of the sourdough adds complexity to the sweetness of syrup and powdered sugar. Day-old bread actually works better for French toast than fresh bread because it absorbs the egg mixture without falling apart.
Adjusting Sweetness Levels
This recipe calls for honey as the sweetener, but you can use regular granulated sugar if you prefer. Honey adds a subtle floral sweetness and helps keep the bread moist for longer. If using sugar instead of honey, use the same measurement and mix it with the other ingredients. The sweetness in this recipe is mild, just enough to balance the sour notes from the fermentation. You can increase the honey or sugar by a tablespoon or two if you prefer a slightly sweeter bread, though too much sweetener can interfere with the yeast activity.
Understanding Salt’s Role
Salt is necessary in bread baking for more than just flavor. It strengthens the gluten structure, helping the dough hold its shape and rise properly. Salt also controls the fermentation rate, preventing the dough from over-proofing too quickly. Without salt, bread tastes flat and bland no matter what other flavors you add. The amount of salt in this recipe is carefully balanced to enhance the bread without making it taste salty. Do not reduce or omit the salt as it affects both flavor and texture significantly.
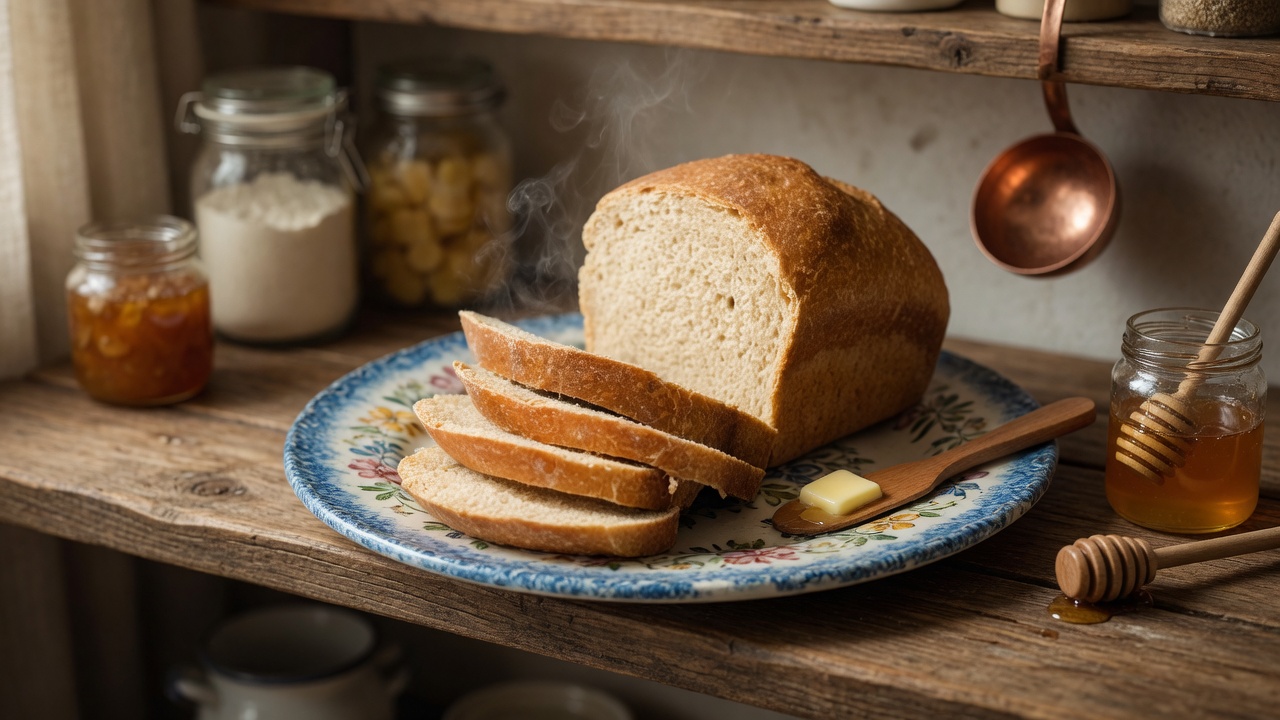
Sourdough Sandwich Bread
24
servings20
minutes45
minutes200
kcal16
hours17
hours5
minutesIngredients
1/2 cup softened butter or coconut oil (113 g)
2 tablespoons honey or sugar (42 g for honey or 24 g for sugar)
1 tablespoon salt (17 g)
1 cup active, bubbly sourdough starter (227 g)
2 1/2 cups room temperature water (590 g)
8 cups all-purpose flour (1120 g)
Directions
- Mix Ingredients: In a stand mixer, combine all ingredients, adding the flour last. Adjust flour as needed based on the starter’s hydration.
- Knead the Dough: Knead until the dough is smooth and elastic, about 10 minutes. Perform the windowpane test for doneness.
- Bulk Rise: Let the dough rise in a warm place for 10-12 hours.
- Divide and Shape: Split the dough into two equal parts. Roll each piece into a rectangle, then roll up and place in greased or parchment-lined loaf pans.
- Second Rise: Allow the loaves to rise at room temperature for 2-4 hours until doubled in size.
- Bake: Preheat the oven to 375°F (190°C). Optionally, apply an egg wash for a golden crust. Bake for 45 minutes or until golden.
- Cool: Let the loaves cool completely before slicing.
Nutrition Facts
- Calories: 200kcal
- Fat: 4g
- Sodium: 323mg
- Carbohydrates: 35g
- Protein: 5g