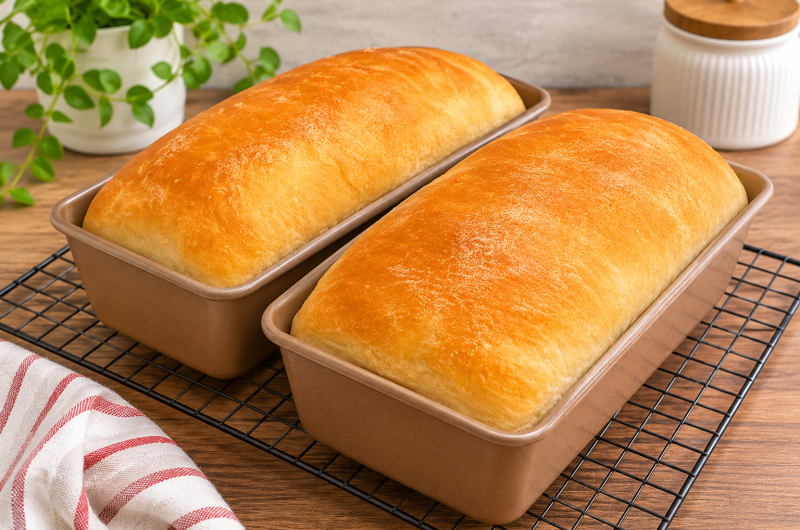
Homemade sourdough sandwich bread is a wonderful choice for anyone who enjoys fresh bread with a soft texture, a golden crust, and a mild sourdough flavor. Unlike traditional crusty sourdough boules, this recipe produces a tender loaf that slices neatly and works beautifully for sandwiches, breakfast toast, and everyday meals. The combination of active sourdough starter, all-purpose flour, butter, honey, and water creates a dough that develops flavor through natural fermentation while remaining soft enough for ordinary sandwich bread. This easy sourdough sandwich bread recipe makes two loaves, giving you enough bread for several meals or the opportunity to freeze one for later. With a little patience during fermentation and proper kneading, the finished bread has a pleasant chew, a delicate crumb, and the familiar shape of classic homemade sandwich bread.
Why This Soft Sourdough Bread Is Different from Traditional Sourdough
Many people associate sourdough bread with a thick, crunchy crust and large holes throughout the interior. Those characteristics are excellent for rustic bread, but they are not always convenient when preparing sandwiches or spreading butter across a slice. This soft sourdough sandwich loaf is designed to have a more even crumb and a gentler crust. Butter contributes richness and tenderness, while honey or sugar provides a small amount of sweetness that balances the natural tang of the sourdough starter. The dough is shaped and baked in loaf pans rather than in a Dutch oven, which helps create uniform slices. Because the recipe relies on an active sourdough starter instead of commercial yeast, the dough needs sufficient time to ferment. The result is a versatile homemade bread that combines sourdough flavor with the practical qualities of everyday sandwich bread.
The Benefits of Making Sourdough Sandwich Bread at Home
Making sandwich bread from scratch allows you to understand exactly what goes into every loaf. This recipe uses six familiar ingredients, without requiring commercial yeast or a long list of dough conditioners. It is particularly useful for home bakers who already maintain a sourdough starter and want another way to use it beyond rustic artisan loaves. Homemade sourdough sandwich bread can be sliced thick for toast or thin for sandwiches, depending on how you plan to serve it. Baking two loaves also makes the process efficient because the same mixing and fermentation schedule produces enough bread for multiple days. Although the recipe takes longer than conventional yeast bread, much of that time is spent allowing the dough to rise. The actual hands-on work is relatively straightforward, especially when using a stand mixer to knead the dough.
Understanding the Six Ingredients in This Sourdough Bread Recipe
The ingredient list is simple, but each component contributes something important to the finished loaf. All-purpose flour forms the main structure of the bread, while water hydrates the flour and allows gluten to develop. Active sourdough starter provides the natural fermentation needed for rising and adds the characteristic sourdough flavor. Butter or coconut oil contributes richness and helps produce a softer crumb. Honey or sugar balances the flavor and provides sweetness, while salt improves the overall taste and helps regulate dough strength and fermentation. The recipe uses 8 cups of all-purpose flour, 2½ cups of water, 1 cup of active starter, ½ cup of butter or coconut oil, 2 tablespoons of honey or sugar, and 1 tablespoon of salt. Keeping these quantities consistent helps maintain the intended texture, although the dough may feel slightly different depending on flour absorption and starter hydration.
Choosing an Active Sourdough Starter for Reliable Bread Rising
A healthy, active sourdough starter is one of the most important ingredients in this homemade sandwich bread. The recipe calls for 1 cup, or approximately 200 grams, of starter that is active and bubbly. Ideally, the starter should have visibly expanded after feeding and contain plenty of small bubbles throughout. These signs indicate that the microorganisms responsible for fermentation are active enough to help the bread rise. A starter that has been refrigerated for a long time without feeding may need to be refreshed before baking. Using a weak starter can extend the fermentation time considerably and may produce a dense loaf. Because this bread does not contain commercial yeast, the starter is responsible for the dough’s rise. For the most predictable results, use the starter when it is near its peak activity rather than after it has completely collapsed.
Why All-Purpose Flour Works Well for Soft Sandwich Loaves
All-purpose flour is the foundation of this sourdough sandwich bread recipe. It provides enough protein to form a useful gluten network while generally producing a softer texture than bread made entirely with high-protein bread flour. The original ingredient quantity is 8 cups, approximately 1120 grams, although flour weights can vary depending on how the cups are filled. Weighing the flour is the most reliable approach because measuring by volume can accidentally introduce too much flour into the dough. The flour absorbs water during mixing and kneading, gradually transforming the ingredients into a smooth, elastic dough. Different brands of all-purpose flour may absorb slightly different amounts of liquid, so the dough’s appearance and texture are useful guides. The goal is a dough that becomes cohesive and elastic rather than one that feels excessively dry, stiff, or crumbly.
How Butter and Honey Create a Tender Sourdough Crumb
Butter and honey help distinguish this soft sourdough sandwich bread from lean sourdough recipes made with only flour, water, starter, and salt. The recipe includes ½ cup of softened butter, weighing approximately 113 grams, or the same specified quantity of coconut oil as an alternative. Fat contributes richness and helps the finished loaf remain tender. The butter should be very soft and cut into smaller pieces so that it incorporates evenly during mixing. The recipe also includes 2 tablespoons of honey, approximately 42 grams, or 2 tablespoons of sugar, approximately 24 grams. These sweeteners create a gently sweet flavor without turning the loaf into dessert bread. Honey may contribute a slightly different aroma and moisture level than granulated sugar, but either option can be used according to the original recipe.
Preparing the Ingredients Before Mixing the Bread Dough
Good preparation makes the mixing stage easier and helps prevent mistakes with ingredient measurements. Begin by weighing the flour, water, sourdough starter, salt, and chosen fat. If using butter, allow it to soften sufficiently before adding it to the mixing bowl. Very cold butter is more difficult to incorporate into dough, particularly when mixing a large batch. Check that the sourdough starter is active and bubbly before beginning. It is also helpful to prepare two loaf pans, a clean work surface, and the equipment needed for shaping later. A kitchen scale is especially valuable because this recipe makes a substantial amount of dough. Keeping the ingredients measured and ready means you can focus on developing the correct dough consistency rather than stopping repeatedly during mixing. These small preparation steps make homemade sourdough bread more manageable for beginners.
Mixing the Dough for a Smooth and Even Texture
To begin making the dough, place the ingredients in the bowl of a stand mixer, preferably adding the flour last. This order allows the liquid ingredients and starter to combine before the flour is incorporated. Add the softened butter or coconut oil, honey or sugar, salt, active starter, water, and all-purpose flour according to the listed quantities. Begin mixing at a low speed until the ingredients form a rough dough. Continue mixing until the flour is fully hydrated and no dry patches remain. At first, the dough may appear uneven or slightly sticky, but it should become more cohesive as kneading continues. Because the recipe makes two loaves, the dough can be heavy for some household stand mixers. If the machine struggles, mixing the recipe in two batches or preparing half the recipe can make the process easier and protect the equipment.
Kneading Sourdough Sandwich Bread Until Elastic
Proper kneading helps the dough develop enough strength to rise well and hold its shape during baking. With a suitable stand mixer, kneading generally takes around 10 minutes, although the exact time depends on the machine, flour, and dough consistency. As gluten develops, the dough should become smoother, stretchier, and more elastic. It should also begin pulling away from the sides of the mixing bowl rather than remaining a loose mixture. If kneading by hand, expect the process to require more effort and possibly additional time. Work the dough on a clean surface, folding and pressing it repeatedly until it develops a smooth appearance. Avoid adding large amounts of extra flour simply because the dough feels slightly tacky. A properly kneaded enriched sourdough dough should remain soft and flexible, which contributes to the tender texture of the finished sandwich bread.
Using the Windowpane Test to Check Gluten Development
The windowpane test is a useful way to determine whether the dough has developed sufficient gluten. After kneading, remove a small piece of dough and gently stretch it between your fingers. When the gluten network is well developed, the dough should stretch into a thin, nearly translucent sheet before tearing. If it breaks immediately or feels rough and weak, additional kneading may be needed. This test is particularly helpful for sandwich bread because the dough needs enough strength to support a uniform rise and a soft, structured crumb. However, the dough does not need to become perfectly transparent across a large area. The important signs are elasticity, smoothness, and the ability to stretch without breaking instantly. Checking the dough rather than relying entirely on the mixing time helps account for differences between stand mixers and flour brands.
Allowing the Dough to Ferment Naturally for Better Flavor
After kneading, the dough needs a long first rise, commonly called bulk fermentation. The original recipe recommends approximately 10 to 12 hours in a warm location, although actual fermentation speed depends on the temperature and the strength of the starter. During this stage, the sourdough culture produces gases that expand the dough and contributes to its developing flavor. Cover the mixing bowl or fermentation container to prevent the surface from drying out. A comfortably warm, stable environment generally encourages more consistent fermentation than a cold room. However, avoid placing the dough directly on a hot surface, because excessive heat can damage the starter culture or cause fermentation to progress too quickly. As the dough ferments, it should gradually become lighter, puffier, and noticeably larger. These visual changes are more important than following a fixed number of hours.
Recognizing When the First Rise Is Complete
Knowing when to end bulk fermentation is an important part of successful sourdough sandwich bread baking. A well-fermented dough should look expanded and airy, with a softer, more inflated appearance than it had immediately after kneading. The original recipe uses a 10-to-12-hour rise as a guide, but warmer kitchens may require less time, while cooler conditions may extend the process. Do not allow the dough to continue fermenting indefinitely simply because the suggested time has not passed. Overfermented dough can become very sticky, weak, and difficult to shape. It may also struggle to rise properly during the second proof or in the oven. For better consistency, observe the dough’s volume, strength, and texture throughout fermentation. When the dough has developed noticeable expansion and still has enough structure to handle, it is ready to be divided and shaped.
Dividing the Dough into Two Equal Sandwich Loaves
Once bulk fermentation is complete, transfer the dough onto a clean work surface and divide it into two equal portions. A kitchen scale is useful here because evenly sized pieces will rise and bake more consistently. Handle the dough carefully to preserve some of the air developed during fermentation, but do not worry about gently pressing out larger bubbles while preparing the sandwich loaf shape. Unlike rustic sourdough bread, which often aims for a very open crumb, sandwich bread benefits from a more even interior. Each portion should have enough dough to fill a standard loaf pan after shaping and proofing. If the dough feels sticky, a lightly floured work surface can make it easier to manage. Avoid using excessive flour during shaping, since too much loose flour between layers may prevent the rolled dough from sealing properly.
Shaping Sourdough Bread for a Uniform Sandwich Crumb
The shaping method is one of the most useful techniques for producing attractive sourdough sandwich loaves. Begin by gently flattening one portion of dough into a rectangle. The rectangle should be roughly suited to the width of the loaf pan so that the rolled dough fits comfortably inside. Starting at one short end, roll the dough into a compact cylinder, keeping the roll reasonably tight without tearing the surface. This creates an even shape and helps distribute the dough throughout the pan. Pinch the seam gently if needed, then place the shaped loaf into a parchment-lined or buttered pan with the seam underneath. Repeat the process with the second portion of dough. A neatly rolled loaf tends to produce more regular slices and reduces the likelihood of large, uneven gaps inside the finished bread.
Preparing Loaf Pans to Prevent Sticking
Properly prepared loaf pans make it easier to remove the bread without damaging the crust. The original recipe allows either parchment-lined pans or pans coated with butter. Both methods work well, although parchment paper can be particularly helpful when the bread has a tender crust that might otherwise stick to the sides. If using parchment, position it so that the loaf can be lifted out comfortably after baking. If using butter, coat the bottom and sides of the pan evenly. Place each shaped dough portion into its prepared pan, keeping the seam side down and the top surface smooth. The pans should provide enough room for the dough to expand during the second rise. Avoid pressing the dough firmly into the corners, since it will naturally spread and fill the pan as fermentation continues.
Giving the Shaped Loaves Enough Time to Rise
The second rise, also called final proofing, allows the shaped sourdough sandwich bread to become lighter before baking. According to the original recipe, this stage takes approximately 2 to 4 hours at room temperature, or until the dough has doubled in size. The actual time depends on the activity of the starter, the room temperature, and how far fermentation progressed during the first rise. Cover the loaf pans lightly so that the surface of the dough does not dry out. As proofing continues, the dough should become noticeably fuller and rise toward or above the top of the pan, depending on pan dimensions. A properly proofed loaf should feel airy rather than heavy or tightly compressed. Baking too early can result in a dense crumb, while allowing the dough to overproof may cause it to collapse or bake with reduced volume.
Baking Homemade Sourdough Sandwich Bread at 375°F
When the shaped loaves have completed their second rise, preheat the oven to 375°F (190°C). Place the loaf pans in the oven and bake for approximately 45 minutes, following the original recipe’s instructions. During baking, the dough should expand, develop a golden surface, and gradually form a stable interior crumb. The butter and honey or sugar help create a pleasant flavor and encourage browning. If a deeper golden finish is desired, the original recipe mentions an optional egg wash, although no egg quantity is included in the main ingredient list. The bread should be well risen and golden when finished. Oven performance and loaf pan dimensions can affect the exact baking time, so check the bread’s appearance near the end of baking. Avoid removing the loaves too early, as the center may remain underbaked.
How to Tell When Sourdough Sandwich Bread Is Fully Baked
A golden crust is a useful sign of progress, but the outside appearance alone does not always confirm that the center of a large sandwich loaf has finished baking. The original recipe recommends baking for 45 minutes at 375°F, and this provides a practical starting point. The finished loaves should have an evenly browned top and a firm, well-set structure. If you have an instant-read thermometer, checking the center of the bread can provide additional reassurance; enriched sandwich bread is commonly fully baked at an internal temperature around 190–200°F (88–93°C). This temperature guidance is an additional baking reference rather than a measurement supplied in the original recipe. If the top browns rapidly before the middle is finished, loosely covering the bread with foil can help prevent excessive browning. Allow the loaves to finish baking before transferring them to a cooling rack.
Why Cooling Sourdough Bread Before Slicing Matters
Freshly baked sourdough sandwich bread is tempting to cut immediately, but cooling is important for the final texture. As the loaf comes out of the oven, the interior is still hot and contains moisture that continues to redistribute while the bread rests. Cutting too soon can compress the crumb and make the slices appear sticky or gummy. The original recipe specifically recommends allowing the bread to cool completely before slicing. Transfer the loaves from their pans to a wire rack once they can be handled safely, then leave them until they are no longer warm in the center. A cooling rack allows air to circulate around the bread, helping prevent trapped moisture from softening the bottom crust. Once completely cooled, the loaves can be sliced with a serrated bread knife for sandwiches, toast, or storage.
What the Finished Sourdough Sandwich Bread Should Taste Like
This sourdough sandwich loaf should have a gentle sourdough flavor rather than the intense tang sometimes associated with long-fermented artisan bread. The honey or sugar provides subtle sweetness, while the butter adds a pleasant richness. The crust should be golden and relatively tender, and the interior should feel soft, flexible, and slightly chewy. Because the dough is rolled before baking, the slices should have a fairly even crumb with small to medium air pockets rather than large irregular holes. This texture makes the bread practical for spreading butter, peanut butter, jam, or other sandwich fillings without the toppings falling through the bread. The exact flavor depends on the starter’s acidity and fermentation conditions. A very mature starter or prolonged fermentation can create a more pronounced sour taste, while a milder starter generally produces a gentler flavor.
Serving Ideas for Homemade Sourdough Sandwich Loaves
Soft sourdough sandwich bread can be used in nearly any meal that calls for sliced bread. For breakfast, toast a slice and serve it with butter, honey, jam, or your favorite spread. It also makes a useful base for avocado toast, scrambled eggs, or breakfast sandwiches. At lunchtime, the sturdy yet tender slices work well with cheese, vegetables, chicken, turkey, or other preferred sandwich fillings. The bread can also be used for grilled cheese sandwiches, French toast, or simple toast served alongside soup. Because this recipe produces two loaves, it is convenient for households that use bread regularly throughout the week. Slicing the bread after it has completely cooled helps keep the pieces neat, and storing a portion in the freezer allows you to enjoy homemade bread without baking every day.
Keeping Homemade Sourdough Sandwich Bread Fresh
Homemade sourdough sandwich bread is best stored in a way that protects its moisture without trapping excessive condensation. Once the loaves have cooled completely, place them in a clean bread bag or suitable airtight container. For short-term use, keep the bread at room temperature in a cool, dry location and aim to enjoy it within a few days. Refrigeration is generally not ideal for maintaining soft bread texture because it can speed up staling, although refrigeration may sometimes be necessary for particular storage conditions. For longer storage, freezing is the better option. Slice the cooled bread before freezing so that individual pieces can be removed as needed. Wrap the slices or loaf securely to reduce freezer burn. When ready to serve, thaw the bread at room temperature or warm individual slices in a toaster until they reach the desired texture.
Freezing Sourdough Sandwich Bread for Convenient Meal Preparation
Freezing homemade sandwich bread is especially useful when a recipe makes two large loaves. Instead of leaving both loaves at room temperature, one can be enjoyed fresh while the second is stored for later. Begin by allowing the bread to cool completely, since wrapping warm bread can trap moisture and create unwanted ice crystals in the freezer. Slice the loaf using a serrated knife, then arrange the pieces in a freezer-safe bag or container. Removing excess air before sealing helps protect the flavor and texture. For the best eating quality, use frozen bread within approximately two to three months. Individual slices can often be toasted directly from frozen, making them convenient for busy mornings. If thawing an entire loaf, keep it wrapped while it comes to room temperature, then unwrap before serving to avoid condensation collecting on the crust.
Notes on Avoiding Dense or Heavy Sourdough Bread
Dense sourdough sandwich bread can result from several factors, including an inactive starter, insufficient kneading, inadequate proofing, or excessive flour. Because this recipe depends entirely on natural fermentation, the starter needs to be strong enough to lift a substantial amount of dough. A starter that has not been properly refreshed may produce little rise even after many hours. Gluten development is equally important, so knead until the dough becomes smooth and elastic and can pass the windowpane test. During fermentation, allow enough time for the dough to expand without letting it become weak and overfermented. If the dough feels unusually stiff, review the flour measurements and consider whether the flour absorbed more water than expected. Careful measuring, strong starter activity, and attention to the dough’s appearance will help produce a lighter, softer finished loaf.
Notes on Preventing Overfermentation During the Long Rise
Overfermentation is a common concern when making naturally leavened sandwich bread, particularly in warm kitchens. The recipe suggests 10 to 12 hours for bulk fermentation, but this should be treated as an approximate range rather than a strict requirement. In a warm room, an active sourdough starter may cause the dough to expand much faster. If fermentation continues too long, the gluten structure can weaken, leaving the dough sticky, loose, and difficult to shape. The bread may then spread or collapse instead of rising properly. To avoid this problem, begin checking the dough before the suggested fermentation period ends. Look for a substantial increase in volume, a puffy surface, and enough strength to hold its shape when handled. If your kitchen is consistently warm, a cooler fermentation location may help slow the process and make the schedule easier to manage.
Notes on Using a Stand Mixer or Kneading by Hand
A stand mixer is convenient for this recipe because the dough contains a considerable amount of flour and requires thorough kneading. However, not every household mixer is designed to handle a batch large enough for two loaves. The original recipe notes that some standard stand mixers may struggle with the full quantity. If the motor slows significantly, the machine becomes hot, or the dough repeatedly climbs the attachment, stop mixing and divide the batch or prepare a half recipe instead. Hand kneading is also possible, although it requires more time and physical effort. Work the dough until it becomes smooth, elastic, and capable of stretching without tearing immediately. Regardless of the kneading method, the final dough texture is more important than following an exact number of minutes. Properly developed dough will support better rising and more even slices.
Notes on Making One Loaf Instead of Two
The original recipe produces two sandwich loaves, but preparing a smaller batch can be useful for households that need less bread or have a compact stand mixer. To make one loaf, halve every ingredient quantity rather than reducing only the flour or water. This preserves the intended balance of starter, liquid, salt, fat, and sweetener. The dough can then be mixed, kneaded, fermented, shaped, and baked using the same general method. Fermentation timing will still depend on the starter and room temperature, so the dough’s appearance should guide the process. A smaller batch may also be easier to knead by hand and shape on a limited work surface. Although the recipe’s full quantities are retained in the recipe card below, halving the entire formula is a practical option when the original two-loaf batch is too large for your equipment.
Notes on Butter, Coconut Oil, Honey, and Sugar Options
This homemade sourdough sandwich bread includes two ingredient choices that allow some flexibility without changing the overall recipe structure. The first is the choice between ½ cup of softened butter and coconut oil. Butter provides a familiar rich flavor, while coconut oil is an alternative for those who prefer not to use butter. The second choice is between 2 tablespoons of honey and 2 tablespoons of granulated sugar. Honey has a different weight from sugar, which is why the source lists approximately 42 grams for honey and 24 grams for sugar. These alternatives should be selected before mixing rather than added together. Using both butter and coconut oil, or both honey and sugar, would change the original ingredient balance. Keeping the alternatives separate ensures the recipe remains faithful to the supplied formula while allowing the baker to choose the preferred option.
Notes on Bread Texture, Flour Measurements, and Dough Consistency
The consistency of sourdough sandwich bread dough can vary even when the same recipe is followed carefully. One important reason is that all-purpose flour does not absorb water identically across brands. Another factor is sourdough starter hydration, which determines how much flour and water the starter contributes to the dough. The original recipe allows the flour to be added last so the baker can observe the mixture and make small adjustments when necessary. For consistent results, start with the stated ingredient quantities and avoid changing them unnecessarily. The dough should become soft, elastic, and cohesive after kneading. It may feel slightly tacky, but it should not remain a runny batter. Using a scale, allowing the ingredients to mix thoroughly, and checking gluten development are more reliable than repeatedly adding flour until the dough feels completely dry.
Notes on Creating a Golden Crust Without Drying the Bread
A golden crust is part of the appeal of homemade sourdough sandwich bread, but the bread should remain soft enough for comfortable slicing and everyday use. Baking at 375°F allows the loaves to develop color while the interior cooks through. The honey or sugar in the dough also contributes to browning. The original recipe mentions that an optional egg wash may be used for a darker finish, although the egg wash is not included among the six core ingredients. If using one, treat it as an additional finishing step rather than part of the standard recipe. Avoid increasing the oven temperature simply to brown the surface faster, since this can darken the outside before the center is ready. Once the loaves have baked fully, cool them on a rack and store them appropriately to preserve their tender crust.
Why This Easy Sourdough Sandwich Bread Is Worth Making
This soft sourdough sandwich bread offers a practical way to enjoy naturally fermented homemade bread without the thick crust or irregular shape of a rustic sourdough boule. The ingredient list is short, the method is straightforward, and the finished loaves are useful for breakfast, lunch, and everyday family meals. Although the recipe requires patience during the long fermentation and final proof, most of that time does not involve active work. The main skills are developing the gluten properly, recognizing when the dough has risen enough, shaping it into neat loaves, and allowing it to cool before slicing. With a healthy sourdough starter and careful attention to the dough, this recipe can produce soft, flavorful sandwich bread that is easy to portion, store, toast, and freeze. It is a useful addition to a regular sourdough baking routine.