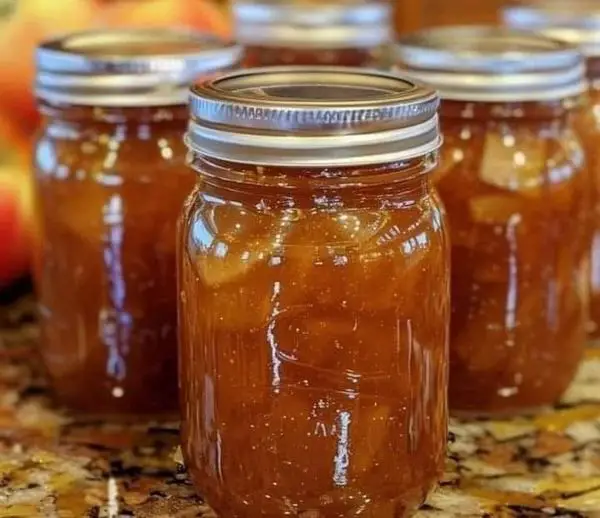
If you’re lucky enough to have a surplus of apples, especially tart varieties, making your own apple jam is a wonderful way to use them. This homemade apple jam recipe is simple yet loaded with the warm flavors of cinnamon and optional spices. It’s a small-batch recipe, ideal for using up extra apples without the need for artificial preservatives or pectin.
Essential Ingredients You’ll Need:
Let’s start by gathering the simple, natural ingredients to make this flavorful apple jam. The recipe calls for just four key components, all of which play an essential role in giving the jam its delicious taste and texture.
Apples:
Apples form the base of this jam, so choose a tart variety like Granny Smith, which is high in natural pectin—an essential ingredient for setting the jam without needing additional store-bought pectin. If you enjoy a mix of flavors, try blending Granny Smith with Pink Lady or Sweet Tango apples. These types give a perfect balance of sweetness and tanginess. Apples with firm flesh are best, as overripe apples can shorten the shelf life of your jam.
Sugar:
This is a low-sugar recipe designed to let the apples’ natural flavors shine. For 1 kilogram (2.2 pounds) of apples, 1.5 cups of sugar will give you a moderately sweet jam that’s enjoyable for both kids and adults. You can reduce the sugar to 1 cup for a more tart, low-sugar jam. If you prefer a sweeter, store-bought-like jam, feel free to increase the sugar to 2 cups.
Lemon Juice:
Lemon juice serves two purposes: it enhances the tartness and helps activate the pectin naturally present in apples. This allows the jam to set properly without adding artificial pectin. If you enjoy a sour kick, feel free to add a bit more lemon juice.
Cinnamon:
Cinnamon adds warmth and depth to the flavor of the jam. While you can use cinnamon powder, I recommend using whole cinnamon sticks to infuse a subtle background flavor that doesn’t overpower the jam. Remove the stick halfway through the cooking process. If you love spice, feel free to add other warming spices such as cloves, cardamom, or nutmeg.
Optional Spices:
Ginger is a fantastic addition to this recipe. You can also experiment with cloves, nutmeg, or cardamom for an even richer, spiced apple jam.
Preparing the Apples:
- Peeling and Slicing:
Start by peeling and slicing your firm, ripe apples. Be sure to avoid any overripe or bruised areas, as these can reduce the jam’s shelf life. The size of the slices depends on whether you prefer a chunky or smoother jam. For a chunkier texture, chop the apples into larger pieces. - Prevent Browning:
Apples tend to brown quickly when exposed to air, so to avoid this, place a mix of water and lemon juice in a wide-based, thick-bottomed pot. As you slice each apple, immediately place the slices in this lemon water mixture to prevent browning. - Cold Plate Test Preparation:
Before starting the jam, place two small plates in the freezer. These will be used later to check the jam’s setting point.
How to Make Apple Jam:
- Cooking the Apples:
Add sugar, the cinnamon stick, and ginger (or other spices of your choice) to the pot of apples. The sugar quantity can vary based on your preference; for a moderately sweet jam, stick with 1.5 cups. Cover the pot and cook on medium-low heat for about 15 minutes. The apples will become soft and translucent as they cook. - Mash or Blend the Jam:
After the apples have softened, you can either mash them for a chunkier texture or blend them with an immersion blender for a smoother consistency. If you prefer chunky jam, skip the mashing step. Pro-tip: To achieve a semi-smooth texture, mash the apples slightly and then blend just a few times. - Slow Cook the Jam:
Lower the heat and cook the jam uncovered for another 20 minutes. Stir occasionally to avoid the sugar caramelizing and creating a bitter taste. As the jam thickens, stir more frequently, especially as it nears the setting stage. You’ll know the jam is ready when you can draw a line through the mixture with a spatula, and the line remains visible.
Cold Plate Test for Jam Setting:
This is an easy and reliable method to check if your jam is ready:
- Take one of the cold plates from the freezer.
- Drop a large spoonful of hot jam onto the cold plate.
- Let the jam cool for about 30 seconds.
- Once cooled, the jam should hold its shape without spreading. If it does, your jam is ready. If it spreads or has water separating around the drop, continue cooking for a few more minutes and test again.
Canning and Storing:
- Filling the Jars:
Carefully spoon the hot jam into clean, sterilized jars. Fill each jar to about ½ inch from the top, leaving enough space to create a proper seal. Tightly seal the lids. - Creating a Vacuum Seal:
To create a vacuum seal, turn the jars upside down and let them sit at room temperature. After about 12 hours, the jars should have formed a vacuum seal. - Storage Options:
This small-batch apple jam can be stored in the fridge for immediate use or frozen for long-term storage. If you plan to can the jam for extended shelf life, follow the water bath canning method for safety.
Flavor Variations:
- Spices: Add a pinch of cloves, cardamom, or nutmeg for extra warmth.
- Sweeteners: Substitute the white sugar with brown sugar for a deeper, molasses-like flavor, perfect for a cozy autumn treat.
- Texture: If you like a more textured jam, leave the apple pieces slightly larger or skip the immersion blending process.


