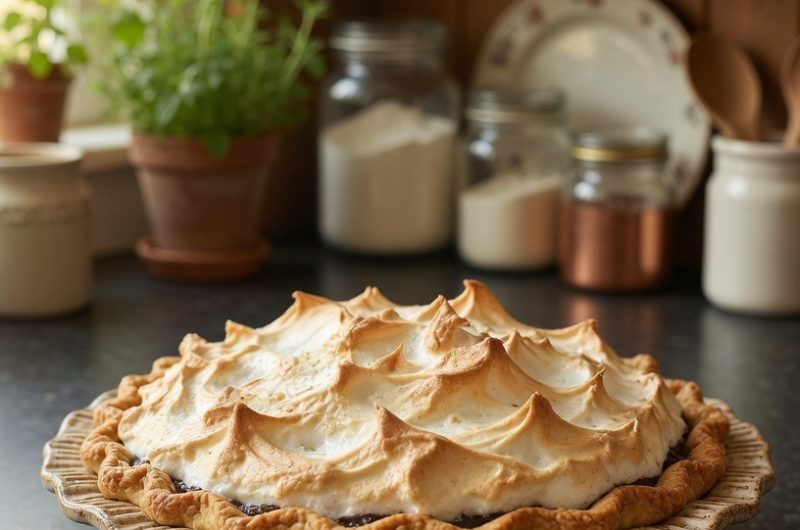
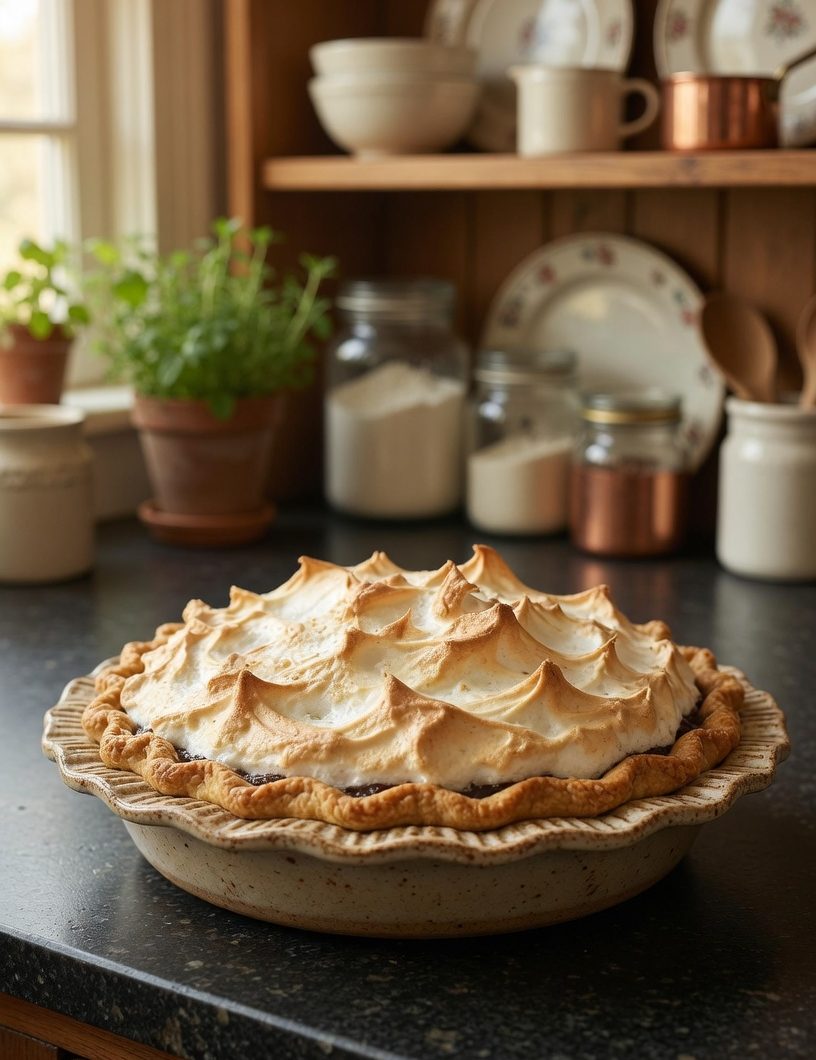
Chocolate meringue pie represents a classic American dessert that combines rich chocolate custard filling with fluffy meringue topping, creating a textural experience that satisfies multiple cravings simultaneously. This traditional pie has graced family tables for generations, evoking memories of homemade baking and special occasions that bring loved ones together around the dinner table. The combination of smooth, creamy chocolate filling with crisp-yet-tender meringue creates a sophisticated dessert that looks impressive enough for formal dining while tasting like grandmother’s homemade recipe. Unlike modern desserts requiring specialized equipment or complicated techniques, this chocolate meringue pie uses straightforward methods that home bakers can master through practice and attention to detail. The recipe requires only basic kitchen tools and ingredients available at any grocery store, making it accessible to bakers of all experience levels and backgrounds. Creating this pie from start to finish takes just forty minutes of active cooking time, making it practical for weeknight desserts or unexpected gatherings. The finished pie looks elegant enough to impress dinner guests while delivering comfort food satisfaction that reminds people of cherished family traditions.
Understanding Pre-Baked Pie Crusts as Your Foundation
A nine-inch pre-baked pie crust provides the crispy foundation that holds all the filling and meringue together while contributing subtle buttery flavor and texture. Using a pre-baked crust eliminates the need for blind baking and allows you to focus entirely on creating the perfect chocolate custard and meringue topping. The crust should be fully cooled before adding filling to prevent the hot filling from cooking the crust further and creating an unwanted soggy bottom. Quality pie crusts, whether prepared at home or purchased from the bakery section, bake to a light golden brown that provides textural contrast to the creamy chocolate filling underneath. The buttery, slightly salty flavor of the crust complements the sweetness of the chocolate without competing for attention or overwhelming the palate.
Sugar and Cocoa Working Together for Deep Chocolate Flavor
One cup of granulated sugar provides the sweetness while also contributing to the proper consistency of the custard filling through its interaction with cornstarch during the cooking process. Four heaping tablespoons of unsweetened cocoa powder deliver intense chocolate flavor without any added sweetness that would make the filling overly sweet. The combination of sugar and cocoa powder creates flavor complexity and depth that sugar alone could never achieve on its own. Quality cocoa powder makes a noticeable difference in the final flavor of your pie, with Dutch-processed varieties creating deeper, more complex chocolate notes compared to natural cocoa powder varieties. The amount of cocoa used in this recipe has been carefully calculated to provide significant chocolate flavor that stands up to the sweetness without becoming bitter.
Cornstarch’s Essential Role in Creating Proper Custard Consistency
Three tablespoons of cornstarch thickens the milk mixture into a smooth custard consistency through the process of starch gelatinization that occurs when heat is applied. The cornstarch absorbs moisture and swells as the mixture heats, transforming liquid into a pudding-like consistency that is thick enough to support a spoon. Using too little cornstarch results in runny filling that does not hold its shape when sliced, while too much creates an overly thick and pasty texture that feels stodgy rather than smooth. The cornstarch must be mixed thoroughly with sugar and cocoa powder before any liquid is added to prevent lumping and ensure even distribution. When cornstarch is properly distributed throughout the sugar and cocoa, it activates evenly during cooking and creates a uniform texture.
Salt Enhancing All Flavors in the Pie Filling
A simple pinch of salt enhances the chocolate flavor while balancing the overall sweetness and preventing the filling from tasting flat or one-dimensional. Salt is an essential ingredient in desserts, though its presence should never be obvious or noticeable to the average person eating the pie. The salt strengthens chocolate flavor while suppressing any bitterness that might arise from the cocoa powder. This ingredient demonstrates how even small amounts of salt significantly impact the perception of sweetness and overall flavor balance in baked goods.
Egg Yolks Creating Richness, Color, and Binding Action
Four large egg yolks provide richness and deep yellow color to the filling while also supplying binding action that helps set the custard during cooking. The yolks contain lecithin, which functions as a natural emulsifier, creating a smooth, velvety texture in the finished pie. Egg yolks must be tempered carefully by slowly adding hot milk mixture to prevent the proteins from scrambling and creating an undesirable grainy texture. This tempering process gradually brings the yolks to a safe temperature without cooking them, which is why the technique requires patience and constant stirring. The color that egg yolks contribute to the filling deepens the brown chocolate hue and creates visual appeal.
Whole Milk as the Primary Liquid Component
Two cups of whole milk provides the liquid base for the chocolate custard while contributing fat that creates richness and smooth texture in the finished pie. Whole milk produces superior flavor and creates a more luxurious mouthfeel compared to low-fat or skim milk alternatives. The milk must be heated to activate the cornstarch and develop flavor through the cooking and caramelization process. When the milk is brought to a boil, it begins to thicken and develop deeper flavors through the Maillard reaction, a chemical process that creates browning and complex flavors.
Vanilla Extract Providing Aromatic Warmth and Depth
One teaspoon of pure vanilla extract adds warmth and aromatic quality that complements chocolate beautifully without creating obvious vanilla flavor. Pure vanilla extract produces significantly superior results compared to imitation varieties, which contain synthetic vanillin that can taste artificial or harsh. The vanilla should be added after removing the mixture from heat to preserve its delicate flavor compounds and volatile aromatics that can dissipate if exposed to excessive heat. Quality vanilla extract makes a noticeable difference in the overall taste profile of the finished pie.
Butter and Chocolate Chips Adding Final Richness and Depth
Two tablespoons of unsalted butter and one-quarter cup of semi-sweet chocolate chips added to the hot filling create additional richness and enhanced chocolate intensity. These ingredients melt into the hot custard, distributing evenly and improving both flavor and texture of the pie. The chocolate chips add subtle texture variation while the butter creates a glossy appearance and smooth mouthfeel. The combination of these two ingredients elevates the chocolate flavor from pleasant to exceptional.
Egg Whites Creating Stable Meringue Topping
Four large egg whites whipped with cream of tartar create stiff peaks that form the meringue topping for your pie. The cream of tartar stabilizes the whites by lowering their pH level, preventing them from becoming grainy or weeping moisture during baking. Egg whites must be completely free of any egg yolk to whip successfully to stiff peaks. Room-temperature eggs whip faster and reach greater volume compared to cold eggs straight from the refrigerator, which is why this step makes a measurable difference.
Meringue’s Protective and Textural Functions
The meringue topping seals the pie, creating a protective barrier that prevents air from reaching the filling underneath and extending the pie’s shelf life. The crisp exterior combined with the tender interior of properly made meringue creates textural contrast that makes eating the pie more interesting and enjoyable. The meringue must be sealed completely to the crust edges to prevent shrinkage and the weeping of moisture that occurs when air reaches the filling.
Baking Temperature and Timing for Perfect Meringue
Baking the meringue at three hundred twenty-five degrees Fahrenheit for approximately twenty minutes allows it to set and brown without burning the peaks. Temperature that is too high browns the meringue too quickly before it sets completely, while temperature that is too low results in meringue that never browns or sets properly. The meringue should be light golden brown with no soft, uncooked spots remaining when you remove the pie from the oven. Watching the pie during the final minutes prevents over-browning.
Adding Meringue While Filling Remains Hot
The meringue must be added to the hot chocolate filling immediately after preparation to cook the bottom slightly and create proper adhesion between the filling and meringue. The warm filling continues cooking the meringue bottom gently, creating better texture and preventing air pockets from forming between layers. A cold filling does not properly cook the meringue bottom, resulting in separation and weeping of liquid underneath the meringue.
Cooling and Setting for Proper Slicing Technique
Allowing the pie to cool completely before slicing is essential for creating clean, attractive pieces that hold together properly. A warm pie falls apart when cut because the filling has not set firmly enough to support its own weight. Complete cooling, typically requiring several hours or overnight refrigeration, allows the custard to firm up sufficiently for neat slicing. A pie cut while still warm produces unappetizing mushy pieces that crumble and fall apart on the plate.
Knife Dipping Technique for Professional Presentation
Dipping your knife into warm water before each cut prevents the meringue from sticking to the blade and tearing. The warm knife cuts through the meringue and filling cleanly without dragging or pulling, creating neat slices with clean edges. Wiping the knife between cuts maintains cleanliness and prevents meringue from building up on the blade and creating rough edges. This simple technique dramatically improves the visual presentation of your finished slices.
Toothpick and Plastic Wrap Storage Method
Placing toothpicks into the meringue and gently draping plastic wrap over the top prevents the plastic from pressing directly into the meringue and damaging the texture. The toothpicks create small bridges that hold the plastic away from the surface of the meringue. This storage method is superior to covering directly with plastic wrap, which would compress the meringue and create an unpleasant texture.
Understanding Meringue Weeping and Shrinkage Prevention
Meringue weeping occurs when moisture from the filling reaches the meringue, softening it and creating separation. This happens when the meringue is not sealed completely to the pie crust edges, allowing air and moisture to reach the filling underneath. To prevent weeping, ensure the meringue completely covers the surface of the pie with no gaps or holes, and seal the edges firmly to the crust. Proper sealing prevents shrinkage as the pie cools, keeping the meringue looking attractive and fresh.
Proper Refrigeration Duration Before Consuming
Refrigerate the pie for at least two to three hours or overnight before slicing and serving. This cooling time allows the filling to set completely and become firm enough to slice cleanly. A pie that has been properly cooled produces neat slices with distinct layers, while a pie consumed too soon has mushy filling that does not hold together. The extended cooling also allows all the flavors to meld together, improving the overall taste experience of the finished pie.
Chocolate Meringue Pie
Perfect for special occasions, family dinners, or whenever you crave homemade dessert that tastes like traditional family recipes. The straightforward preparation takes just forty minutes of active cooking time, making this elegant pie achievable for bakers of all skill levels.
8
servings15
minutes25
minutes325
kcal40
minutesIngredients
- For the Chocolate Filling:
1 pre-baked 9-inch pie crust
1 cup granulated sugar
4 tablespoons unsweetened cocoa powder (heaping measurement)
3 tablespoons cornstarch
1 pinch salt
4 large egg yolks
2 cups whole milk
1 teaspoon pure vanilla extract
2 tablespoons unsalted butter
1/4 cup semi-sweet chocolate chips
- For the Meringue Topping:
4 large egg whites
1 pinch salt
1/4 cup granulated sugar
1/4 teaspoon cream of tartar
A few drops pure vanilla extract
Directions
- In a large saucepan, mix sugar, cocoa powder, cornstarch, and salt using a whisk. Pour in milk, stir well, and bring to a boil over medium heat. Boil for 1 minute while stirring. In a separate bowl, beat the 4 egg yolks together until smooth.
- Slowly add small amounts of the hot milk mixture to the beaten yolks while stirring constantly. Add gradually to prevent cooking the eggs. Pour the egg mixture back into the saucepan with the remaining milk mixture. Cook over medium heat, stirring constantly for about 3 minutes until the mixture thickens and coats a spoon.
- Remove from heat and stir in vanilla extract, chocolate chips, and butter until melted. Pour the chocolate filling into the pre-baked pie crust. Beat 4 egg whites with salt and cream of tartar until stiff peaks form. Gradually add sugar and vanilla while beating.
- Spread meringue over the hot filling, sealing it completely to the crust edges with no gaps. Bake at 325°F for about 20 minutes until golden brown. Let the pie cool at room temperature for 1-2 hours, then refrigerate for at least 3 hours or overnight before serving.
- Dip a sharp knife in warm water before each cut to prevent meringue from sticking.
Notes
- Egg Safety: Use fresh eggs and the tempering process heats them to safe temperature.
- Oven Temperature: 325°F is important. Higher temperatures brown too quickly. Lower temperatures may not set properly.
- Serving Temperature: Serve chilled from refrigerator for best texture and flavor.
- Make-Ahead Option: Prepare completely the day before. Cover and refrigerate overnight before serving.
Nutrition Facts
- Calories: 325kcal
- Fat: 17g
- Carbohydrates: 37g
- Sugar: 9g
- Protein: 5g
- Iron: 1.75mg