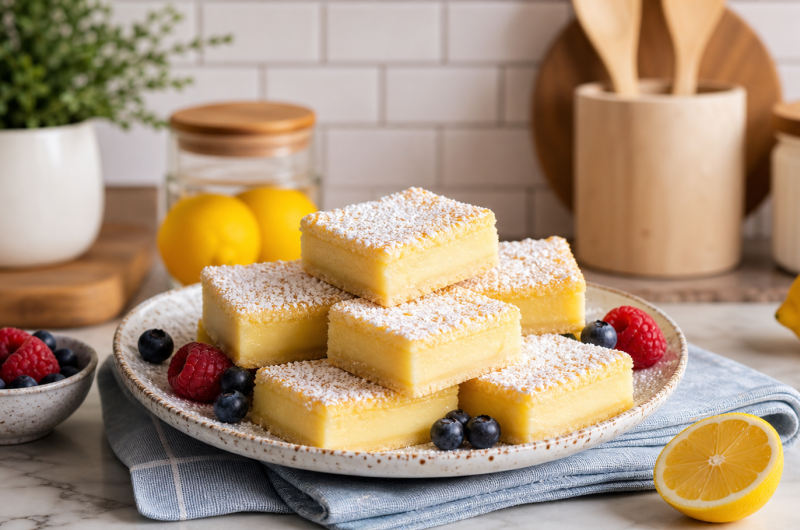
Magic custard layer cake represents one of the most fascinating baking discoveries in modern home cooking. This remarkable dessert begins as a simple, thin batter that transforms completely during the baking process. What makes it truly special is how it naturally separates into three distinct layers without any additional intervention. The top layer becomes a light, fluffy sponge cake that feels like eating clouds. The middle section develops into a smooth, creamy custard that melts on your tongue. The bottom layer forms a slightly denser, richer custard base that holds everything together. This beautiful transformation happens automatically in the oven, which is why many people call it “magic.” The process seems impossible until you understand the simple science behind it, making this cake a conversation starter at any gathering where you serve it.
Why Home Bakers Are Falling in Love with This Dessert
The popularity of magic custard layer cake has exploded in recent years among people who love to bake at home. Search trends show increasing interest in terms like “easy layered dessert,” “self-layering cake,” and “magic cake recipe” from home cooks across the world. What drives this enthusiasm is the combination of visual drama and genuine ease of preparation. Unlike traditional layered cakes that require baking multiple cake layers separately and then stacking them with frosting, this version does all the work for you. The cake looks like something a professional pastry chef spent hours creating, yet it comes together with basic pantry ingredients anyone can find. There is no complicated frosting technique to master, no risk of layers sliding sideways, and no need for special equipment. A single bowl and a standard baking dish are all you need. This makes it perfect for anyone who wants to impress family and friends without spending half the day in the kitchen.
Understanding the Science Behind the Three Layers
The reason this cake creates distinct layers lies in basic food science and how different ingredients behave when heated. When you prepare the batter, you separate your eggs into whites and yolks, treating each group differently. The egg whites get whipped with white vinegar into stiff peaks, which traps tiny air bubbles throughout the mixture. These bubbles are the secret to the fluffy top layer. Meanwhile, the egg yolks combine with butter, sugar, milk, and flour to create a richer, heavier mixture. During baking, the heat causes a natural separation. The light foam from the whipped egg whites rises toward the top of the baking dish, where it bakes into a tender sponge layer. The heavier mixture with flour and milk sinks toward the bottom, where the heat gently cooks it into a smooth custard. The result is three beautiful, distinct textures created from a single batter.
Breaking Down Each Ingredient and Its Purpose
Every single ingredient in magic custard layer cake has been chosen for a specific reason. Unsalted butter provides richness, moisture, and that wonderful tender crumb texture that makes each bite satisfying. Whole milk serves as the liquid base that transforms into the custard layers during baking. Eggs do the heavy lifting in this recipe, since the separation into whites and yolks creates the entire layer system. White vinegar helps stabilize the whipped egg whites so they hold their peaks longer and create a more stable foam. Confectioner’s sugar sweetens the entire mixture and creates a smooth texture because it dissolves more easily than granulated sugar. All-purpose flour gives structure to the custard layers and helps them set during baking without becoming rubbery or tough. Vanilla extract brings flavor depth that makes every layer taste complete and satisfying. Water helps balance the consistency and ensures the batter mixes smoothly without becoming too thick.
Getting Your Oven and Baking Dish Ready
Preparation is your first step toward success with magic custard layer cake, and this starts with your oven and baking dish. Preheat your oven to 325 degrees Fahrenheit, which equals about 163 degrees Celsius. This lower temperature is important because it allows the layers to form properly without the outside baking too quickly. A temperature that is too high will cause the top to brown too fast before the custard layers have time to set properly. You want gentle, even heat throughout the baking time. Use an eight-inch square baking dish, which is the standard size for this recipe. Lightly grease the entire dish with butter or cooking spray, paying special attention to the corners where the batter tends to stick. Make sure every surface is covered so the baked cake slides out easily when you are ready to serve it.
Mastering the Art of Whipping Egg Whites
Creating perfect stiff peaks from egg whites is one of the most important steps in making magic custard cake, because these peaks are what create the fluffy top layer. Start with the egg whites in a completely clean bowl, meaning there can be absolutely no traces of egg yolk, grease, or any other oil residue. Even a tiny drop of fat will prevent the egg whites from whipping properly. Add a small amount of white vinegar to the whites, which serves as a stabilizer and helps them hold their peaks even after you fold them into the heavier batter. Using a hand mixer or stand mixer on medium-high speed, beat the egg whites until stiff peaks form, which means the peaks stand straight up and do not fall over when you lift the beaters. This usually takes about five to eight minutes with an electric mixer. Be careful not to overbeat, because overbeaten egg whites become grainy and do not fold as smoothly into the batter.
Creating the Rich Egg Yolk Base Mixture
While your egg whites are resting at room temperature, you can start working on the egg yolk mixture, which will become the custard base of your finished cake. In a separate mixing bowl, combine the egg yolks with confectioner’s sugar and beat them together using an electric mixer on medium speed. You want to beat them until the mixture becomes pale in color and noticeably lighter in texture, which usually takes about three to five minutes. This process traps tiny air bubbles into the mixture and helps everything combine smoothly. Once the yolk mixture is pale and creamy, pour in the melted butter that has cooled to room temperature and beat again until everything is well combined. Then add the water while continuing to mix, which helps adjust the consistency of the batter and ensures smooth blending with the flour and milk that will come next.
Sifting and Adding Flour Without Overdoing It
Adding flour to your egg yolk mixture requires a gentle hand, because overmixing at this stage can make your cake dense and tough instead of light and tender. Take your sifted flour and add it gradually to the egg yolk mixture, a little bit at a time rather than all at once. Mix on low speed each time you add more flour, stirring just until you do not see any white streaks in the batter. Overmixing develops gluten in the flour, which would make your cake heavy and rubbery. The mixture should look smooth and thick at this point, ready for the milk that will come next.
Incorporating Milk and Vanilla for Smooth Custard Formation
Once the flour is fully combined with the egg yolk mixture, you need to add the lukewarm milk slowly while stirring continuously. Pour the milk in gradually, in small amounts at a time, stirring between each addition. The mixture will gradually become thinner and more liquid as you add the milk, and this is exactly what you want. The batter should eventually look quite thin and watery, almost like a thick pancake batter. This thin consistency seems wrong at first, but it is absolutely essential for the magic to happen during baking. Add the vanilla extract at the end, mixing just until combined. The batter should smell sweet and vanilla-scented, which is a sign that everything is mixed correctly.
Folding Whipped Egg Whites into the Batter Correctly
Folding the whipped egg whites into your batter is the step that requires the most care and attention. Take about one-third of the whipped egg whites and gently fold them into the batter using a rubber spatula. Folding means using the spatula to cut down through the middle of the mixture, then scraping along the bottom and bringing the mixture up and over the top. Do not stir or beat, because stirring would deflate the egg whites. Repeat this process two more times, adding the remaining egg whites in two equal portions. Small white streaks are acceptable and even expected at this stage, but you should aim to combine everything as much as possible without overdoing it.
Pouring and Baking for Perfect Layer Development
Once all the egg whites are folded in, you need to work quickly to pour the batter into your prepared baking dish and get it into the oven. Pour the entire batter into the eight-inch square dish, distributing it evenly. The batter will look very thin and watery in the dish, which is correct and expected. Place the baking dish in your preheated 325-degree oven and bake for forty-five to sixty minutes. The cake is done when the top is golden brown and feels set to the touch, but the center still jiggles slightly when you gently shake the pan. If the top starts browning too quickly, loosely cover the baking dish with aluminum foil.
Allowing Proper Cooling and Setting Time
Patience is essential after your magic custard cake comes out of the oven, because rushing this cooling step can result in mushy, poorly defined layers. Allow the cake to cool at room temperature for at least thirty minutes before moving it anywhere. After thirty minutes, transfer the baking dish to your refrigerator and chill for at least two hours, though overnight chilling is even better. Cold cake is much easier to slice cleanly because the custard layer becomes firm enough to hold together. When you are ready to serve, dust the top generously with confectioner’s sugar, which provides a classic presentation that looks beautiful and professional.
Important Tips for Successful Results Every Time
Several key practices will help you achieve perfect results. Always use room-temperature eggs if possible, because they blend together much more smoothly. Never skip the step of whipping egg whites to stiff peaks, because this creates all the structure that makes the top layer light. Maintain steady oven temperature throughout baking by keeping the oven door closed. Make sure your oven is actually at 325 degrees by using an oven thermometer, because oven temperatures can vary quite a bit. Avoid overmixing the batter once the flour is added, because this develops gluten that will make the cake dense. Cool the cake fully and refrigerate before slicing, because this gives you much cleaner slices with well-defined layers.
Creating Delicious Variations While Keeping the Magic
Although classic vanilla magic custard cake is wonderful, you can create exciting variations while maintaining the magical layer formation. For a citrus version, add one tablespoon of lemon zest or orange zest to the egg yolk mixture. For a spiced variation, add half a teaspoon of ground cinnamon or a quarter teaspoon of ground nutmeg to the flour mixture. For a chocolate version, replace about two tablespoons of the flour with unsweetened cocoa powder. You can also experiment by adding a quarter teaspoon of almond extract along with the vanilla, which creates an interesting flavor complexity.
Storing Your Cake and Serving It Beautifully
Magic custard cake keeps well in the refrigerator because the custard layers help preserve moisture. Store leftover cake in an airtight container in the refrigerator for up to three days. The cake can be served cold straight from the refrigerator, or you can let it sit at room temperature for about fifteen minutes before serving if you prefer it slightly warmer. The cake pairs beautifully with fresh berries such as raspberries, strawberries, or blueberries, which add brightness and tartness. Whipped cream is another classic pairing that works wonderfully, adding richness and a cool contrast to the warm spices if you made a spiced version.
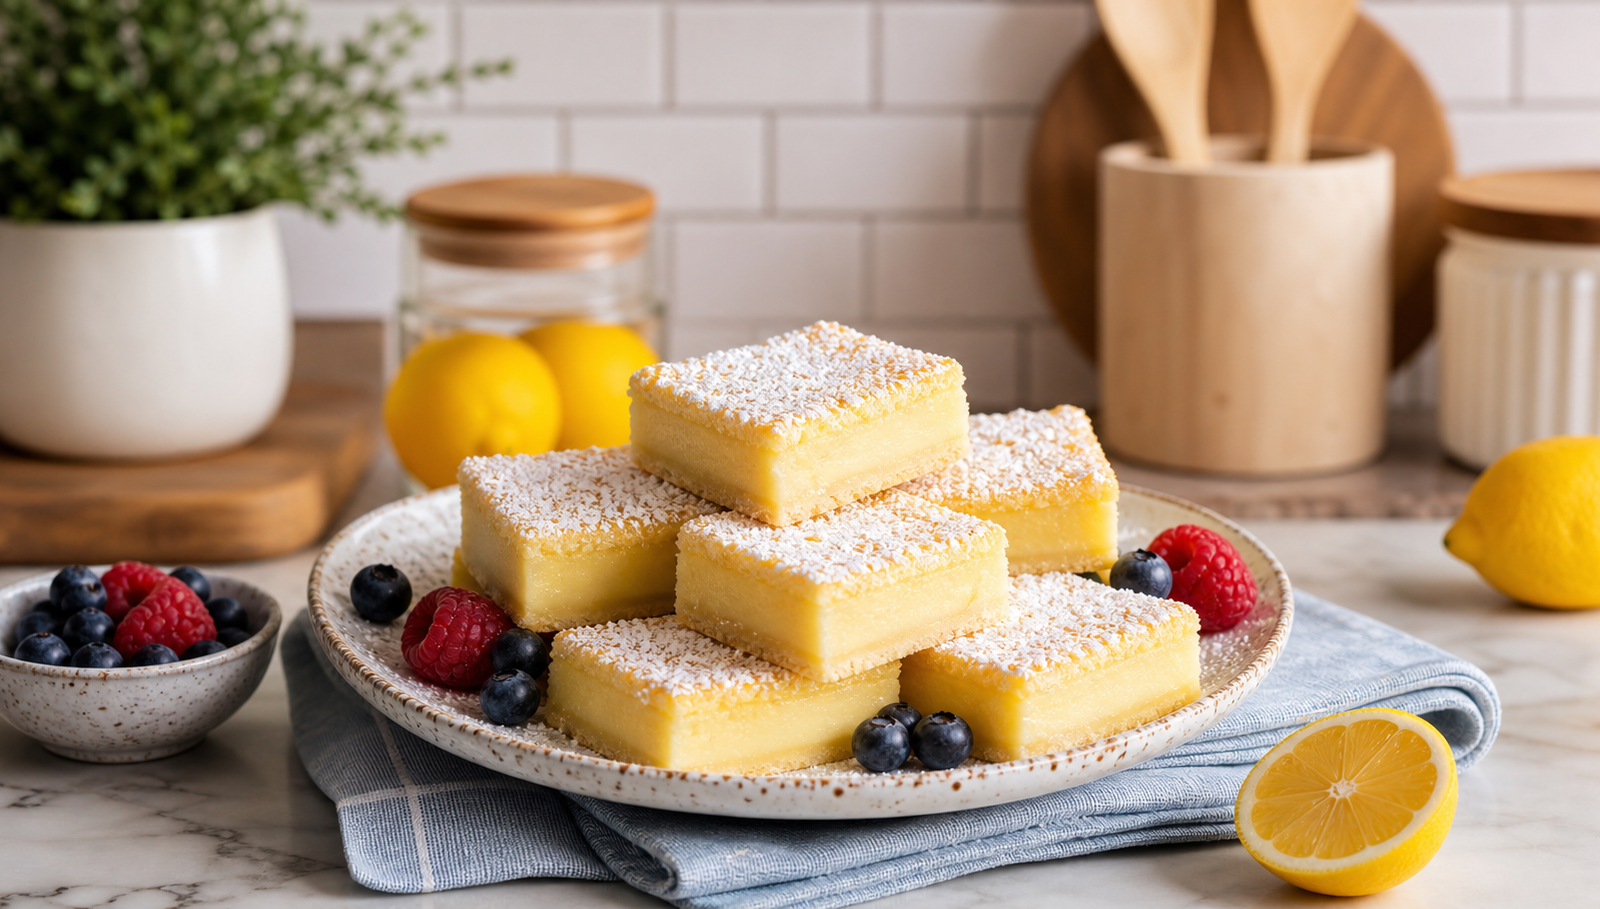
Magic Custard Cake Recipe
Enjoy this Vanilla Magic Custard Cake as a show-stopping dessert for any occasion. With its unique layers and heavenly flavor, it’s sure to be a crowd-pleaser!
12
servings25
minutes35
minutes139
kcal1
hourIngredients
4 eggs, room temperature
3/4 cup (150g) caster sugar
125g unsalted butter, melted
1 teaspoon vanilla extract
¾ cup plain flour – sifted
2 cups (500ml) lukewarm milk
1/4 cup (30g) icing sugar for decoration
Directions
- Preheat your oven to 170°C (fan-forced). Line a 20cm square baking tin with baking paper, leaving extra paper hanging over the sides for easy removal.
- Separate the eggs. Place the egg whites in a clean, dry bowl and whip with an electric mixer until stiff peaks form. Set aside.
- In another large bowl, beat the egg yolks and caster sugar until light and frothy using an electric mixer.
- Gradually mix in the melted butter and vanilla extract at low speed.
- Slowly incorporate the sifted flour, a few spoonfuls at a time, followed by the lukewarm milk. Mix until smooth.
- Gently fold the whipped egg whites into the batter until just combined. The batter may appear lumpy—this is normal.
- Pour the batter into the prepared tin and bake for 35 minutes or until the top is golden and the cake has set.
- Allow the cake to cool in the tin before removing. Dust with icing sugar and serve.
Notes
- Notes
Baking times may vary based on oven temperature and ingredient temperature.
If the batter looks uneven or runny, trust the process; the layers will form during baking.
Store leftovers in an airtight container in the refrigerator for up to three days.
Nutrition Facts
- Calories: 139kcal
- Fat: 3g
- Saturated Fat: 1g
- Polyunsaturated Fat: 0.4g
- Cholesterol: 51mg
- Sodium: 48mg
- Carbohydrates: 23g
- Fiber: 0.2g
- Sugar: 18g
- Protein: 4g
- Calcium: 72mg
- Iron: 1mg