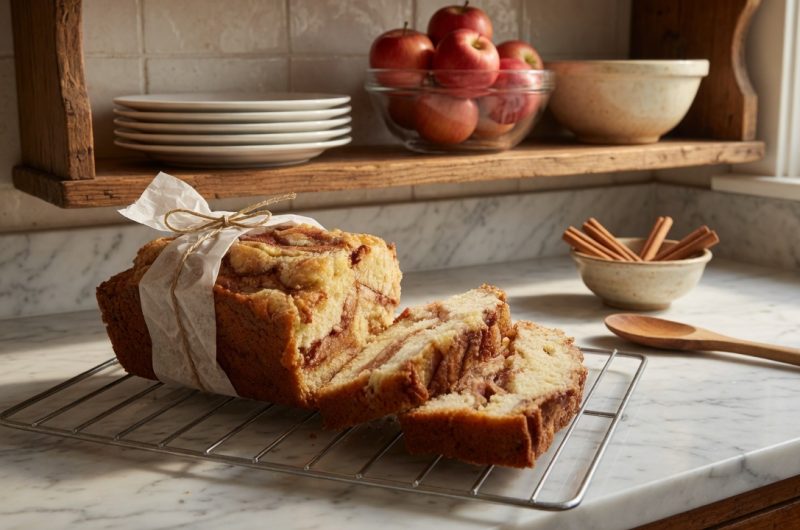
Jewish apple cake holds a special place in dessert traditions across many households, combining simple ingredients with warmth and comfort that few other cakes can match. This traditional cake has been passed down through generations, representing more than just a recipe—it embodies family gatherings, holiday celebrations, and the joy of homemade baking. What makes this cake so enduringly popular is its straightforward approach to creating something genuinely delicious without requiring complicated techniques or hard-to-find ingredients. The beauty of Jewish apple cake lies in how fresh apples, warm cinnamon, and basic pantry staples come together to create a dessert that tastes far more impressive than the effort required to make it. Whether you’re baking for a special occasion or simply craving something homemade and comforting, this recipe delivers results that will satisfy everyone at your table.
Understanding the Appeal of Apple-Based Desserts
Apple desserts have remained popular across cultures for centuries because apples offer natural sweetness combined with subtle tartness that balances richly in baked goods. When you use fresh apples in cake, they contribute moisture and texture that keep the crumb tender throughout the baking process. The fruit breaks down slightly during baking, distributing its flavor and juices throughout the cake rather than sitting as distinct pieces. This integration creates a cake that tastes like apples are woven into every bite rather than simply sprinkled on top. Many people prefer apple-based desserts over those relying solely on added sugars because the natural fruit flavor creates depth and complexity that pure sweetness cannot achieve. The combination of apples with warm spices like cinnamon creates flavor notes that feel both comforting and sophisticated simultaneously, which explains why apple cake remains appropriate for casual family dinners and formal holiday meals alike.
The Importance of Proper Oven Preparation and Pan Selection
Before you begin mixing ingredients, taking time to properly prepare your equipment sets the foundation for successful baking. Preheating your oven to three hundred fifty degrees Fahrenheit allows the heating element to reach the correct temperature, ensuring your cake bakes evenly from the moment it enters the oven. Many bakers underestimate how important proper preheating is—an oven that hasn’t reached full temperature will bake your cake unevenly, resulting in a center that’s undercooked while the edges are overdone. Selecting a ten-inch tube pan specifically designed for this cake matters because the center tube allows heat to penetrate from multiple directions, promoting even baking throughout. The tube pan’s design also creates beautiful presentation once you invert the finished cake, showing off those gorgeous layers of apples and cinnamon throughout the cake’s structure.
Creating the Perfect Cinnamon-Sugar Layer
The cinnamon-sugar mixture that layers through this cake serves as the flavor foundation that makes each bite memorable. Combining white sugar with ground cinnamon creates an aromatic blend that adds sweetness and warmth simultaneously. Ground cinnamon contains essential oils that become more fragrant when heated, which means the aroma intensifying as your cake bakes is a good sign that everything is proceeding correctly. The ratio of cinnamon to sugar matters—too much cinnamon can overpower the apple flavor while too little leaves the cake tasting plain. Many experienced bakers recommend measuring cinnamon carefully and even tasting a tiny bit of the mixture with your finger to confirm the balance feels right before adding it to your apples. This simple step prevents the disappointment of finishing a cake only to discover the spice level isn’t quite what you hoped for.
Mixing the Batter with Proper Technique
Creating a well-balanced batter requires combining ingredients in the right order and mixing with appropriate care. Start by sifting your dry ingredients together—the flour, sugar, baking powder, and salt—which ensures even distribution and prevents lumpy batter. Sifting might seem like an extra step, but it aerates the flour and prevents clumps that can create dense pockets in the finished cake. When you add the wet ingredients—vegetable oil, beaten eggs, orange juice, and vanilla extract—blend thoroughly until everything combines evenly without overmixing, which can develop too much gluten and make the cake tough. The orange juice adds subtle citrus notes that complement both apples and cinnamon while contributing moisture to keep the crumb tender. Vegetable oil creates a more tender, moist crumb compared to butter, which is why traditional Jewish apple cake recipes specifically call for oil rather than butter.
Understanding the Layering Process and Its Impact on Texture
The layering technique used in this recipe creates distinct flavor experiences as you move through each layer of cake. Spreading batter in the pan first creates a foundation that prevents apples from sinking directly to the bottom during baking. Adding a layer of sliced apples directly onto this batter layer means the fruit sits in the middle of the cake, distributing its flavor and moisture throughout. The cinnamon-sugar sprinkled over these apples caramelizes slightly during baking, creating pockets of concentrated sweetness and spice. Adding another layer of batter on top seals in the apples, so they steam slightly as the cake bakes, softening and becoming incorporated into the crumb. This gentle steaming keeps apples from becoming hard or dry, which can happen if they’re exposed directly to the oven’s heat. The final layer of batter creates the cake’s outer surface, which develops a golden-brown exterior while the interior remains moist and tender.
Selecting and Preparing Apples for Your Cake
The type of apples you choose significantly impacts your cake’s final flavor and texture. Tart varieties like Granny Smith apples provide bright acidity that balances the sweetness of the cake, while sweeter varieties like Fuji or Gala apples contribute more pronounced fruity notes. Many bakers use a combination of varieties to achieve balanced flavor—perhaps two tart apples and one sweet apple per batch. Peeling your apples before slicing matters because unpeeled apples can create tough pieces in the finished cake that some people find unpleasant. Slicing apples relatively thin, about a quarter-inch thick, ensures they cook completely and distribute evenly throughout the cake layers. Some people toss their sliced apples with a bit of lemon juice to prevent browning and to add subtle flavor, though this step is optional. Allowing peeled and sliced apples to sit briefly in a bowl before using them gives them time to release some juice, which you can partially drain before adding them to your cake—this prevents the batter from becoming too wet.
The Role of Vegetable Oil in Creating Moist Crumb
Vegetable oil plays a crucial role in this recipe that goes beyond simply providing fat for moisture. Unlike butter, which has a lower moisture content and creates a denser crumb, vegetable oil distributes evenly throughout the batter and creates a tender, velvety texture. The oil coats flour particles more completely than butter can, which prevents overdevelopment of gluten and results in a softer, more delicate crumb. This is particularly important in apple cake because you want the tender fruit to be the star—a crumb that’s too dense or tough would overshadow the apples. Another advantage of using oil is that it remains liquid even when the cake cools, which means oil-based cakes stay moist for several days while butter-based cakes sometimes dry out more quickly. The neutral flavor of vegetable oil also means it won’t compete with the apple and cinnamon flavors, allowing those tastes to shine through without distraction.
Why Orange Juice Enhances Flavor Beyond Simple Moisture
Using orange juice instead of water or milk adds a subtle complexity to the cake that many people notice but can’t quite identify. The citrus notes in orange juice complement both apples and cinnamon beautifully, creating flavor harmony that feels more sophisticated than the simple ingredient list suggests. Orange juice also adds natural sugars that contribute to browning during baking, helping create that attractive golden exterior. The acidity in orange juice reacts with baking soda or baking powder, creating lift in the batter that makes the cake rise properly. Fresh-squeezed orange juice provides the brightest flavor, though quality store-bought juice works perfectly well. The amount of orange juice in the recipe—typically around three-quarter cup—is carefully calculated to provide the right moisture level without making the batter too wet, so following the measurement precisely matters more with orange juice than with water.
How Eggs Contribute to Structure and Richness
Eggs in cake batter serve multiple essential functions that go beyond simply binding ingredients together. The egg proteins help structure the cake, trapping air bubbles created by baking powder and allowing them to expand during baking. Well-beaten eggs incorporate air directly into the batter, which contributes to the cake’s light, tender texture. The fat in egg yolks adds richness and creates a more luxurious mouthfeel than cakes made with fewer eggs would have. Using room-temperature eggs ensures they blend smoothly into the batter rather than creating cold spots that don’t mix evenly. Many bakers keep eggs in a warm water bath for a few minutes before using them to ensure they’re properly warmed. The amount of eggs in this recipe is carefully balanced—too many would make the cake too eggy or dense, while too few would result in a cake that lacks structure and crumbles when sliced.
Understanding Baking Powder’s Role in Rising
Baking powder, the leavening agent in this recipe, creates the carbon dioxide bubbles that make the cake rise and develop a light, tender crumb. When baking powder contacts moisture and heat, it immediately releases gas that gets trapped in the batter, creating lift. Double-acting baking powder, the most common type in grocery stores, releases gas in two stages—first when it contacts wet ingredients and again when heat is applied. This two-stage release is why your batter might look slightly different after mixing compared to moments before it goes in the oven. Using the correct amount of baking powder matters—too much creates a cake that rises excessively and then collapses as it cools, while too little results in a dense cake that doesn’t rise adequately. Baking powder loses potency over time, so replacing it annually ensures your cakes always rise properly.
Recognizing When Your Cake Is Properly Baked
Determining when your cake is finished baking requires using both sight and tactile feedback rather than relying solely on baking time. The toothpick test—inserting a toothpick into the cake’s center and checking whether it emerges clean or with moist crumbs—provides reliable feedback about doneness. A clean toothpick indicates the cake is fully baked, while moist crumbs suggest it needs additional baking time. The cake should also be golden brown on top and pull away slightly from the pan’s edges. If you touch the cake’s surface gently, it should spring back immediately rather than leaving a fingerprint. The baking time provided in recipes is approximate because oven temperatures vary, so using visual cues and the toothpick test provides more reliable results than trusting time alone. Some bakers use a cake tester—a thin metal tool specifically designed for this purpose—rather than toothpicks, though toothpicks work equally well.
Cooling Your Cake Properly to Prevent Damage
Allowing your cake to cool briefly in the pan before inverting it prevents the delicate crumb from breaking apart. Trying to invert a cake while it’s too hot often results in it falling apart because the structure hasn’t fully set. Waiting about ten to fifteen minutes gives the cake time to firm up slightly while remaining warm enough to release easily from the pan. Running a thin knife around the pan’s edges helps loosen the cake from the sides, and gently tapping the pan’s bottom sometimes helps release it. Once inverted onto a cooling rack or serving plate, allow the cake to cool completely before slicing or serving. Complete cooling means the crumb structure fully sets, and you’ll get clean slices rather than pieces that crumble or compress. Some bakers prefer serving their cake while still slightly warm, which creates a wonderful aroma and pleasant texture, though it’s also delicious when completely cooled.
Storing Your Cake to Maintain Freshness
Proper storage extends your cake’s freshness and allows you to enjoy it over several days. An airtight container at room temperature keeps the cake fresh for three to four days, protecting it from air exposure that causes drying. Wrapping the cake tightly in plastic wrap before placing it in a container provides extra protection against moisture loss. If you live in a particularly warm or humid climate, storing the cake in the refrigerator extends its freshness, though some people feel the cold slightly changes the cake’s texture. For longer storage, freezing works well—wrap the completely cooled cake tightly in plastic wrap and then aluminum foil to prevent freezer burn. Frozen cake keeps for up to two months and thaws at room temperature in about four hours. Slicing the cake before freezing allows you to thaw individual portions as needed, which is convenient for smaller households.
Serving Suggestions That Enhance Your Cake
While Jewish apple cake is delicious entirely on its own, several accompaniments complement it beautifully and elevate the serving experience. A dollop of whipped cream adds richness and a cool contrast to the warm, spiced cake. Vanilla ice cream melts slightly into the warm cake, creating a luxurious dessert that feels indulgent without being overly heavy. A light dusting of powdered sugar adds visual appeal and subtle sweetness. Some people drizzle warmed caramel sauce over slices for extra sweetness and flavor complexity. Serving the cake with a cup of coffee or tea creates a perfect afternoon break or after-dinner dessert. For special occasions, you might arrange fresh apple slices or cinnamon sticks alongside plated slices for decoration. The beauty of this cake is its versatility—it works equally well served simply with coffee or dressed up for formal entertaining.
Adapting the Recipe for Different Dietary Needs
Many people want to make Jewish apple cake while accommodating dietary restrictions, and fortunately this recipe adapts relatively well to several modifications. For a dairy-free version, ensure your whipped cream or ice cream accompaniments are dairy-free, though the cake itself contains no dairy. For those avoiding refined sugar, experimenting with sugar substitutes can work, though results may vary slightly compared to the original. Oil-based cakes actually adapt well to whole wheat flour substitutions—using half whole wheat and half all-purpose flour maintains good texture while adding nutritional value. Adding extra cinnamon, nutmeg, or a small amount of cardamom creates interesting flavor variations that some people prefer. Some bakers add chopped nuts to their batter or layers for additional texture and nutrition. Making these adaptations requires slightly more attention than following the original recipe, but they allow more people to enjoy this traditional dessert.
Why This Cake Works for Various Occasions
Jewish apple cake’s versatility explains why it remains popular for diverse occasions from casual family gatherings to formal holiday meals. The cake works perfectly for Rosh Hashanah celebrations, where apples hold particular significance, and it’s equally appropriate for Sukkot gatherings or other Jewish holidays. Many families serve it as part of their weekend meals, and it appears at church potlucks, office parties, and community events across many cultures. The warm, homey nature of apple cake makes it appropriate for any season, though it feels particularly fitting during fall and winter months when apples are in peak season. Younger children enjoy the slightly sweet, familiar flavors, while adults appreciate the depth and sophistication that proper spicing provides. This universal appeal across age groups and occasions is one reason the recipe has endured for generations.
Apple Cake
Perfect for holiday celebrations, family gatherings, or any time you want homemade dessert that impresses without requiring complicated techniques. The cake’s moist texture and balanced apple-cinnamon flavor make it appealing to both children and adults. Serve it warm with whipped cream or vanilla ice cream, or enjoy it plain as an afternoon treat with coffee or tea.
14
servings20
minutes1
hour10
minutes394
kcal1
hour30
minutesIngredients
- Cinnamon-Sugar
5 teaspoons white sugar
2 teaspoons ground cinnamon
- Cake
3 cups all-purpose flour
2 cups white sugar
2 ½ teaspoons baking powder
½ teaspoon salt
1 cup vegetable oil
4 large eggs, beaten
¼ cup orange juice
2 teaspoons vanilla extract
3 medium apples – peeled, cored and sliced
Directions
- Preheat the oven to 350 degrees F (175 degrees C). Grease and flour a 10-inch tube pan.
- To make the cinnamon-sugar: Combine sugar and cinnamon in a small bowl; set aside.
- To make the cake: Combine flour, sugar, baking powder, and salt in a large mixing bowl. Stir in oil, eggs, orange juice, and vanilla until well combined.
- Pour 1/2 of the batter into the prepared pan, then top with 1/2 of the sliced apples and sprinkle with 1/2 of the cinnamon-sugar. Repeat once more with remaining batter, apples, and cinnamon-sugar.
- Bake in the preheated oven until a toothpick inserted into the center comes out clean, about 70 to 90 minutes. Cool briefly in the pan; run a table knife around the edges to loosen. Invert carefully onto a serving plate or rack and let cool completely.
Nutrition Facts
- Calories: 394kcal
- Fat: 18g
- Carbohydrates: 56g
- Protein: 5g