Chocolate fudge snowballs represent a delightful frozen treat that combines rich chocolate flavor with wholesome oatmeal and toasted coconut in a convenient bite-sized package. These chewy, satisfying confections appeal to people of all ages and work beautifully for holiday gift-giving, festive occasions, or simply enjoying as an everyday sweet snack. The beauty of this recipe lies in its straightforward preparation method: no baking required, just simple mixing and chilling. Unlike traditional candies that require specialized equipment or extensive experience, these snowballs come together easily using basic kitchen tools and pantry staples. The combination of melted butter, milk, and sugar creates a rich fudge base that binds the oatmeal and coconut together, creating texture that is both chewy and satisfying. These treats taste equally delicious served straight from the refrigerator for a refreshing cold snack or thawed slightly for a softer eating experience. Whether you are a seasoned candy maker or attempting homemade confections for the first time, this recipe delivers impressive results that rival store-bought versions at a fraction of the cost.
Understanding the Fudge Base and Its Critical Components
The fudge base combines granulated sugar, melted butter, and whole milk in proportions carefully calibrated to create proper consistency when cooled. The sugar provides sweetness and helps structure the fudge by dissolving and combining with butter and milk to create a smooth, homogeneous base. Granulated sugar dissolves more readily than other types during the brief boiling period, ensuring an even texture without crystalline grittiness. Melted butter contributes rich, creamy flavor while providing fat that helps bind all components together. The butter’s fat content is essential for achieving the smooth, slightly spreadable consistency that allows the mixture to hold its shape without becoming brittle. Whole milk adds liquid that dilutes the sugar concentration to the proper level, preventing excessive sweetness while creating the ideal texture. The ratio of these three ingredients has been refined through testing to reach the candy stage at the specified temperature: two hundred twenty-five to two hundred thirty degrees Fahrenheit, which corresponds to soft-ball stage in candy making.
Why Large Saucepans Matter for Safe Cooking
Using a large saucepan with high sides is essential for this recipe because the sugar, butter, and milk mixture expands and foams significantly as it heats. The foam can rise dramatically and potentially overflow from smaller or shallow pans, creating a dangerous mess on the stovetop. A large pan provides ample space for the mixture to expand without spilling, ensuring safe cooking throughout the boiling process. The high sides also help contain splatters that can occur as the mixture bubbles vigorously. Using an appropriately sized pan prevents the frustration of cleaning sticky caramelized mixture from your stovetop. Professional candy makers emphasize pan size because undersized pans are a common cause of boiling-over incidents that interrupt cooking and potentially create food waste.
The Critical Boiling Stage and Temperature Monitoring
Bringing the mixture to a gentle boil over medium heat initiates the process of concentrating flavors and reaching the proper candy stage. The boiling process evaporates some of the liquid while the sugar dissolves completely, creating the firm but chewy texture desired in the finished snowballs. Boiling for five to six minutes at medium heat allows adequate time for the mixture to reach two hundred twenty-five to two hundred thirty degrees Fahrenheit without over-cooking. Using a candy thermometer eliminates guesswork by providing precise temperature readings, ensuring consistent results across batches. The specified temperature range corresponds to the soft-ball stage in candy making, which produces confections that are firm enough to hold their shape but soft enough to chew. Over-cooking beyond this temperature creates harder candies, while under-cooking results in mixture that is too soft to shape properly.
Why Avoiding Stirring During Boiling Prevents Problems
Once the mixture reaches a boil, avoiding stirring prevents sugar crystallization that creates grainy texture rather than the desired smooth, creamy fudge. Stirring introduces air and movement that can cause sugar crystals to form, disrupting the fudge’s smooth structure. The mixture itself continues mixing from the natural convection of boiling, so additional stirring is unnecessary and counterproductive. Resisting the urge to stir requires discipline but produces noticeably better results. This principle applies to most candy making: once boiling begins, hands off until the proper temperature is reached.
Preparing Dry Ingredients While the Mixture Boils
Combining rolled oats, fine unsweetened coconut, and cocoa powder in a separate bowl while the fudge mixture boils saves time and ensures all components are ready for rapid mixing once the fudge reaches the proper temperature. Large rolled oats provide hearty texture and wholesome grain flavor that balances the sweetness of the fudge. Fine unsweetened coconut adds subtle tropical flavor and chewy texture without excessive sweetness. Unsweetened cocoa powder delivers rich chocolate flavor essential to these treats. Thoroughly mixing the dry ingredients ensures even distribution of cocoa powder throughout, preventing pockets of intense chocolate flavor or areas with insufficient chocolate.
Combining Wet and Dry Ingredients at the Proper Temperature
Once the fudge mixture reaches the correct temperature, immediately removing it from heat and carefully pouring it over the dry ingredients begins the blending process. The heat from the fudge mixture partially cooks the dry ingredients, helping them blend smoothly while the mixture is still warm and pliable. Stirring thoroughly after pouring ensures complete incorporation of all components without pockets of unmixed dry ingredients. The mixture will be soft and loose at this stage, which is normal and expected. Attempting to shape at this point would result in failure, as the mixture lacks the firmness necessary to hold its shape.
The Essential Cooling and Chilling Process
Transferring the mixed bowl to the refrigerator and chilling until the mixture is firm enough to handle represents a critical step that separates successful candy-making from frustrating messes. Several hours of chilling, or preferably overnight, allows the mixture to firm up sufficiently for scooping and shaping. Allowing the mixture to cool to nearly room temperature before refrigerating helps it firm up more effectively because less energy is required to solidify it. The cooled mixture should reach a consistency similar to thick peanut butter or play-dough: firm enough to hold its shape but still workable without excessive hardness. Insufficient chilling results in mixture too soft to shape, while excessive chilling can make the mixture too hard to scoop. Checking the texture after several hours guides your decision about whether additional chilling is needed.
Shaping the Snowballs with Proper Technique
Once the mixture is sufficiently chilled and firm, scooping out portions with a spoon or cookie scoop and rolling them into one and a half inch balls creates uniformly sized treats. Using a scoop ensures consistency across the batch, creating snowballs of similar size that cook evenly if any heating is involved and look more professional. The mixture may feel sticky during rolling, so moistening your hands slightly with water helps prevent sticking without adding excessive moisture. Working quickly prevents the mixture from warming and becoming difficult to handle. Completing all shaping in one session rather than working in multiple sittings maintains consistent texture throughout the batch.
Coating in Coconut for Texture and Visual Appeal
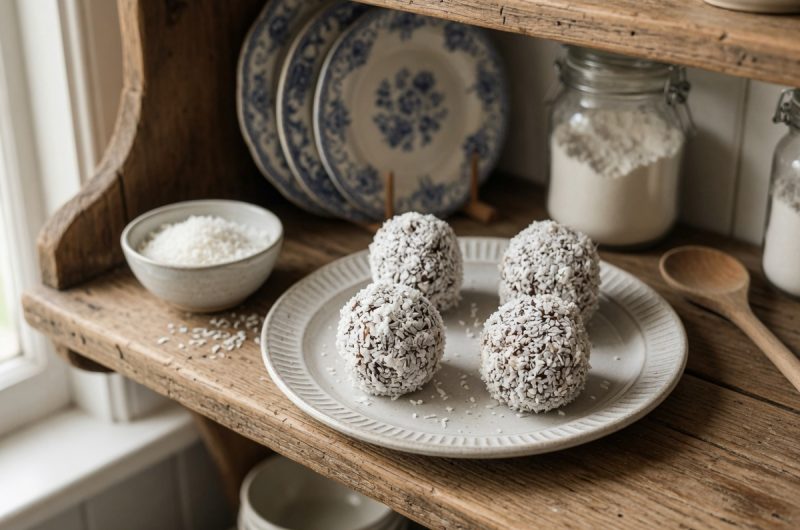
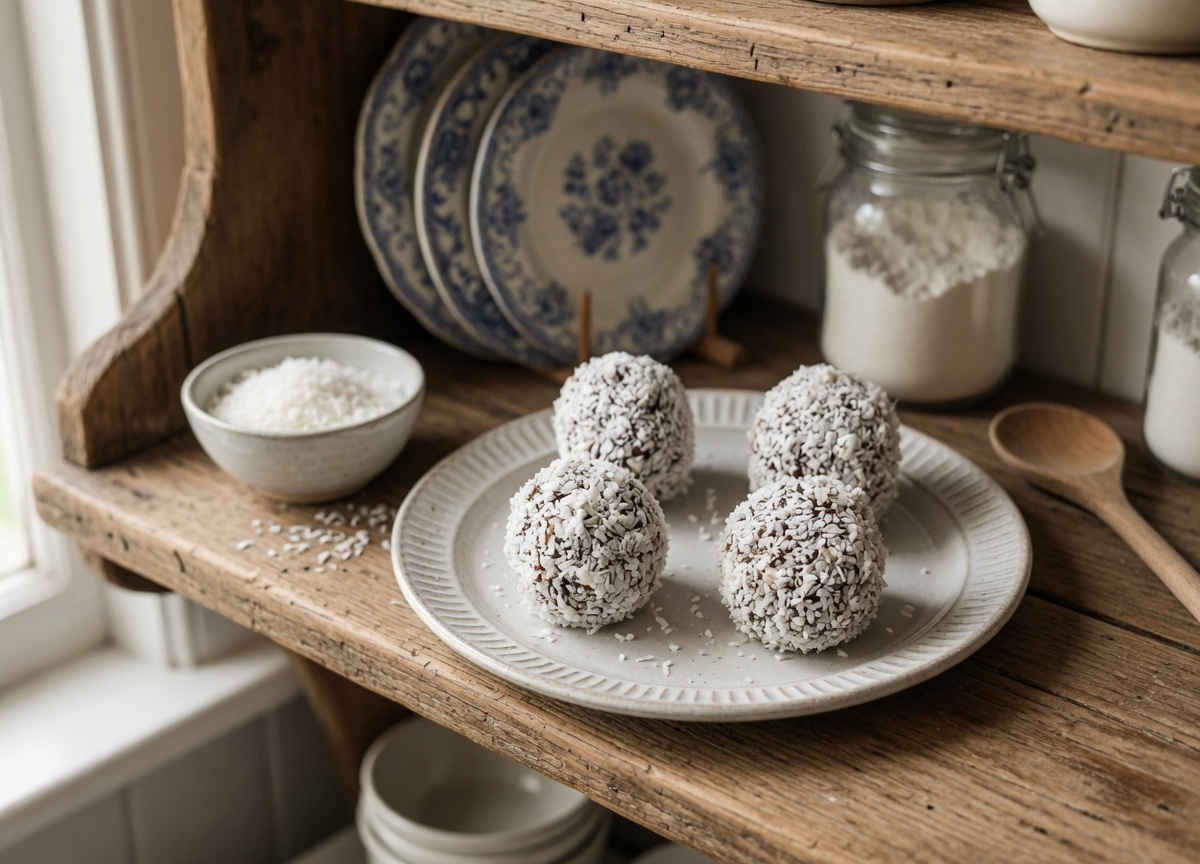
Rolling each shaped ball in the remaining unsweetened coconut adds multiple benefits: the coconut provides textural contrast, adds subtle flavor, creates visual appeal, and helps prevent the balls from sticking together during storage. The coconut coating should be thick enough to completely cover the chocolate mixture underneath, creating an attractive appearance and protecting the soft filling from absorbing refrigerator odors. Some pieces of coconut will naturally fall off during handling and storage, which is normal and does not affect the treats’ quality. The coconut coating also makes the treats more pleasant to eat by providing texture contrast between the soft chocolate filling and crispy coconut exterior.
Proper Storage for Maintaining Quality
Placing the finished snowballs in an airtight container and refrigerating ensures they maintain their soft yet slightly chewy texture while preventing them from drying out or absorbing odors from the refrigerator. The cold temperature keeps the butter in the mixture solid, maintaining the firm texture that prevents the snowballs from becoming overly soft or losing their shape. The airtight container prevents exposure to air that could dry out the treats and prevents absorption of refrigerator odors that might compromise flavor. These snowballs also freeze beautifully for longer storage, making batch preparation and enjoying across multiple weeks convenient. Frozen snowballs can be thawed at room temperature for thirty minutes before eating or enjoyed directly from the freezer for a cold, refreshing treat.
Understanding How These Treats Develop Flavor
The flavors in these snowballs develop and intensify during chilling and storage as the components meld together and moisture redistributes throughout the mixture. Freshly made snowballs taste good but seem less complex than those that have aged in refrigeration overnight. Allowing overnight storage before serving produces noticeably more developed flavor where individual components integrate into a cohesive whole. This aging time explains why making these treats several days before an event produces superior results compared to preparing them immediately before serving. Planning ahead allows these treats to reach their full flavor potential.
Adjusting Texture and Consistency as Needed
If the mixture proves too soft to roll after chilling for several hours, returning it to the refrigerator for additional time allows further firming. The texture should be similar to thick peanut butter: firm enough to hold its shape but soft enough to scoop without requiring excessive pressure. If the mixture becomes too hard and difficult to scoop, allowing it to sit at room temperature for ten to fifteen minutes softens it sufficiently for handling. Understanding these adjustments prevents frustration if the texture is not perfect on the first attempt.
Christmas Snowballs
Perfect for holiday gift-giving, festive occasions, or everyday snacking, these chewy treats satisfy chocolate cravings while delivering wholesome ingredients. Serve cold directly from the refrigerator for refreshing sweetness, or thaw slightly for softer texture. These snowballs freeze beautifully for convenient make-ahead preparation.
15
minutes5
minutes129
kcal20
minutesIngredients
3 cups granulated sugar
3/4 cup melted butter
1 1/4 cups whole milk
3 cups large rolled oats
1 cup unsweetened fine coconut
12 tablespoons unsweetened cocoa powder
1 1/2 cups extra coconut (for rolling)
Directions
- In a large saucepan, combine sugar, melted butter, and milk. Heat over medium until it boils. Cook for 5-6 minutes, or until it reaches 225-230°F on a candy thermometer.
- Mix rolled oats, 1 cup of coconut, and cocoa powder in a large bowl.
- Pour the hot mixture over the dry ingredients and mix well. Refrigerate until firm.
- Shape into 1 1/2 inch balls and roll in extra coconut.
- Store in the fridge or freezer.
Nutrition Facts
- Calories: 129kcal
- Fat: 7g
- Cholesterol: 8mg
- Sodium: 30mg
- Carbohydrates: 18g
- Protein: 1g