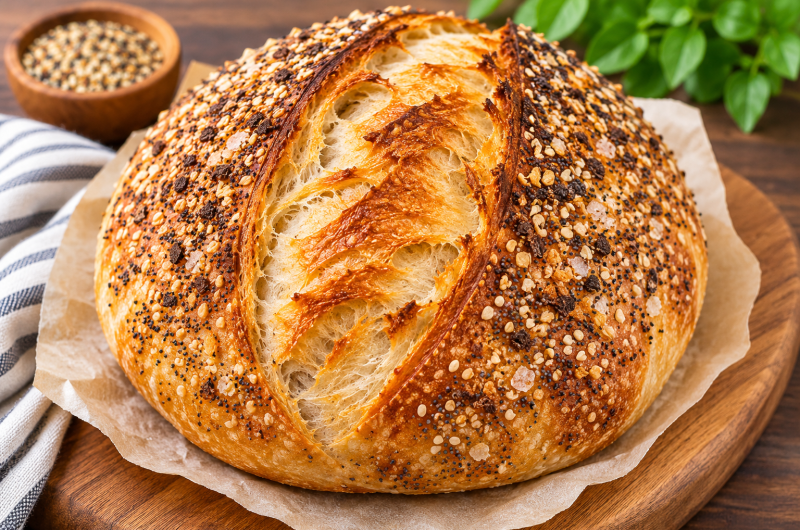
Homemade Sourdough Bagel Bread combines the familiar flavor of an everything bagel with the rustic texture of traditional artisan sourdough bread. This flavorful loaf is made with active sourdough starter, water, bread flour, salt, and everything bagel seasoning. The dough develops naturally through fermentation, creating a pleasantly chewy interior and a beautifully browned crust. What makes this recipe different from ordinary sourdough bread is the addition of everything bagel seasoning during the stretch-and-fold process and the brief boiling step before baking. These techniques give the finished loaf a distinctive bagel-inspired character while maintaining the shape and structure of homemade sourdough bread. The dough is refrigerated for eight to twenty-four hours before baking, allowing its flavor to develop further. Once baked, the bread can be sliced for breakfast, toasted for sandwiches, or served alongside soups and salads. This everything bagel sourdough loaf is an appealing choice for anyone who enjoys traditional sourdough baking but wants something with a more savory flavor.
What Makes Everything Bagel Sourdough Bread Different?
Everything Bagel Sourdough Bread stands out because it combines several baking techniques that are not usually found together in a standard sourdough loaf. Traditional sourdough bread relies on natural fermentation to develop flavor, texture, and structure. Bagels, on the other hand, are commonly boiled before baking, which helps produce their characteristic chewy crust. This recipe brings those approaches together by preparing a naturally fermented sourdough dough, incorporating everything bagel seasoning, and briefly boiling the shaped loaf before baking. The result is a bread that has the savory aroma of an everything bagel and the satisfying interior of artisan sourdough. Unlike individual bagels, the dough is shaped into one large loaf, making it convenient for slicing and sharing. The seasoning is distributed through the dough during stretching and folding, rather than being used only on the outside. This means the sesame, garlic, onion, and other flavors commonly found in everything bagel seasoning can be enjoyed throughout the bread.
Why This Sourdough Bagel Loaf Is Worth Baking at Home
Baking an everything bagel sourdough loaf at home gives you the opportunity to enjoy a bakery-style bread using only a few familiar ingredients. The recipe does not require commercial yeast because the active sourdough starter provides the fermentation needed to raise the dough. Bread flour helps develop a strong gluten structure, while water creates a flexible dough that can be stretched and folded during fermentation. Salt balances the flavor, and everything bagel seasoning gives the loaf its distinctive savory taste. Another advantage is that the recipe can fit into an overnight sourdough schedule. After the dough has completed bulk fermentation and shaping, it rests in the refrigerator for eight to twenty-four hours. This makes it possible to prepare the dough one day and bake it the next. The finished bread can be enjoyed in several ways, from simple buttered toast to savory breakfast sandwiches. Its combination of chewy texture, tangy flavor, and aromatic seasoning makes it especially appealing for sourdough enthusiasts.
Understanding the Five Ingredients in This Sourdough Bread Recipe
One of the most attractive features of this homemade sourdough bagel bread recipe is its short ingredient list. The dough requires 350 grams of water, 100 grams of sourdough starter, 500 grams of bread flour, 10 grams of salt, and 40 grams of everything bagel seasoning. Each ingredient has a specific purpose in creating the finished loaf. Water hydrates the flour and allows the gluten network to develop. The sourdough starter introduces naturally occurring yeast and lactic acid bacteria, which ferment the dough and contribute flavor. Bread flour provides the protein needed for a strong, elastic structure. Salt improves the overall taste and influences dough strength and fermentation. Everything bagel seasoning adds the savory flavor that makes this loaf different from plain sourdough. The original ingredient quantities should be maintained because changing the flour, water, or starter amounts can affect dough consistency and fermentation. Following the measurements with a digital kitchen scale helps produce more consistent results.
Why Bread Flour Is Important for a Chewy Sourdough Loaf
Bread flour is the main structural ingredient in this everything bagel sourdough bread recipe. The original formula uses 500 grams of bread flour, which provides the foundation for the dough. Bread flour generally contains more protein than all-purpose flour, allowing it to develop a stronger gluten network when mixed with water and worked through stretching and folding. This gluten network helps the dough trap gases produced during fermentation, giving the loaf its shape and internal structure. A strong dough is particularly useful for this recipe because the loaf undergoes several handling stages, including folding, shaping, cold proofing, and boiling. The dough needs enough elasticity to maintain its form while still being flexible enough to expand during baking. Bread flour also contributes to the pleasantly chewy texture associated with artisan sourdough and bagel-style bread. Different flour brands absorb water differently, so the dough may feel slightly softer or firmer depending on the flour used. Keeping the original measurements provides a reliable starting point.
The Role of Water in Sourdough Bagel Bread Dough
Water is essential for hydrating the flour and helping the sourdough starter become evenly distributed throughout the dough. This recipe uses 350 grams of water with 500 grams of bread flour and 100 grams of active sourdough starter. The resulting dough should be flexible enough for stretch-and-fold techniques while still having enough strength to hold a shaped loaf. If the starter contains equal weights of flour and water, the overall dough hydration is approximately 73 percent when the starter is included in the calculation. This produces a moderately hydrated sourdough dough rather than the very stiff dough traditionally used for individual bagels. That difference helps explain why the finished bread resembles an artisan sourdough loaf with bagel-inspired characteristics rather than a conventional bagel. Water temperature can also influence fermentation speed. Warmer water may encourage faster fermentation, while cooler water can slow the process. Because the original recipe does not specify a water temperature, ordinary clean drinking water at a comfortable room temperature is a practical choice.
Why an Active Sourdough Starter Makes a Difference
An active sourdough starter is responsible for fermenting the dough and helping the bread rise naturally. The recipe calls for 100 grams of starter, which should ideally be healthy and showing clear signs of activity before mixing. A recently fed starter that has risen noticeably, developed bubbles, and has a pleasant fermented aroma is generally suitable for bread making. The microorganisms in the starter consume available carbohydrates and produce gases and acids during fermentation. The gases help expand the dough, while the acids contribute to the characteristic flavor associated with sourdough bread. Using a sluggish starter can result in slower fermentation and a denser finished loaf, particularly when the dough must withstand the additional handling involved in boiling. Starter activity also affects the length of bulk fermentation, which is why the original recipe does not provide a fixed number of hours for this stage. Paying attention to the dough’s appearance and development is more reliable than following the clock alone.
How Everything Bagel Seasoning Creates a Savory Flavor
Everything bagel seasoning is the ingredient that gives this sourdough loaf its distinctive flavor and aroma. The recipe uses 40 grams, which are incorporated during the stretch-and-fold stage. Commercial everything bagel seasoning commonly contains a combination of sesame seeds, poppy seeds, dried garlic, dried onion, and salt, although exact blends vary by manufacturer. These ingredients create a savory flavor that pairs naturally with the tanginess of fermented sourdough. Sesame and poppy seeds contribute a mild nutty taste and texture, while dried garlic and onion add aromatic depth. Because the seasoning is folded into the dough, its flavor is distributed throughout the loaf rather than being concentrated only on the crust. This makes the bread especially suitable for savory sandwiches and toast. Some seasoning blends contain a significant amount of salt, so their flavor intensity may vary. The original recipe includes 10 grams of salt separately, and that quantity should remain unchanged when following the supplied formula.
Preparing the Dough for Homemade Sourdough Bagel Bread
The first stage of making sourdough bagel bread is combining the main dough ingredients. Place the water and active sourdough starter in a large mixing bowl and stir until the starter begins to disperse. Add the bread flour and salt, then mix until all the flour is hydrated and no dry patches remain. The dough may initially look rough or uneven, which is normal at this stage. It does not need to become perfectly smooth immediately because the following resting and folding stages will help develop its structure. Cover the bowl and allow the dough to rest for approximately thirty to sixty minutes, as directed in the original recipe. This resting period gives the flour time to absorb moisture and allows the dough to become easier to handle. Although the original instructions say to mix all the ingredients initially, they also specify adding the everything bagel seasoning during the stretch-and-fold process. Keeping the seasoning aside until folding follows that more detailed instruction and helps distribute it through the dough.
Why Resting the Dough Before Folding Is Important
Allowing sourdough dough to rest after mixing is a useful technique because it gives the flour time to absorb water and begin developing structure. The original recipe recommends covering the mixed dough for thirty to sixty minutes before starting the stretch-and-fold process. During this period, the dough often changes from a rough mixture into a more cohesive mass. Hydrated flour proteins begin forming gluten connections, making the dough easier to stretch without tearing. Resting also reduces the amount of physical mixing needed to develop strength. This is especially helpful when preparing artisan sourdough bread by hand because it allows the dough to improve naturally between handling stages. Keep the bowl covered to prevent the surface from drying out and forming a skin. The dough does not need to double during this initial rest, and the purpose is not to complete fermentation. Instead, this short pause prepares the dough for the following folds and helps make the overall process more manageable.
How Stretch and Folds Strengthen Sourdough Bread
Stretch-and-fold techniques are commonly used in artisan sourdough baking to strengthen dough without traditional kneading. This recipe calls for three sets of stretch and folds or coil folds. To perform a standard stretch and fold, gently lift one side of the dough, stretch it upward until resistance develops, and fold it toward the center. Rotate the bowl and repeat around the remaining sides. Each set helps organize the gluten network and improve the dough’s ability to retain gas during fermentation. As the folds progress, the dough should gradually become smoother, more elastic, and better able to hold its shape. Avoid pulling so forcefully that the dough tears, because gentle stretching is more effective than aggressive handling. The original recipe does not specify exact intervals between the three sets. Spacing them approximately thirty minutes apart is a practical approach that allows the dough to relax between folds. Keep the bowl covered during the resting periods to maintain moisture and prevent drying.
Adding Everything Bagel Seasoning During the Folding Process
The seasoning is incorporated during the stretch-and-fold stage rather than being mixed entirely into the dough at the beginning. This method helps distribute the savory ingredients through the loaf while allowing the dough to develop some strength first. The original recipe uses 40 grams of everything bagel seasoning for the stretch-and-fold inclusions. During a folding set, gently stretch the dough and sprinkle a portion of the seasoning across the exposed surface. Fold the dough over itself to enclose the seasoning, then continue until the ingredients are distributed throughout the dough. If needed, the seasoning can be added gradually during more than one fold to avoid creating large concentrated pockets. Be gentle because dried garlic, onion, and seeds can make the dough slightly less smooth as they become incorporated. Some seasoning may appear on the surface, which is normal. The goal is to create an even distribution that delivers everything bagel flavor throughout the finished bread without damaging the dough’s structure.
Understanding Coil Folds as an Alternative Dough Technique
Coil folds are another method of strengthening sourdough dough, and the original recipe allows them as an alternative to standard stretch and folds. Instead of pulling the dough from the sides of the bowl, gently lift it from the center with both hands. Allow the ends to stretch downward, then lower the dough so that the hanging sections fold underneath. Rotate the bowl and repeat if necessary. This technique can be especially useful for moderately hydrated dough because it develops strength while minimizing rough handling. Coil folds also help preserve gas bubbles that begin forming as fermentation progresses. The dough should become more organized and hold its shape better after each set. As with standard stretch and folds, allow resting time between sets so the gluten can relax. Everything bagel seasoning can be incorporated during the folding process, although it may be easier to distribute evenly during a traditional stretch-and-fold set. Both methods can produce a strong dough when performed gently.
Bulk Fermentation and How to Recognize Proper Dough Development
Bulk fermentation is the stage when the sourdough starter actively ferments the dough, producing gases and developing flavor. After completing the folding sets, cover the dough and allow it to continue fermenting at room temperature. The original recipe does not specify an exact duration because fermentation speed depends on the temperature of the kitchen and the strength of the starter. A warm environment generally encourages faster activity, while a cooler kitchen may require substantially more time. Instead of relying only on a timer, observe the dough for visible signs of fermentation. It should become noticeably larger, feel lighter, and show bubbles or an airy appearance. The surface may appear slightly rounded, and the dough should have some elasticity when handled. It is not always necessary for sourdough to double in size before shaping, particularly in warmer conditions where overfermentation can occur quickly. The goal is to develop enough fermentation for a flavorful, well-risen loaf while preserving the dough’s strength.
How Kitchen Temperature Affects Sourdough Fermentation
Temperature is one of the most important factors influencing the timing of sourdough bread preparation. The microorganisms in an active starter generally work faster in a warm kitchen and more slowly in a cool environment. This means two bakers using identical ingredients may experience different bulk fermentation times. The original recipe correctly emphasizes that fermentation depends on the temperature of the home rather than giving one fixed duration. In a warmer kitchen, the dough may become puffy and noticeably expanded within several hours. In cooler conditions, the same changes may take much longer. The amount of starter, flour characteristics, and dough temperature also influence the process. Monitoring the dough’s volume and texture is therefore more useful than following a strict schedule. If fermentation continues too long, the dough may become weak, sticky, and difficult to shape. If it is stopped too early, the finished bread may have a dense interior. Learning to recognize dough development helps improve consistency.
Shaping the Sourdough Bagel Bread into an Artisan Loaf
Once bulk fermentation is complete, the dough is ready to be shaped. Turn it onto a lightly floured work surface and handle it gently to avoid pressing out all the air developed during fermentation. The original recipe describes shaping the loaf before transferring it to a banneton, with an additional reference to creating a decorative turkey shape. For a standard loaf, gather the dough into a round or oval shape and create gentle surface tension by folding and tightening the outer layer. The goal is to produce a cohesive loaf that holds its form without tearing. A bench scraper can be helpful for moving the dough and controlling its shape. If a decorative turkey-shaped loaf is desired, the dough can be arranged with additional shaped sections, but these pieces may need to be reattached after boiling. Because boiling a large decorated loaf can be challenging, a simple round shape is the more practical option for most home bakers. Both approaches use the same dough formula.
Using a Banneton for Better Loaf Shape and Structure
A banneton, also called a proofing basket, supports the shaped sourdough loaf while it rests before baking. The original recipe instructs placing the shaped dough into a banneton after bulk fermentation. A well-floured basket helps prevent sticking and supports the dough’s shape during its final proof. Depending on the basket, the loaf may be placed seam-side up so that it can later be turned onto parchment paper for scoring. The banneton also helps prevent the dough from spreading too much while it rests. This is particularly useful for a loaf that will be handled again before baking. If the dough is decorated into a more complicated shape, make sure the basket can accommodate the design without compressing delicate sections. Covering the basket helps protect the dough from drying out during refrigeration. The banneton does not need to be expensive or decorative to work well. Its primary purpose is to provide support and help the dough maintain a consistent shape.
Why Cold Proofing Improves Sourdough Bread
Cold proofing, sometimes called cold retardation, is an important stage in this sourdough bagel bread recipe. After shaping, the dough is placed in the refrigerator for eight to twenty-four hours. During this period, fermentation continues at a slower rate, allowing the dough to develop flavor while becoming firmer and easier to handle. The cooler temperature can also make scoring more manageable because chilled dough generally holds its shape better than warm, soft dough. Longer refrigeration may create a more pronounced sourdough flavor, although the exact result depends on starter activity, refrigerator temperature, and the fermentation completed before chilling. The original recipe provides a flexible refrigeration window, making it convenient to fit baking into different schedules. A loaf prepared in the afternoon can often be baked the following morning, while a longer cold proof may suit a later baking time. Keep the dough covered during refrigeration to prevent the surface from drying out and forming an unwanted crust.
How to Score Sourdough Bagel Bread Before Baking
Scoring is the process of making controlled cuts in the surface of bread dough before baking. These cuts help guide expansion as the loaf heats and the gases inside begin to expand. The original recipe instructs scoring the dough after refrigeration and before boiling. For a standard round loaf, one confident expansion cut is often sufficient. A bread lame or sharp razor can be used to make a clean incision without dragging through the dough. Decorative scoring can also be added, but complicated designs may become less distinct during the boiling stage. If making the turkey-shaped variation mentioned in the original instructions, the decorative sections should be shaped carefully and handled gently. The boiling process may loosen smaller attached pieces, so they may need adjustment before baking. For most home bakers, a simple scoring pattern is easier to manage and more reliable. Because this recipe includes boiling before baking, the dough should be handled with particular care to preserve its shape.
Why This Sourdough Loaf Is Boiled Before Baking
The boiling step is what gives this recipe its strongest connection to traditional bagel making. Bagels are commonly boiled before baking because the hot water gelatinizes starches on the surface of the dough, helping create a distinctive chewy crust. This sourdough bagel bread recipe applies a similar technique to a larger loaf. The original instructions call for boiling the shaped bread for one to two minutes on each side before transferring it to parchment paper and baking. This is an unusual step for a full-sized sourdough loaf, so careful handling is essential. A large loaf is heavier and more delicate than an individual bagel, and it may be difficult to turn without damaging its shape. The boiling water should be deep enough to accommodate the loaf safely, and the pot should provide enough room for gentle movement. A large slotted utensil or suitable lifting tool may help. The goal is to briefly treat the outer surface rather than cook the interior.
Handling a Large Sourdough Loaf During Boiling
Boiling a full-sized sourdough loaf requires more care than boiling individual bagels because the dough is relatively large and can lose its shape when lifted. The original recipe instructs boiling the loaf for one to two minutes per side. Before beginning, prepare a large pot of water and make sure there is enough room for the dough to float without becoming trapped against the sides. The water should be boiling gently rather than splashing violently. Lower the chilled loaf carefully into the water using suitable heat-safe equipment. Avoid dropping it because hot water can splash and cause burns. After the first side has boiled, turn the loaf gently and complete the second side. Transfer it carefully to parchment paper or a suitable baking surface, allowing excess water to drain. The original baker noted that decorative turkey-shaped pieces needed reattachment after boiling, illustrating how easily complex shapes can become disturbed. A simple loaf shape is therefore more practical for this method.
Adding Extra Everything Bagel Seasoning Before Baking
The original recipe incorporates 40 grams of everything bagel seasoning during the stretch-and-fold process and also mentions sprinkling additional seasoning over the loaf after boiling. This finishing step gives the bread a more recognizable everything bagel appearance and adds extra flavor to the crust. Because the additional topping quantity is not specified, it should be treated as an optional finishing amount rather than included in the measured dough formula. The moist surface of the boiled loaf may help the seasoning adhere, making it easier to distribute evenly. Sprinkle the seasoning lightly across the top, avoiding excessively thick patches that could become bitter or burn during baking. Everything bagel seasoning often contains dried garlic and onion, which can brown quickly under high heat. The loaf should therefore be monitored during the uncovered portion of baking. The seasoning inside the dough provides the main flavor, while the optional surface topping adds visual appeal and a stronger savory aroma.
Baking Sourdough Bagel Bread in a Dutch Oven
A Dutch oven is a popular tool for baking artisan sourdough because its heavy construction retains heat and its lid traps steam during the first stage of baking. The original recipe uses a preheated Dutch oven at 450°F. The shaped and boiled loaf is transferred onto parchment paper and carefully placed into the hot baking vessel. The bread is baked covered for thirty minutes, allowing the trapped moisture to keep the surface flexible during the early stages of baking. This helps the loaf expand before the crust becomes firm. After thirty minutes, the lid is removed and the bread continues baking for another twenty minutes at the same temperature. The uncovered stage allows excess surface moisture to escape and encourages deeper browning. Because the loaf contains everything bagel seasoning, the top should be watched carefully to prevent the garlic and onion pieces from becoming excessively dark. The Dutch oven will be extremely hot, so thick oven mitts and careful handling are essential.
Understanding the Difference Between Covered and Open Baking
The supplied recipe mentions that two loaves were baked using different methods and that the open-baked loaf turned out better. This is useful information because boiling changes the surface of the dough, and the best baking method may differ from that used for ordinary sourdough. Covered Dutch oven baking traps steam, helping delay crust formation and encouraging expansion. Open baking allows moisture to escape more freely, which may help the boiled surface dry and brown more quickly. However, the exact result depends on the oven, loaf shape, dough fermentation, and amount of surface moisture remaining after boiling. The original instructions provide specific baking times only for the covered Dutch oven method, so those timings are preserved in the recipe card. Open baking is a possible variation, but it would require monitoring and potentially adjusting the baking process. For anyone making this bread for the first time, following the documented Dutch oven instructions provides a clear starting point. The finished loaf can then be evaluated before experimenting with another baking method.
Achieving a Golden Crust and Properly Baked Interior
A successful sourdough bagel loaf should have a well-browned exterior and an interior that is fully baked without becoming excessively dry. The original recipe bakes the loaf at 450°F for thirty minutes with the Dutch oven lid on, followed by twenty minutes uncovered. During the covered stage, the bread heats through and begins developing its internal structure. The uncovered stage encourages the crust to become darker and more flavorful. Because the loaf has been boiled before baking, its surface may behave differently from that of ordinary sourdough bread. The crust can develop a slightly firmer, chewier character, while the everything bagel seasoning may brown faster than the surrounding bread. A kitchen thermometer can be useful for checking doneness, with many lean sourdough loaves finishing around 205–210°F internally. This temperature is a general guide rather than a measurement supplied in the original recipe. The loaf should also feel firm and have a well-developed crust before being removed from the oven.
Why Sourdough Bagel Bread Needs Two Hours to Cool
Cooling is an important part of bread making because the interior continues settling after the loaf leaves the oven. The original recipe recommends placing the finished sourdough bagel bread on a cooling rack for two hours before cutting it. During this time, moisture redistributes through the crumb and the internal structure becomes more stable. Cutting into a very hot loaf can compress the soft interior and create slices that appear sticky or gummy, even when the bread has been baked properly. A wire cooling rack allows air to circulate around the loaf, helping prevent moisture from collecting underneath the crust. This is particularly useful for a bread that has undergone boiling before baking because the exterior may retain additional moisture. The aroma of everything bagel seasoning can make the bread tempting to slice immediately, but waiting improves the final texture. Once fully cooled, the loaf can be cut into even slices and enjoyed fresh or toasted.
What Texture Should You Expect from Everything Bagel Sourdough Bread?
This sourdough bagel bread has a texture that differs from both ordinary sandwich bread and traditional individual bagels. The use of bread flour and natural fermentation creates a structured, chewy interior, while the relatively generous amount of water keeps the dough softer than typical stiff bagel dough. The boiling step affects the surface, helping produce a crust with a bagel-inspired chew. Everything bagel seasoning adds small crunchy elements and a savory flavor throughout the loaf. Depending on fermentation and baking conditions, the crumb may contain a mixture of small and medium air pockets rather than the very tight texture associated with many bagels. The finished bread should be sturdy enough for slicing but tender enough to enjoy without excessive chewing. When toasted, the crust becomes crisper and the aromatic seasoning becomes more noticeable. The combination makes this bread particularly suitable for savory toppings and sandwiches. Its texture is best described as artisan sourdough with an everything bagel character.
Delicious Ways to Serve Homemade Sourdough Bagel Bread
Everything bagel sourdough bread is versatile because its savory flavor works with many breakfast and lunch foods. One of the simplest ways to serve it is toasted with butter or cream cheese, allowing the seasoning and tangy sourdough flavor to remain prominent. The bread also makes an excellent base for avocado toast, especially when topped with sliced tomatoes or a cooked egg. For a more substantial breakfast, use thick slices to prepare egg and cheese sandwiches. At lunchtime, the loaf can be used for turkey, chicken, or vegetable sandwiches, where its chewy texture helps support the fillings. It also pairs well with soups, salads, and savory spreads. Because everything bagel seasoning already contains several strong flavors, the bread often needs only simple accompaniments. Toasting can make the crust crispier and bring out the aroma of the dried garlic, onion, and seeds. Fresh slices are also enjoyable without additional toppings when the loaf has cooled properly.
How to Store Sourdough Bagel Bread After Baking
Proper storage helps preserve the texture and flavor of homemade sourdough bagel bread. Once the loaf has cooled completely, it can be stored in a bread bag or suitable container at room temperature for a short period. Keeping the bread away from excessive moisture helps prevent the crust from becoming unpleasantly soft, while avoiding direct exposure to air reduces drying. For best quality, homemade sourdough is generally enjoyed within the first few days after baking. If the loaf will not be eaten soon, freezing is a practical option. Slice the bread after it has cooled, separate the slices if necessary, and place them in a freezer-safe bag or container. Frozen slices can be toasted directly or thawed before serving. Refrigerating bread is usually less desirable because it can accelerate staling, although storage needs may vary in very warm or humid environments. Because this loaf contains seeds and dried seasoning, inspect it before serving and discard any bread showing signs of mold.
Notes on Preventing Dense Sourdough Bagel Bread
A dense loaf can result from several factors, including an inactive starter, insufficient fermentation, weak dough structure, or excessive handling. This recipe relies entirely on natural sourdough fermentation, so starter strength is especially important. Use a starter that has been fed and is showing visible activity before mixing the dough. During the early stages, complete the three sets of folds to help develop gluten strength. Allow bulk fermentation to continue until the dough becomes noticeably expanded and airy, rather than shaping it simply because a certain number of hours has passed. At the same time, avoid letting the dough ferment so long that it becomes weak and difficult to handle. The boiling step can also affect the final loaf if the dough is moved roughly or left in the water too long. Gentle handling during shaping, boiling, and transfer to the baking vessel helps preserve the gas developed during fermentation. Following these principles improves the chance of a well-structured interior.
Notes on Avoiding a Flat or Spread-Out Loaf
A sourdough loaf that spreads excessively may have insufficient gluten strength, too much fermentation, or weak shaping. The original recipe uses bread flour and three sets of stretch and folds, both of which help build structure. During mixing, make sure the flour is fully hydrated so that the dough develops evenly. Perform the folds gently but thoroughly, allowing the dough to rest between sets. When bulk fermentation is complete, shape the dough with enough surface tension to hold a rounded or oval form. A properly floured banneton supports the loaf during its refrigerated proof. The cold rest also firms the dough, making it easier to handle. However, this recipe includes boiling, which introduces an additional opportunity for the loaf to lose its shape. A large sourdough loaf is more delicate than a small bagel, so transferring it into and out of the water requires care. Keeping the shape simple and avoiding unnecessary handling can help reduce spreading.
Notes on Working with Everything Bagel Seasoning
Everything bagel seasoning adds flavor, but its ingredients can influence both the dough and the finished crust. The original recipe uses 40 grams during the folding process, and this quantity should remain unchanged. Since many seasoning blends contain salt, garlic, onion, sesame seeds, and poppy seeds, their flavor can vary noticeably between brands. Some blends are particularly salty, while others contain a higher proportion of seeds. The recipe also includes 10 grams of salt in the dough, so using a strongly salted seasoning may produce a more intensely savory loaf. Dried onion and garlic can absorb some moisture during fermentation, although the effect depends on the blend. During baking, these ingredients may brown faster than the bread itself, especially when additional seasoning is sprinkled over the top. Monitor the loaf during the uncovered baking stage and avoid unnecessary extra browning. For the most consistent result, use the same seasoning blend each time and distribute it evenly during the folds.
Notes on the Decorative Turkey-Shaped Bread Variation
The original instructions include a reference to shaping the sourdough loaf into a turkey design and mention that the legs needed to be reattached after boiling. This appears to describe a decorative presentation rather than an essential part of the bread recipe. A turkey-shaped loaf may be appealing for Thanksgiving or another seasonal gathering, but it requires additional care because the dough includes separate shaped sections. When the loaf is boiled, these smaller pieces may loosen or detach, especially if the dough is turned or lifted roughly. If attempting this presentation, the main body should be shaped securely, and any decorative sections should be attached as firmly as possible before refrigeration. After boiling, inspect the loaf and adjust any pieces that have moved before baking. The original baker’s experience suggests that open baking may be easier for maintaining the appearance of this design, although specific open-baking instructions were not supplied. For a straightforward everyday loaf, a simple round or oval shape is more reliable.
Notes on Choosing Between a Dutch Oven and Open Baking
The original recipe provides detailed Dutch oven baking instructions while also reporting that an open-baked version produced a better result. Both methods can be used for artisan sourdough, but they create different baking environments. A covered Dutch oven retains moisture around the loaf, encouraging expansion during the first stage. Open baking exposes the crust directly to the oven’s heat, allowing surface moisture to escape more quickly. Because this bread is boiled before baking, the amount of moisture on the exterior may influence how the crust develops. A loaf that remains very wet after boiling could benefit from careful draining before being placed in the oven. The documented method uses thirty minutes covered and twenty minutes uncovered at 450°F. Anyone choosing to experiment with open baking should monitor the loaf carefully because the original recipe does not provide a verified alternative schedule. For consistent results, follow the supplied Dutch oven method first and make adjustments only after observing how the bread performs in your oven.
Notes on Making the Sourdough Baking Schedule Easier
Sourdough baking becomes more manageable when the preparation stages are organized around the dough’s natural fermentation. This recipe begins with mixing and a thirty-to-sixty-minute rest, followed by three sets of folds. Bulk fermentation then continues until the dough shows clear signs of readiness. After shaping, the loaf is placed in a banneton and refrigerated for eight to twenty-four hours. This flexible cold-proofing period makes it possible to separate dough preparation and baking into different days. For example, the dough can be mixed in the morning, folded during the early part of fermentation, shaped later in the day, and refrigerated overnight. The following day, the loaf can be scored, boiled, and baked. The exact schedule will vary because starter activity and room temperature affect fermentation. It is more important to watch the dough than to force it into a fixed timetable. Planning ahead also ensures that there is enough time for the required two-hour cooling period before slicing.
Why Homemade Everything Bagel Sourdough Bread Is a Great Baking Project
Homemade Everything Bagel Sourdough Bread offers a flavorful variation on traditional artisan sourdough while introducing techniques associated with bagel making. The recipe uses a simple combination of water, active starter, bread flour, salt, and everything bagel seasoning, but the finished loaf has a distinctive character. Natural fermentation develops the sourdough flavor, stretching and folding strengthens the dough, and cold proofing makes the loaf easier to handle before baking. The brief boiling step gives the bread a bagel-inspired exterior, while baking at a high temperature produces a browned crust and a chewy interior. Although boiling a full-sized loaf requires extra care, the method provides an interesting challenge for bakers who want to try something beyond ordinary sourdough. The bread is suitable for breakfast toast, sandwiches, and savory meals, making it useful beyond a single occasion. With patience during fermentation and careful handling during boiling and baking, this recipe produces a memorable homemade loaf with the familiar flavor of everything bagels.
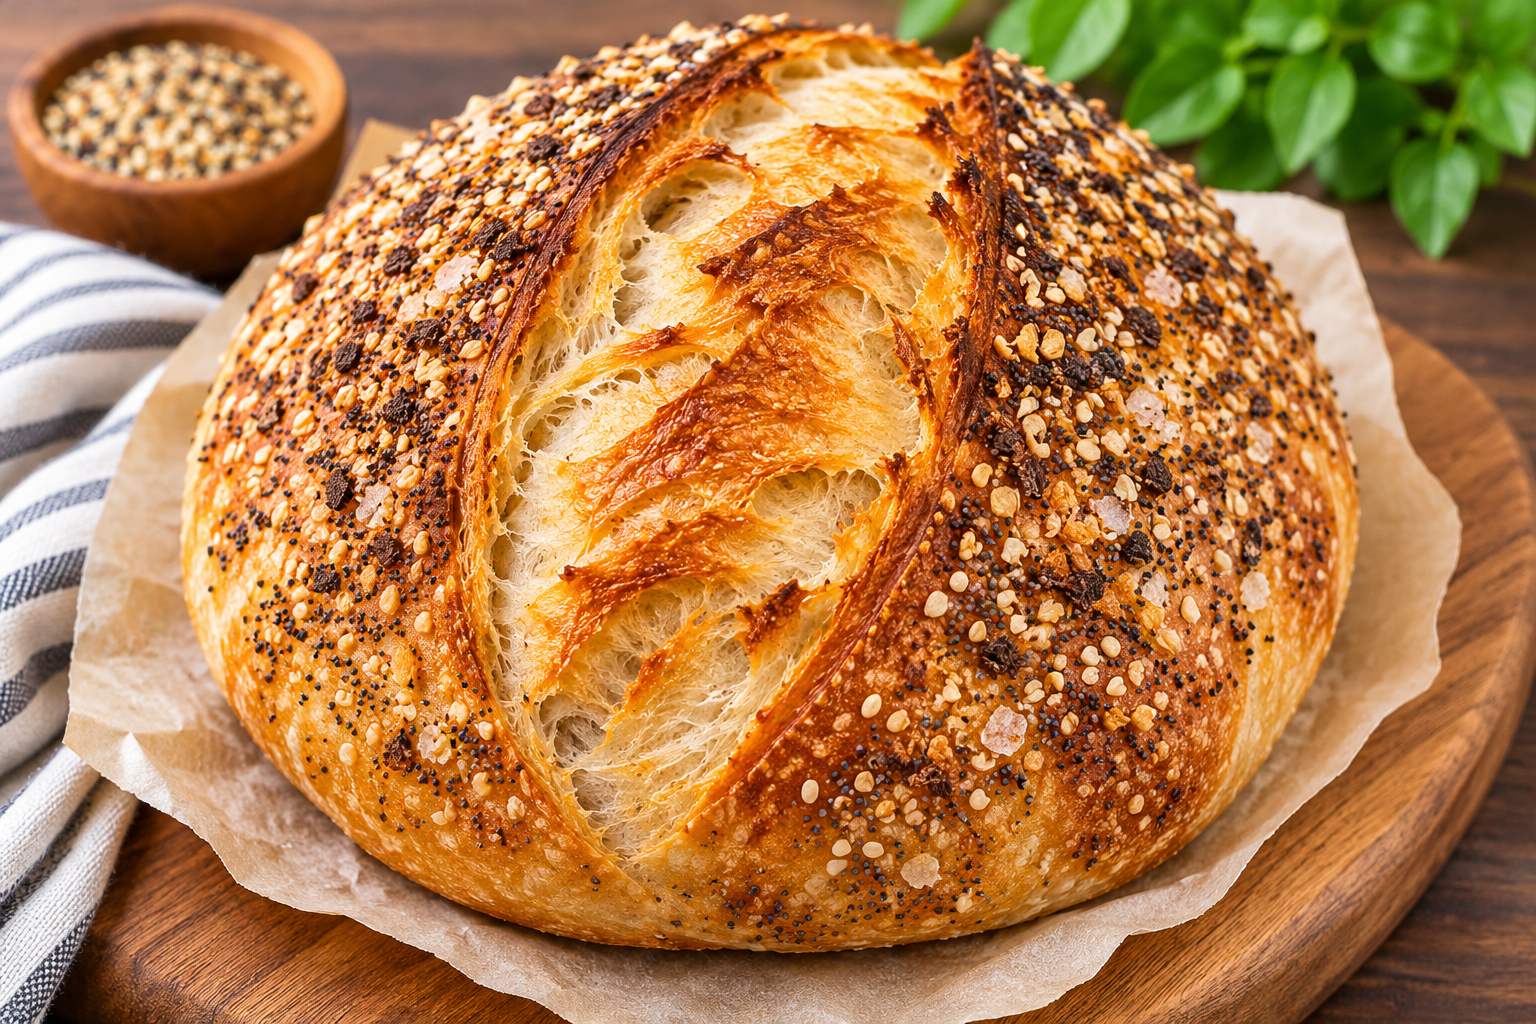
Everything Bagel Sourdough Bread
A savory artisan sourdough loaf made with active sourdough starter, bread flour, and everything bagel seasoning. The dough is naturally fermented, refrigerated overnight, briefly boiled, and baked to create a chewy, bagel-inspired crust with a flavorful sourdough interior.
1
servings10
minutes60 minutes
10 Hours
2 mimutes
50 minutes
Ingredients
- For the Sourdough Bagel Bread Dough
350 g water
100 g active sourdough starter
500 g bread flour
10 g salt
40 g Everything Bagel Seasoning (added during stretch and folds)
- Optional Finishing Topping
Additional Everything Bagel Seasoning, for sprinkling after boiling (quantity not specified in the original instructions)
Directions
- In a large mixing bowl, combine 350 g water and 100 g active sourdough starter.
Add 500 g bread flour and 10 g salt.
Mix until all ingredients are combined and no dry flour remains. Keep the everything bagel seasoning aside for the folding stage. - Cover the mixing bowl and allow the dough to rest for 30–60 minutes.
This resting period helps the flour absorb the water and makes the dough easier to handle. - Perform the first set of stretch and folds or coil folds.
Gently lift and fold the dough to develop gluten strength without tearing it. - During the folding process, add the 40 g of everything bagel seasoning.
Distribute it evenly through the dough while continuing the folds.
Complete a total of three sets of stretch and folds or coil folds, allowing the dough to rest between sets. - Cover the bowl and leave the dough to bulk ferment at room temperature.
The fermentation time will depend on the temperature of the kitchen and the activity of the sourdough starter.
Allow the dough to become noticeably larger, puffy, and airy before moving to the shaping stage. - Transfer the fermented dough onto a lightly floured work surface.
Shape it into a round or oval loaf, creating enough surface tension to help it hold its form.
A decorative turkey-shaped loaf may also be made, as mentioned in the original instructions, although a simple loaf shape is easier to boil. - Transfer the shaped dough into a well-floured banneton or proofing basket.
Cover it to prevent the surface from drying out. - Place the banneton in the refrigerator for 8–24 hours.
This cold-proofing stage allows the dough to develop additional flavor and become firmer before baking. - Preheat the oven to 450°F (232°C).
If using a Dutch oven, preheat it according to the manufacturer’s guidance.
Prepare a large pot of water for boiling the loaf. - Remove the dough from the refrigerator.
Carefully turn it out and score the surface using a bread lame or sharp knife.
If making the decorative turkey-shaped variation, arrange the shaped sections before boiling. - Carefully lower the loaf into gently boiling water.
Boil for 1–2 minutes on the first side.
Turn the loaf carefully and boil for another 1–2 minutes on the opposite side.
Lift the bread out gently and allow excess water to drain.
Important: Boiling a full-sized sourdough loaf is more difficult than boiling individual bagels. Use a sufficiently large pot and suitable heat-safe utensils to avoid splashing and damaging the dough. - Transfer the boiled bread onto parchment paper.
If desired, sprinkle a little additional everything bagel seasoning over the surface.
For a decorative loaf, gently reattach any pieces that loosened during boiling. - Carefully place the loaf into the preheated Dutch oven.
Cover with the lid and bake at 450°F for 30 minutes. - Remove the Dutch oven lid carefully.
Continue baking at 450°F for another 20 minutes, or until the loaf has a well-browned crust and is baked through. - Transfer the finished bread to a wire cooling rack.
Allow it to cool for approximately 2 hours before slicing.
Serve fresh or toasted with your preferred savory toppings.
Notes
- Recipe Notes
Use an active sourdough starter for reliable fermentation.
Bread flour helps develop a strong dough structure and chewy texture.
Allow the dough to rest for 30–60 minutes before the folding process.
Complete three sets of stretch and folds or coil folds.
Add the measured 40 g of everything bagel seasoning during folding.
Bulk fermentation depends on room temperature and starter activity.
Shape the loaf gently to preserve the air developed during fermentation.
Refrigerate the shaped dough for 8–24 hours.
Use a well-floured banneton to prevent sticking.
Boil the loaf for 1–2 minutes per side, handling it carefully.
The boiling step is unusual for a large sourdough loaf and may cause delicate decorative sections to loosen.
Additional seasoning may be sprinkled over the boiled loaf before baking.
Bake covered for 30 minutes at 450°F, followed by 20 minutes uncovered.
The original baker reported that an open-baked loaf turned out better, but did not provide a separate open-baking schedule.
Allow the finished bread to cool for 2 hours before slicing.
Store cooled bread properly and freeze extra slices if needed.