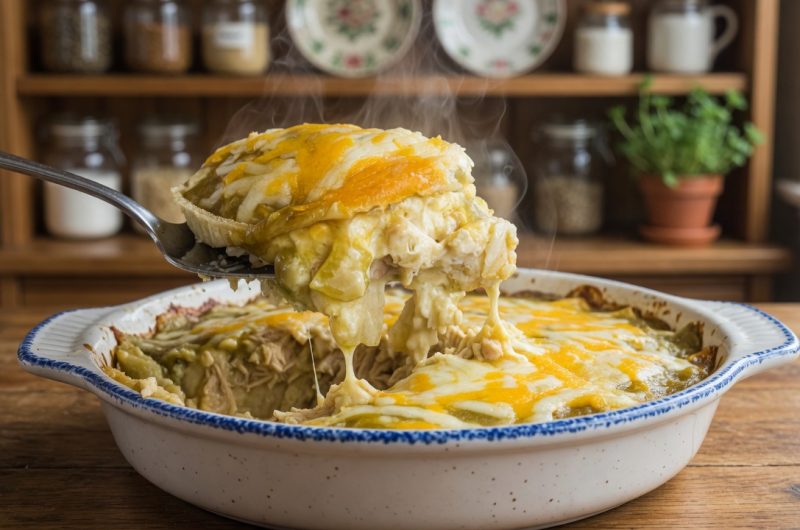
Weeknight dinners often come down to a choice between something quick or something flavorful, but this green chili chicken enchilada casserole gives you both without any compromise. Ready in about 40 minutes, this dish layers tender chicken, melted cheese, and tangy green chili sauce between corn tortillas for a meal that feels far more special than the effort it actually requires. It’s the kind of recipe that works just as well for a hectic Tuesday night as it does for a relaxed Sunday family dinner.
What Makes Green Chili Enchiladas Different from Red
Most people are familiar with red enchilada sauce, but green chili sauce brings a completely different flavor profile to the table. Made primarily from tomatillos and green chilis rather than red chilis and tomatoes, green enchilada sauce tends to have a brighter, tangier taste with a milder heat level compared to its red counterpart. This makes it a great option for anyone who wants Mexican-inspired flavor without an overwhelming amount of spice, while still delivering plenty of zest in every bite.
Choosing the Right Chicken for This Recipe
This casserole calls for two cups of cooked chicken breast, and how you prepare that chicken is entirely up to your schedule and preference. Canned chicken works in a pinch and requires zero prep time, making it the fastest option available. If you have a bit more time or want a richer flavor, picking up a rotisserie chicken from the grocery store and shredding it yourself adds a noticeably fresher taste without requiring you to cook the chicken from scratch at home.
The Cheese Blend That Makes This Casserole Shine
Cheese plays a starring role in any good enchilada casserole, and this recipe calls for two cups of shredded cheddar or Monterey jack, though combining both varieties gives you the best of both worlds. Cheddar brings a sharper, more pronounced flavor, while Monterey jack melts smoothly and adds a milder, creamier quality to each bite. Mixing the two together creates a more complex cheese flavor throughout the casserole rather than relying on just one note from start to finish.
Understanding the Role of Sour Cream and Cream of Chicken Soup
The combination of sour cream and cream of chicken soup might seem like an unusual pairing, but together they create the creamy, cohesive filling that holds this casserole together. Sour cream contributes a tangy richness that balances out the heat from the green chilis, while the cream of chicken soup adds body and a deeper savory flavor to the overall mixture. Without these two ingredients, the filling would be much thinner and less satisfying in terms of texture.
Why Corn Tortillas Work Best Here
Using six-inch corn tortillas in this recipe keeps things authentic to traditional Mexican cooking while also making the dish naturally gluten-free. Corn tortillas hold up reasonably well when layered with sauce, though they do soften more than flour tortillas would, which actually works in this casserole’s favor by helping everything meld together into a cohesive dish rather than staying in distinct, separate layers. Twelve tortillas gives you enough to build three solid layers throughout the casserole.
Preparing Your Oven and Workspace
Before you start mixing anything together, preheat your oven to 350 degrees Fahrenheit so it’s fully heated by the time your casserole is assembled and ready to bake. Getting the oven going early saves you from waiting around later and ensures your casserole starts cooking evenly the moment it goes in. While the oven heats up, this is also a good time to get your baking dish and all your ingredients gathered together within easy reach.
Mixing the Chicken Filling Correctly
In a large mixing bowl, combine your cream of chicken soup, sour cream, a portion of the green chili enchilada sauce, and a dash of salt and pepper to taste. Stir these ingredients together until they form a smooth, unified base before folding in your cooked chicken and the diced green chilis. Make sure the chicken and chilis are evenly distributed throughout the creamy mixture, since this filling will be spread across multiple layers of the casserole.
Building the First Layer of Your Casserole
Start assembling your casserole by spreading a portion of the green chili enchilada sauce across the bottom of your baking dish. This bottom layer of sauce is important because it prevents the tortillas from sticking to the dish and infuses flavor into every single bite from the very first layer up. Once the sauce is spread evenly, arrange a layer of corn tortillas over it, making sure they cover the entire surface of the dish without too many gaps.
Layering the Chicken Mixture and Cheese
Spread about one-third of your prepared chicken mixture evenly over the tortillas, then drizzle a bit more enchilada sauce on top to keep everything moist and flavorful. Continue building additional layers using more tortillas, chicken mixture, and sauce, repeating this pattern until you’ve created three total layers. After completing your second layer of chicken and sauce, sprinkle a portion of your shredded cheese blend across the top before continuing on to the next layer.
Finishing the Top Layer for Maximum Flavor
Once you’ve built all three layers, finish the casserole with one final layer of tortillas topped generously with the remaining enchilada sauce, making sure every corner and edge gets good coverage. Sprinkle whatever cheese you have left over the very top, creating a thick, even blanket that will melt into a golden, bubbly finish as it bakes. This top layer of cheese is what gives the casserole its irresistible, gooey appearance once it comes out of the oven.
Baking Your Casserole to Bubbly Perfection
Place your fully assembled casserole into the preheated oven and let it bake for approximately 30 minutes. You’re looking for the cheese on top to be fully melted and slightly golden in spots, with the sauce bubbling gently around the edges of the dish. If your oven tends to run hot, start checking a few minutes early to avoid over-browning the cheese before the inside has had a chance to heat through completely.
Letting the Casserole Rest Before Serving
Once your casserole comes out of the oven, resist the urge to cut into it immediately. Letting it rest for five to ten minutes allows the layers to settle and firm up slightly, which makes serving much easier and helps the casserole hold its shape when you scoop out a portion. Cutting into it too soon often results in a messier, less structured slice, even though the flavor will still be just as good.
Topping Ideas to Customize Your Casserole
Part of what makes this casserole so enjoyable is how easily it can be customized with different toppings once it’s served. A dollop of sour cream on top adds extra creaminess, while a spoonful of fresh salsa brings brightness and acidity to balance the richness of the cheese and sauce. Shredded lettuce and diced tomatoes add a fresh, crunchy contrast, and if you’re someone who enjoys extra heat, sliced jalapeños or a pinch of cayenne pepper mixed into the filling beforehand can kick things up a notch.
Adjusting the Spice Level to Your Taste
This recipe is naturally on the milder side thanks to the green chili sauce, making it approachable for most palates, including families with kids who might be sensitive to spicy food. If you prefer more heat, adding sliced jalapeños directly into the chicken filling or sprinkling cayenne pepper into the mixture before assembling the casserole are both easy ways to increase the spice level without changing the overall structure or cooking process of the dish.
Making This Casserole Ahead of Time
If you’re looking to save time on a particularly busy day, this casserole can be assembled ahead of schedule and stored in the refrigerator, covered tightly, until you’re ready to bake it. This makes it a convenient option for meal prepping or for having something ready to pop in the oven after a long day at work. Just keep in mind that baking time might need a few extra minutes if the casserole is going into the oven cold from the refrigerator rather than freshly assembled.
Storing and Reheating Your Leftovers
Leftover casserole keeps well in the refrigerator for a few days when stored in an airtight container, making it a great option for lunches or a quick dinner later in the week. To reheat, place individual portions in the oven or microwave until warmed through, though the oven tends to do a better job of restoring some of that original texture compared to the microwave, which can sometimes leave the tortillas a bit softer than you’d like.
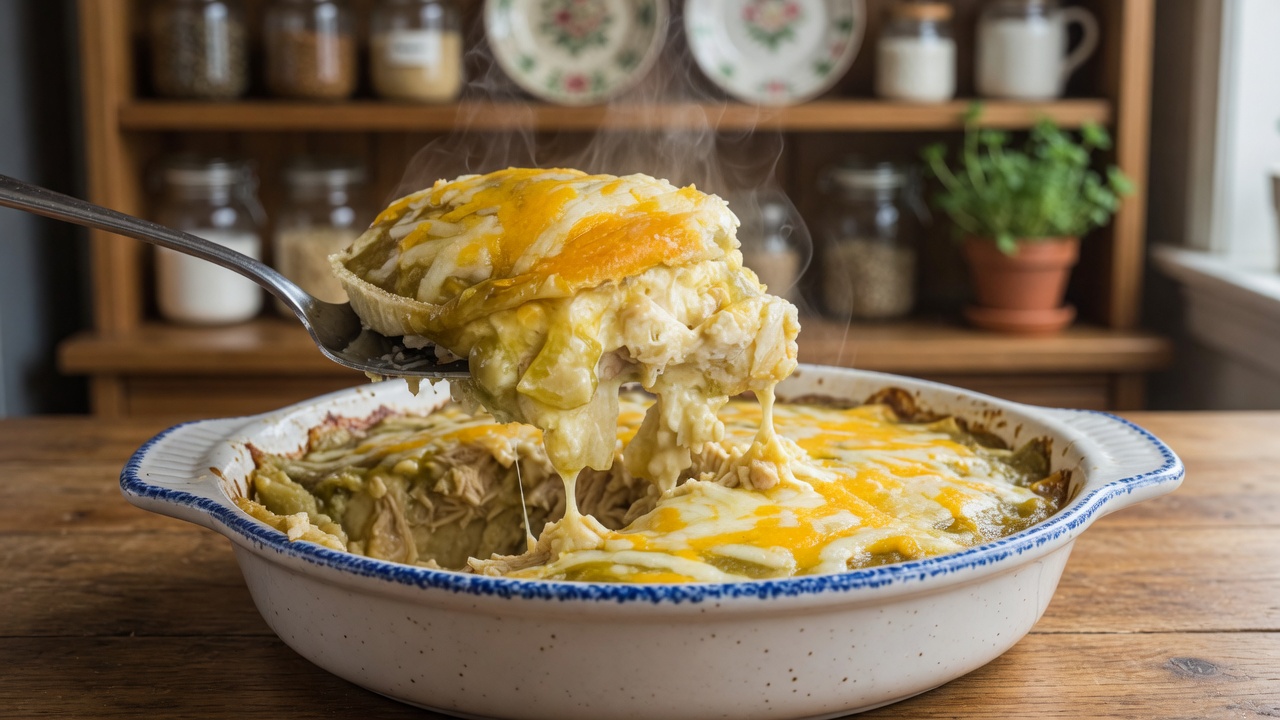
Green Chili Chicken Enchilada Casserole
This green chili chicken enchilada casserole layers tender chicken, melted cheese, and tangy green chili sauce between corn tortillas for an easy, flavorful dinner. Ready in about 40 minutes, it’s a great option for busy weeknights or casual family meals.
8
servings15
minutes30
minutes275
kcal45
minutesIngredients
2 cups cooked chicken, shredded or diced
2 cups shredded cheddar cheese
⅓ cup sour cream
4 ounces canned diced green chilis, drained if needed
15 ounces canned green chili enchilada sauce
12 6-inch corn tortillas
10.5 ounces cream of chicken soup
Salt and pepper, to taste
- Topping Options:
Sour cream
Salsa
Shredded lettuce
Tomatoes
Jalapeños
Directions
- Preheat your oven to 350 degrees Fahrenheit.
- In a large bowl, mix together the cream of chicken soup, sour cream, 1/3 cup of enchilada sauce, salt, and pepper. Add the chicken and diced green chilis, stirring until well combined.
- Pour 1/4 cup of enchilada sauce into the bottom of an 8-inch x 8-inch baking pan and spread it evenly.
- Place 3 tortillas to cover the bottom of the pan, cutting or tearing them as needed to fill gaps.
- Spread 1/3 of the chicken mixture over the tortillas, followed by 1/3 cup of enchilada sauce. Cover with 3 more tortillas.
- Repeat the layering process with another 1/3 of the chicken mixture, 1/3 cup of enchilada sauce, and 1 cup of shredded cheese, followed by 3 more tortillas.
- Add the remaining chicken mixture over the tortillas, followed by 1/3 cup of enchilada sauce. Cover with the remaining tortillas.
- Pour the remaining enchilada sauce over the top of the casserole, ensuring all tortillas are covered. Sprinkle the remaining cup of cheese over the sauce.
- Bake for 25 to 30 minutes, until the cheese is melted and the casserole is bubbly.
- Remove from the oven and let it rest for 5 to 10 minutes before serving. Enjoy your flavorful Green Chili Chicken Enchilada Casserole with your favorite toppings!
Notes
- Nutrition information does not include toppings.
Nutrition Facts
- Calories: 275kcal
- Fat: 15g
- Cholesterol: 38mg
- Potassium: 148mg
- Carbohydrates: 26g
- Fiber: 4g
- Sugar: 5g
- Protein: 11g