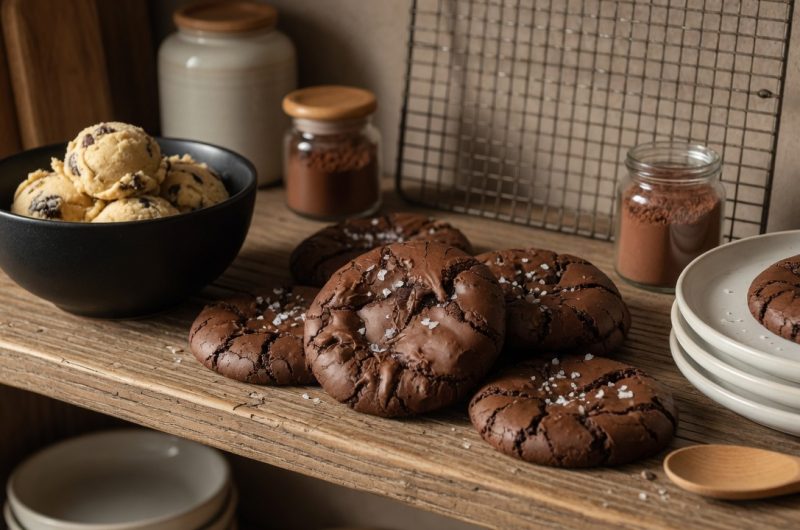
These brownie cookies sit somewhere between a classic brownie and a soft-baked cookie, giving you the best qualities of both in one bite. The crackly top and fudgy center you’d expect from a good brownie pan come together here in individual cookie form, making them easier to portion and share. Adding sourdough discard into the mix brings a subtle tang that plays surprisingly well against the deep chocolate flavor, while keeping the recipe completely gluten-free thanks to a combination of cocoa powder and tapioca flour instead of wheat.
Why Sourdough Discard Works So Well in Chocolate Desserts
Sourdough discard often gets used in bread and pancakes, but chocolate desserts are an underrated place to put it to use. The slight acidity from the discard doesn’t compete with chocolate’s flavor, it actually rounds it out, adding depth without making the finished cookie taste sour or overly tangy. Because this recipe doesn’t rely on the discard for rising power, it works whether your starter is freshly fed and bubbly or has been sitting in the fridge for a few days waiting to be used.
Understanding Why This Recipe Is Naturally Gluten-Free
Instead of relying on a gluten-free flour blend, this recipe uses tapioca flour combined with cocoa powder to build its structure, making it naturally free of gluten without needing any special substitutions. Tapioca flour has a light, slightly stretchy quality when baked, which helps give these cookies their soft, chewy texture rather than something dense or gritty. This makes the recipe a good option for anyone avoiding gluten without having to hunt down a specific blend at the store.
Gathering Your Ingredients Before You Begin
Before turning on your oven, gather everything the recipe requires so you’re not scrambling partway through. You’ll need butter, dark chocolate with around 70 percent cocoa content, caster sugar, one extra-large egg, sourdough starter discard, cocoa powder, tapioca flour, baking powder, fine salt, vanilla bean paste if you’re using it, and sea salt flakes for finishing. Having your chocolate already chopped and your egg at room temperature will help the mixing process go much more smoothly once you get started.
Why Browning the Butter Makes a Real Difference
Rather than simply melting the butter, this recipe calls for browning it first, which is a small extra step that pays off significantly in flavor. Browning butter involves cooking it slowly until the milk solids toast and turn golden brown, giving off a distinctly nutty aroma. Aim to end up with about 40 grams of butter once it’s browned, since some volume is lost to evaporation during the browning process. This nutty, toasted flavor carries through into the finished cookies, adding complexity you wouldn’t get from plain melted butter.
Melting the Chocolate Using a Double Boiler
Once your butter has browned, fill your saucepan about halfway with water and set it over medium heat. Pour the browned butter into a heatproof bowl, then rest that bowl over the saucepan, making sure the bottom doesn’t actually touch the water below. Add your chopped dark chocolate to the bowl and stir occasionally as it melts into the butter. This gentle, indirect heat method prevents the chocolate from scorching or seizing up, which can happen easily if it’s melted directly over high heat.
Whipping the Egg and Sugar to the Right Consistency
While your chocolate is melting, turn your attention to the egg and sugar mixture. Combine the caster sugar and egg in the bowl of a stand mixer fitted with the whisk attachment, then beat on medium-high speed for seven to ten minddutes. This might feel like a long time compared to other cookie recipes, but this extended whipping is what gives these cookies their signature crackly, shiny top once baked. The mixture should turn noticeably pale and slightly fluffy by the time you’re done.
Preparing the Dry Ingredients Separately
In a separate bowl, whisk together your cocoa powder, tapioca flour, baking powder, and salt until they’re evenly combined. Mixing these dry ingredients together before adding them to the wet mixture helps ensure the baking powder and salt get distributed evenly throughout the batter, rather than ending up concentrated in one spot. This step only takes a minute or two but makes a noticeable difference in how evenly your cookies bake and rise.
Bringing the Wet Ingredients Together
Once your egg and sugar mixture has lightened in color and turned fluffy, reduce your mixer speed and add the sourdough starter discard directly into the bowl. Follow this by gradually pouring in your melted chocolate and butter mixture, mixing until everything is thoroughly combined and you no longer see streaks of chocolate sitting separately from the egg mixture. Take your time with this step, since rushing it can leave pockets of unmixed chocolate throughout your batter.
Folding in the Dry Ingredients Gradually
Rather than dumping all your dry ingredients in at once, spoon the cocoa and tapioca flour mixture in gradually, allowing each addition to mix in fully before adding more. This gradual approach helps prevent flour pockets from forming and gives you better control over the final batter consistency. Use a spatula to scrape down the sides of the bowl periodically, since batter tends to cling to the edges and can go unmixed if you don’t check on it during this process.
Adding Vanilla Without Making a Mess
If you’re using vanilla bean paste, this is the point to add it, but it helps to briefly turn off your mixer first. Vanilla bean paste has a slightly sticky consistency that can catch and tangle around the whisk attachment if added while the mixer is running, creating an unnecessary mess. Turn the mixer off, add the vanilla, then turn it back on and continue mixing until it’s fully incorporated throughout the batter.
What the Finished Batter Should Look Like
Once everything is combined, your batter should have a notably thick consistency, though it will still be thinner and more pourable than a typical cookie dough you might be used to working with. This looser texture is normal for this recipe and is part of what allows the cookies to spread slightly into that classic brownie cookie shape while baking, rather than staying in a tall, rounded mound like a traditional drop cookie.
Setting Up Your Baking Trays Properly
Lightly grease or moisten two large baking trays, then line them with baking paper to keep it from sliding around while you’re working. This extra step of moistening the tray slightly before adding the paper helps the paper stay put, which makes the scooping and spacing process much easier and less frustrating, especially since this batter is on the looser, stickier side compared to firmer cookie doughs.
Scooping and Spacing Your Cookies
Using two spoons, scoop out approximately one and a half tablespoons of batter per cookie, placing them onto your prepared trays with enough space between each one to allow for spreading during baking. Try to shape each scoop into a smooth, rounded blob rather than leaving jagged edges, since this affects how evenly the cookies spread and crackle in the oven. Finish each one with a small pinch of sea salt flakes sprinkled over the top before baking.
Baking Time and What to Watch For
Place both trays into your preheated oven and bake for six to seven minutes, watching for the tops to develop that signature crackled appearance while the centers remain soft to the touch. Swap the position of the trays halfway through baking, since most home ovens have hot spots that can cause uneven baking if you don’t rotate things partway through. Keep a close eye near the end, since even an extra minute can shift these cookies from fudgy to overbaked.
Cooling Cookies for the Best Texture
Once your cookies come out of the oven, resist moving them right away, since they need time to firm up while still on the trays. For the chewiest, fudgiest texture, let them cool completely before eating, even though the smell coming from your kitchen will make that difficult. The center continues to set as they cool, so cutting the cooling time short often results in a cookie that falls apart rather than holding together properly.
Storing Your Brownie Cookies Properly
Once fully cooled, store any cookies you don’t eat right away in an airtight container in the refrigerator to keep them fresh. The cold storage helps maintain their fudgy texture for longer, though they can also be enjoyed at room temperature if you prefer a slightly softer bite. Because these cookies contain sourdough discard, refrigeration is a smart choice to keep them tasting fresh for as many days as possible.
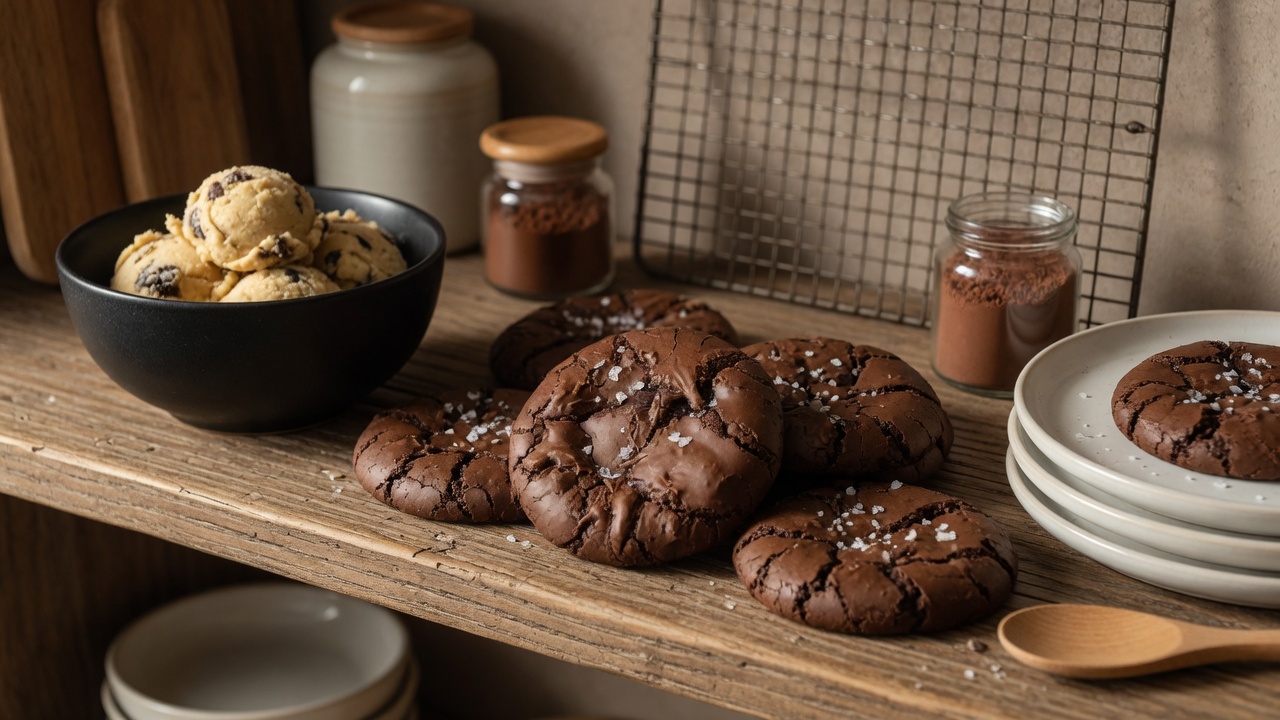
Gluten-Free Sourdough Brownie Cookies
These gluten-free sourdough brownie cookies combine rich dark chocolate, browned butter, and a touch of sourdough discard for a fudgy, crackly-topped treat. Naturally gluten-free thanks to cocoa powder and tapioca flour, they’re a great way to use up extra starter.
4
servings20
minutes15
minutes35
minutesIngredients
50g butter
200g dark chocolate (70% sweetened cooking chocolate)
150g caster sugar
1 extra-large egg
110g sourdough starter discard or on a rise
20g cocoa powder
20g tapioca flour
1/4 teaspoon baking powder
1/4-1/2 teaspoon fine salt
1 teaspoon vanilla bean paste (optional)
Sea salt flakes to finish
Directions
- Preheat and Brown: Preheat oven to 180°C (320°F). In a small saucepan, brown butter until golden and fragrant. It should weigh about 40g after browning.
- Melt Chocolate: Fill the saucepan halfway with water, heat it, then place a heatproof bowl on top. Add butter to the bowl, melt, and add chocolate. Stir until fully melted. Set aside.
- Beat Egg Mixture: In a kitchen mixer, whisk caster sugar and egg until light and fluffy, about 7-10 minutes on medium-high speed.
- Combine Dry Ingredients: In a separate bowl, whisk cocoa powder, tapioca flour, baking powder, and salt.
- Incorporate Ingredients: Gradually add sourdough starter to the egg mixture on low speed. Pour in melted chocolate and mix until combined.
- Add Dry Mixture: Spoon in dry ingredients gradually, mixing well after each addition. Scrape down sides of the bowl as needed.
- Optional Vanilla: Turn off mixer briefly to add vanilla bean paste, if using. Mix until combined.
- Prepare Baking Sheets: Lightly grease or moisten two baking trays and line with parchment paper.
- Scoop and Place: Use two spoons to scoop batter onto the trays, about 1 1/2 tablespoons per cookie. Leave space between each cookie for spreading.
- Sprinkle and Bake: Sprinkle sea salt flakes on top of each cookie. Bake for 6-7 minutes until crackly on top but still soft. Swap trays halfway through baking.
- Cool and Enjoy: Once baked, let cookies cool on the trays to firm up. For best texture, cool completely before serving. Store leftovers in an airtight container in the fridge.
Notes
- Store leftovers in an airtight container in the refrigerator to keep them fresh longer.