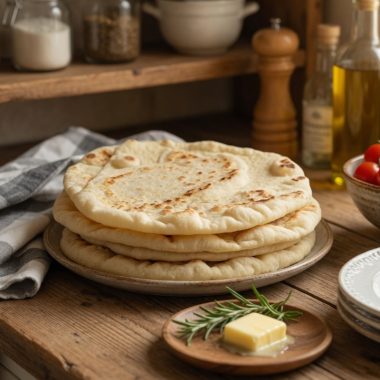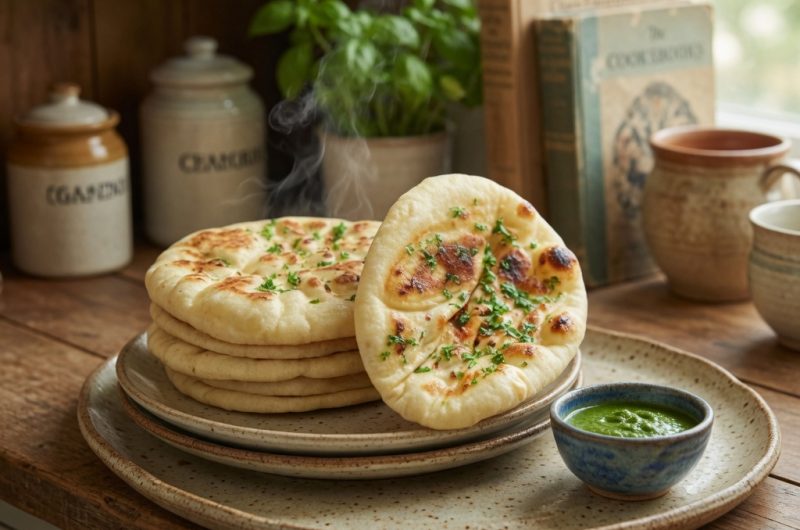
Learning to bake naan bread at home using freshly milled flour transforms your cooking and brings authentic flavors into your kitchen. This traditional Indian flatbread has been enjoyed for centuries, and making it yourself gives you complete control over ingredients and quality. The process of creating naan from scratch is surprisingly straightforward, requiring only basic kitchen tools and simple ingredients that you probably already have on hand. When you make naan at home instead of purchasing it from a bakery or grocery store, you gain the satisfaction of knowing exactly what goes into your food. The soft, slightly chewy texture of homemade naan combined with its authentic taste makes this flatbread a favorite across many households. This easy recipe will help you master the technique of crafting naan bread right in your own kitchen, using wholesome ingredients that deliver exceptional results. You do not need any fancy equipment or specialized kitchen gadgets to succeed with this recipe. Everything you need is likely already in your kitchen, including your hands, a mixing bowl, and a hot skillet or cast iron pan.
Understanding the Benefits of Using Freshly Milled Flour
Freshly milled flour stands out dramatically from the commercial flour you find in supermarkets because of how it is processed and what nutrients it retains. When whole grains are milled at home or in small batches, they maintain the essential oils and natural flavors that are lost during the industrial processing of commercial flour. These natural oils and compounds contribute significantly to the taste, aroma, and overall quality of your baked goods. The freshness of flour that was milled recently translates directly into naan that has superior depth of flavor and a more interesting texture profile. Using flour that is only days old rather than months old makes a genuine difference that you will notice as soon as you taste your naan. Beyond flavor considerations, freshly milled flour retains more of the nutrients from the original grains, including fiber, vitamins, and minerals that commercial processing removes. For health-conscious home bakers, this means the naan you create is more nutritious than versions made with standard all-purpose flour. The combination of better taste, improved texture, and higher nutritional value makes freshly milled flour worth seeking out for bread baking projects.
Choosing Between Hard White Wheat and Kamut for Your Naan
The specific types of grain you select for milling directly influence how your naan turns out, so it is worth understanding the characteristics of different wheat varieties. Hard white wheat provides the structure and elasticity that naan requires for rolling and cooking. This type of wheat contains sufficient gluten to create dough that stretches without tearing and bakes into bread with good structure. Kamut, also known as Khorasan wheat, brings something different to the table. This ancient grain variety adds a distinctive buttery flavor and creates a tender texture in the finished bread. Many bakers find that combining hard white wheat with some Kamut produces the most balanced results, giving you the structure you need along with enhanced flavor and richness. If you are adventurous and want to experiment, you can try other wheat varieties such as spelt or red wheat to discover unique flavor profiles that appeal to your palate. Each grain variety imparts slightly different characteristics, so do not be afraid to try different combinations across multiple batches to find your preferred ratio.
Why Resting Your Dough Makes a Significant Difference
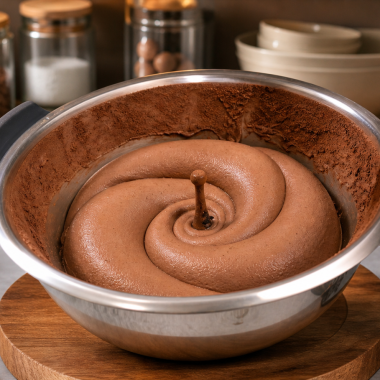
When you mill your own flour, you bring whole grains into contact with moisture for the first time in a way that commercial flour processing has already done. This means freshly milled flour needs a proper resting period to fully absorb the liquid you have added to it. During the rest period, the flour gradually becomes hydrated throughout, transforming from a slightly stiff mixture into smooth, manageable dough. This resting time is not optional if you want the best results; rather, it is a crucial step that affects how easy your dough is to work with and how it performs during cooking. The gluten network that develops during this resting period creates elasticity that allows you to roll the dough thin without tearing. Without adequate resting time, your dough will be difficult to handle, will spring back when you roll it, and may tear or break. Most bakers find that allowing the dough to rest for at least twenty to thirty minutes produces noticeably better results, though longer resting periods often yield even better outcomes.
Preparing Your Cooking Surface for Perfect Results
The surface on which you cook your naan matters as much as the dough itself. A well-heated skillet or cast iron pan is essential for achieving even cooking and proper browning. Your cooking surface should reach a medium-high temperature, which translates to around four hundred degrees Fahrenheit if you are using an oven-safe thermometer to measure. Allowing your skillet adequate time to preheat ensures that when you place naan on it, the heat is distributed evenly across the entire bottom surface. This even distribution of heat promotes consistent cooking across the flatbread rather than creating hot and cold spots. Cast iron pans are particularly excellent for naan because they retain heat exceptionally well and develop a seasoned surface that prevents sticking over time. If you do not have a cast iron pan, any heavy-bottomed skillet works fine, though you may need to adjust your heat or timing slightly. The key indicator that your cooking surface is ready is when a few drops of water sprinkled on it sizzle immediately and evaporate within a second or two.
Mastering the Cooking Process to Achieve Ideal Texture
Cooking naan properly requires attention and timing to ensure you achieve soft, slightly charred flatbread rather than tough, overdone bread. The common mistake many home bakers make is cooking the naan too long, assuming that more cooking time equals better results. In reality, overcooking naan makes it tough, chewy, and unpleasant. The goal is quick cooking on a hot surface that creates brown spots while keeping the interior soft and pliable. Each piece of naan should spend only a few minutes on your cooking surface, typically between one and three minutes per side depending on your heat level and the thickness of your dough. You will know your naan is done when it has brown or slightly charred spots scattered across both sides and no longer looks pale and doughy. The bread should feel soft to the touch and should bend easily without cracking. If you are finding that your naan is browning too quickly and burning before cooking through, reduce your heat slightly. Conversely, if it is taking too long to brown, your heat is probably not hot enough.
The Importance of Brushing Butter on Warm Naan
One of the simplest steps that makes a tremendous difference is brushing melted butter on naan immediately after it comes off the cooking surface. The warmth of the freshly cooked bread causes the butter to melt into the surface and slightly soak into the crumb. This step adds moisture to the bread, prevents it from drying out as it cools, and contributes a rich, delicious flavor. The butter also adds a subtle sheen to the surface that looks appetizing and inviting. If you prefer dairy-free options, ghee works beautifully and adds an even richer flavor than regular butter. For a healthier alternative, you can use a high-quality oil like olive oil or coconut oil, though the flavor profile will be different. Some cooks add minced garlic to their melted butter before brushing, creating garlic naan that is particularly flavorful. The key is applying the butter while the naan is still warm enough that it absorbs into the bread rather than just sitting on the surface.
Using Naan as a Side Dish with Indian Cuisine
Traditional Indian curries and naan are natural partners because the flatbread is perfect for tearing into pieces and using as an edible utensil or vehicle for sauces. When you serve naan alongside butter chicken, one of the most popular Indian dishes, the bread soaks up the rich, creamy sauce beautifully. Chana masala, a spiced chickpea curry, pairs wonderfully with naan, allowing you to enjoy every drop of the aromatic sauce. Palak paneer, a spinach and cheese curry, also benefits from being served with naan for soaking up the flavors. Beyond these classics, naan works with virtually any Indian curry or gravy-based dish you prepare. The bread provides textural contrast to creamy dishes and helps balance heavily spiced sauces. Many Indian restaurants serve naan as a matter of course because experienced cooks know that the flatbread enhances the entire meal. When you make naan at home, you can customize it to pair specifically with the dishes you plan to serve, adjusting thickness or doneness to suit your preferences.
Transforming Naan into Wraps and Sandwich Bases
Naan’s flexibility makes it an excellent bread for wraps and sandwiches, offering an alternative to standard flatbreads or sandwich bread. The soft texture and gentle flavor provide a neutral base that does not overpower fillings. Fill warm naan with grilled vegetables like zucchini, bell peppers, and eggplant for a vegetable wrap that is satisfying and healthy. Falafel, the crispy chickpea fritter, pairs beautifully with naan alongside fresh vegetables and hummus for a complete meal. Marinated and grilled chicken or beef kebabs wrapped in naan with fresh herbs and yogurt sauce create authentic street food-style meals. You can prepare naan in advance and reheat it before filling, making it convenient for meal prep or feeding a crowd. The advantages of using homemade naan for wraps include control over ingredients and the ability to make the bread exactly the thickness and texture you prefer. Unlike commercial flatbreads that often contain preservatives and additives, your homemade naan contains only whole grains and simple ingredients.
Creating Quick and Delicious Naan Pizzas
One of the most creative uses for naan is transforming it into a base for personal pizzas that cook much faster than traditional pizza. Because naan is already a cooked flatbread, you need only top it with sauce, cheese, and your choice of toppings, then briefly warm everything until the cheese melts. This approach is perfect for weeknight dinners when you want something satisfying but do not have time to prepare traditional pizza. Spread your favorite tomato sauce or pesto on the naan, top with mozzarella cheese and whatever toppings appeal to you, then place it on a hot skillet or baking sheet. Within a few minutes, the cheese melts and the naan becomes slightly crispy at the edges while remaining soft underneath. Your family can customize their own naan pizzas with different toppings, making it an interactive meal that everyone enjoys. The advantage over traditional pizza is that you skip the step of preparing dough from scratch and waiting for it to rise, significantly reducing your total cooking time.
Sweet Applications for Warm Naan Bread
While naan is traditionally served as a savory accompaniment to main dishes, the bread works wonderfully for sweet applications as well. Spreading warm naan with jam creates a simple, satisfying dessert or breakfast item that requires minimal effort. Nutella or chocolate spread provides an indulgent option that appeals to people of all ages. Cinnamon sugar brushed on warm naan with a little melted butter creates a flavor combination reminiscent of cinnamon rolls but without the complex preparation. Some cooks brush naan with honey and sprinkle it with chopped nuts for added texture and richness. Fresh berries piled on warm naan with a drizzle of honey or a dollop of yogurt creates a simple but elegant dessert. These sweet applications work particularly well when you have leftover naan from dinner that you want to repurpose into something different for the next day. The versatility of naan as a platform for both savory and sweet toppings makes it an exceptionally practical bread for any home baker.
Short-Term Storage Methods for Cooked Naan
After you have invested time and effort into making fresh naan, you want to store it properly to maintain its quality for as long as possible. Freshly cooked naan can be stored at room temperature in an airtight container for up to two days without significant quality loss. Place the cooked, cooled naan in a container with a tight-fitting lid or wrap it tightly in plastic wrap to prevent air from drying it out. When you are ready to eat the naan, you should reheat it before serving to restore softness and improve the eating experience. Reheating can be done in a dry skillet for a minute or two per side, in a warm oven wrapped in foil, or even briefly in a microwave if you are in a hurry. Proper storage ensures that your homemade naan maintains quality and remains enjoyable throughout the two-day period.
Long-Term Freezing Solutions for Naan Bread
If you want to preserve your naan for longer than two days, freezing is an excellent option that maintains quality for several months. Stack the cooked naan with parchment paper between each piece to prevent them from sticking together. Place the stack in a freezer bag and seal it tightly, removing as much air as possible to prevent freezer burn. Properly frozen naan will maintain good quality for up to three months in your freezer. When you want to eat frozen naan, remove it from the freezer and allow it to thaw at room temperature for a few hours or overnight. Once thawed, reheat the naan using your preferred method before serving. Many people find that frozen and reheated naan tastes nearly as good as fresh naan, making freezing a practical way to preserve your homemade bread for future use. The ability to freeze naan means you can make a large batch when you have time and enjoy it gradually over the following weeks.
Adjusting Ingredients Based on Your Preferences and Dietary Needs
While the basic naan recipe provides excellent results, you have flexibility to adjust ingredients based on your personal preferences or dietary requirements. If you enjoy garlic flavor, you can add minced garlic to your dough during the initial mixing. Fresh herbs like cilantro or mint can be incorporated into the dough for additional flavor complexity. Some cooks add a small amount of yogurt to their dough for tanginess and improved texture. If you need to reduce salt for health reasons, you can decrease the salt content, though this will change the flavor profile slightly. Experimenting with different grain varieties as mentioned earlier allows you to customize the taste and texture to your liking. The beauty of homemade naan is that you control every ingredient and can adjust the recipe to suit your needs exactly.
Troubleshooting Common Naan-Making Challenges
Despite careful attention, sometimes naan does not turn out perfectly on the first try, and understanding common issues helps you improve. If your naan is turning out tough and chewy, you are likely cooking it too long or using heat that is too high. Reducing cooking time and moderating your heat should produce softer results. If your naan is pale and does not brown, your cooking surface is not hot enough, or you are not cooking it long enough. Increase your heat level and allow more time on each side. If your dough is sticky and difficult to handle, you may have added too much liquid or your flour may be fresher than commercial flour and require more hydration than you anticipated. Adding a bit more flour gradually until the dough reaches the right consistency solves this issue. If your naan is tearing when you try to roll it, your dough needs more resting time to develop elasticity. These common issues are easily corrected with small adjustments to your technique.
Equipment Alternatives If You Do Not Have a Cast Iron Skillet
While cast iron is ideal, you do not need it to make excellent naan. Any heavy-bottomed skillet, whether stainless steel or non-stick, works perfectly well for cooking naan. A griddle provides a larger cooking surface that allows you to prepare multiple pieces at once, which is convenient when feeding a family. If you have access to a traditional tandoor oven, this is actually the traditional cooking method for naan, though it requires specialized equipment and experience. For most home bakers without a tandoor, a regular skillet provides excellent results and allows you to make naan whenever you want without special equipment. The key characteristics you want in your cooking vessel are heat retention and even heat distribution rather than any specific type or brand.

Homemade Fresh-Milled Flour Naan Flatbread
Naan with fresh milled flour is such a fun and easy thing to make! You get the perfect chew with that tender flatbread feeling! It’s just so warm and comforting, and always a real treat every time I make it! This is such an easy recipe, great for jumping into baking with fresh milled flour! It comes together in no time, and no mixer is required!
8
servings15
minutes25
minutes40
minutesIngredients
2 cups freshly milled flour (240g; half hard white wheat and half Kamut recommended)
1 tsp sugar
¾ cup warm water (178g)
½ tsp salt
½ tsp baking powder
2 tbsp plain Greek yogurt (or regular yogurt; adjust flour if needed)
1 tbsp olive oil
1 tsp instant yeast
4-5 tbsp melted butter (for brushing after cooking)
Directions
- Grind hard white wheat and Kamut grains to create fresh flour.
- Mix the flour, sugar, and warm water in a bowl until fully combined. Let the mixture sit for 15 minutes.
- Add salt, baking powder, yogurt, and oil. Mix until combined. Knead briefly to form a cohesive dough.
- Mix in instant yeast and knead until the dough is smooth and slightly sticky.
- Lightly oil the dough and bowl, cover, and let rise for 1-2 hours until doubled.
- Divide the dough into eight equal portions. Shape each into a ball and let rest for 15 minutes.
- Heat a cast iron skillet or nonstick pan to medium-high (400°F).
- Roll out each dough ball into an oval shape (~⅛ inch thick). Brush one side with water and place it water-side down on the hot skillet.
- Brush the cooked naan with melted butter immediately after cooking. Serve warm!
Notes
- For added flavor, try infusing the butter with garlic or herbs.
Use a food processor for milling if you don’t have a dedicated mill.
Experiment with adding herbs or spices like cumin or nigella seeds to the dough