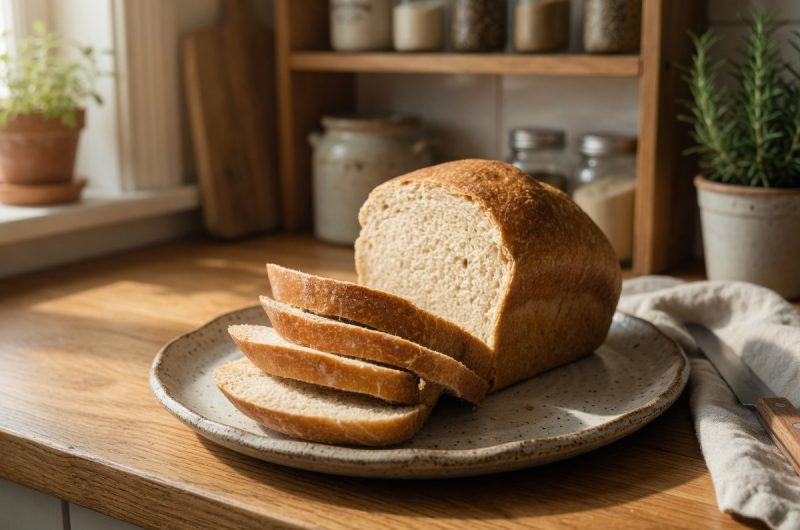
If you have ever been on a quest to bake gluten-free bread, you have likely realized it is an art that requires precision, patience, and understanding of how gluten-free ingredients behave differently than traditional wheat flour. This comprehensive guide will walk you through every step of the gluten-free bread-making process, sharing essential tips and proven techniques to ensure your bread turns out soft, moist, and full of delicious flavor. By the end of this guide, you will not only know how to bake a perfect gluten-free loaf but also understand the science behind why certain techniques work better than others. Making successful gluten-free bread at home is absolutely achievable when you follow the right methods and avoid common mistakes. With practice and attention to detail, you will develop the skills to make consistently excellent gluten-free bread that rivals professional bakery quality.
Understanding the Unique Challenges of Gluten-Free Baking
Gluten-free bread baking presents different challenges than traditional wheat bread because gluten is what gives bread its structure, elasticity, and characteristic chewy texture. Without gluten, you must rely on other ingredients and techniques to create the same desirable qualities. Understanding these differences helps you make better decisions about ingredient selection and baking methods. The structure of gluten-free bread depends on starch molecules, eggs, and binding agents like xanthan gum to hold everything together. This is why gluten-free bread requires different handling techniques and produces a different texture than traditional bread. Success comes from embracing these differences and working with them rather than trying to force gluten-free dough to behave like traditional dough.
Selecting the Right Gluten-Free Flour Blend for Success
The foundation of successful gluten-free bread starts with choosing the right flour blend, as not all gluten-free flours behave the same way. Using a high-quality, specifically formulated gluten-free flour blend is critical because these blends are carefully balanced to provide the right combination of starches and proteins to mimic the elasticity that gluten would provide. Brands like Bob’s Red Mill One-to-One or specialty blends designed specifically for bread baking work much better than all-purpose gluten-free flour or single-grain flours. A proper flour blend contains a combination of different starches such as brown rice flour, tapioca starch, and potato starch along with binders and sometimes xanthan gum already included. If your chosen flour blend does not include xanthan gum, you will need to add it separately to achieve proper binding and structure. Investing in a quality flour blend rather than trying to create your own is recommended for beginners because formulated blends have been tested extensively for bread baking.
Understanding the Role of Xanthan Gum in Structure
Xanthan gum acts as a binding agent that is absolutely essential for holding the bread structure together and replacing some of the functions that gluten would normally provide. This ingredient helps create the network that traps moisture and gas bubbles, resulting in a crumb structure that holds together properly. If your flour blend already includes xanthan gum, do not add additional amounts, as this can make the bread overly thick or gummy. The typical amount of xanthan gum for bread is about one-half to one teaspoon per cup of flour, though this varies depending on your specific flour blend. Adding xanthan gum correctly is crucial because too little will result in a crumbly loaf, while too much will create a dense, gummy texture that is unpleasant to eat.
Combining Dry Ingredients for Even Distribution
The magic of gluten-free bread begins with the right blend of dry ingredients combined with proper mixing technique. Start by whisking together the all-purpose gluten-free flour, xanthan gum if your blend does not already include it, instant yeast, cream of tartar, granulated sugar, and salt. This whisking step ensures an even distribution of the leavening agents and other components throughout the flour mixture, which is absolutely crucial for achieving a consistent rise and uniform flavor throughout the loaf. Taking time to whisk these ingredients together properly prevents having areas with too much yeast or salt concentrated in one spot. Proper distribution of leavening agents ensures the bread rises evenly throughout rather than having some areas that rise more than others.
Incorporating Wet Ingredients for Proper Hydration
Incorporating the wet ingredients into your dry mixture—including warm milk, melted butter, apple cider vinegar, and egg whites—requires careful attention to technique. The warm milk activates the yeast and provides the liquid needed for hydration, while the vinegar helps to tenderize the crumb and adds subtle flavor. Use a stand mixer fitted with a paddle attachment to combine the ingredients until the dough reaches a thick, batter-like consistency that is completely different from traditional kneadable doughs. This unique texture is normal for gluten-free bread and should not alarm you. The mixture will resemble thick pancake batter rather than the stiff dough you might expect from traditional bread recipes.
Beating the Dough to Create Proper Aeration
Turning your mixer to medium-high speed and beating the dough for approximately three minutes creates the essential aeration that develops a light and fluffy structure capable of supporting proper rise. This beating step aerates the batter by incorporating tiny air bubbles throughout, which expand during baking and create the open crumb structure that makes good bread appealing. The dough’s texture should resemble a thick, sticky batter—not something you would knead by hand like traditional bread dough. This active beating step is what creates the foundation for the bread’s final texture, so do not skip it or rush through it. Properly beaten dough will appear slightly glossy and hold air bubbles when you stop the mixer.
Managing the First Rise for Even Development
Transfer the beaten dough to a prepared loaf pan, smoothing the top with a wet spatula to create an even surface. Cover it with plastic wrap and let it rise in a warm, draft-free area of your kitchen. The dough should increase in size by about fifty percent, though it will not double as traditional bread does because gluten-free dough has different rising characteristics. Patience during this rise is absolutely key because a slow, steady rise ensures the bread’s texture remains light and even throughout. Finding the right environment for rising is important—the ideal temperature is around seventy to seventy-five degrees Fahrenheit. A warm kitchen corner, inside a microwave with the light on, or an oven with just the light on works perfectly.
Recognizing Proper Rising Completion
You will know the dough has risen enough when it has increased by approximately fifty percent and appears puffy and light. Unlike traditional bread dough, gluten-free dough will not double in size, so watching for the fifty percent increase is the correct visual cue. The surface may appear slightly bumpy or pock-marked, which is normal for gluten-free dough. Avoid overproofing, which occurs when you let the dough rise too long and the structure becomes weak, potentially causing collapse during baking. The entire rising period typically takes two to four hours depending on kitchen temperature and yeast activity.
Preparing Your Oven for Optimal Baking
Preheat your oven to three hundred seventy-five degrees Fahrenheit, which equals approximately one hundred ninety degrees Celsius, and allow it to reach temperature completely before placing the bread inside. Using an oven thermometer ensures your oven is actually at the correct temperature, as many home ovens run hot or cold. The correct oven temperature is important because baking gluten-free bread at too high a temperature can brown the outside too quickly before the interior is fully cooked. Starting with a properly preheated oven ensures the bread begins baking immediately when inserted, rather than sitting cold while the oven continues heating.
Baking the Loaf to Perfect Doneness
Bake the bread for about fifty minutes, though the exact time may vary depending on your oven and the size of your loaf pan. To determine doneness accurately, use an instant-read thermometer inserted into the center of the loaf—the internal temperature should reach around two hundred degrees Fahrenheit. The crust will turn golden brown when properly baked, while the interior remains soft and moist. Gluten-free bread tends to bake slightly faster than traditional bread, so checking at around forty-five minutes is wise. If the top is browning too quickly before the center is cooked, you can tent the loaf loosely with aluminum foil to slow down browning.
Cooling Your Bread Properly
Allow the bread to cool in the pan for approximately ten minutes after removing it from the oven, which allows the structure to set enough to handle without falling apart. Transfer it to a wire cooling rack and let it cool completely before slicing, which prevents squishing the loaf and allows the crumb structure to firm up properly. Using a serrated knife for cutting creates cleaner, more even slices than a regular knife would. The bread will continue to firm up slightly as it cools completely, so resisting the urge to slice it while still warm is important for achieving the best texture and appearance.
Using a High-Quality Flour Blend Consistently
Choosing the right flour blend is critical for consistent success, as a mix like Better Batter or similar specifically formulated blends provides the perfect balance of starches and proteins to mimic the elasticity that gluten would provide. Avoid using all-purpose gluten-free flour for bread, as these blends are formulated more for general baking rather than bread-specific applications. Single-grain flours like all rice flour or all almond flour will not work for bread because they lack the necessary combination of starches and proteins. Sticking with one proven flour blend throughout your gluten-free bread baking journey helps you develop consistency and understand how that specific blend behaves.
The Importance of Measuring by Weight
For consistently excellent results in gluten-free bread baking, use a digital kitchen scale to measure ingredients by weight rather than volume. Weight measurements eliminate the guesswork of scooping flour differently depending on how tightly you pack it or how humid it is outside. Using a scale ensures your ingredient ratios are accurate every single time you bake. Converting volume measurements to weight can be done by looking up conversion information online or in baking references, typically finding that one cup of gluten-free flour weighs about one hundred twenty to one hundred thirty grams depending on the blend.
Creating the Ideal Rising Environment
Yeast thrives in a warm, humid environment, so finding the right spot in your kitchen for rising is essential. Avoid placing your dough in an oven that is too hot, as excessive heat can kill the yeast and prevent proper rising. Instead, choose a naturally warm spot in your kitchen such as on top of the refrigerator, in a turned-off oven with just the light on, or in a microwave with just the light on. If your kitchen tends to be cool, you might need to place the dough in a warmer location or extend the rising time slightly. The goal is maintaining steady warmth without exposing the dough to direct heat that could harm the yeast.
Investing in the Right Baking Pan
A Pullman loaf pan works wonderfully for gluten-free bread because its tall, narrow shape promotes even baking and creates slices that are perfect for sandwiches. These specialized pans keep the dough contained during rising and baking, preventing it from spreading sideways. Regular loaf pans work reasonably well, though they allow the dough to spread more, creating a wider, shorter loaf. Whichever pan you choose, make sure it is well-greased or lined with parchment paper to prevent sticking. Some people prefer to use parchment paper because gluten-free bread is more delicate and can stick more easily than traditional bread.
Preventing Dough From Drying Out
Gluten-free dough is highly absorbent and prone to drying out more easily than traditional dough, so keeping it covered during the rise is essential. Plastic wrap works well, though some people prefer a damp cloth or plastic bag instead. If you live in a particularly dry climate, consider using a damp cloth instead of plastic wrap to provide additional moisture. Checking occasionally during rising to ensure the surface is not drying out helps you catch potential problems early. If drying does occur, you can spray the surface lightly with water to add moisture back.
Recognizing and Avoiding Overproofing
Overproofing occurs when you allow dough to rise too long, causing the structure to weaken and collapse during baking or immediately after. A pock-marked surface and very puffy appearance indicate you may be approaching overproofing. Gluten-free dough is more prone to overproofing than traditional dough because without gluten there is less structural integrity. It is better to slightly under-proof than over-proof, as under-proofed bread will still bake reasonably well while over-proofed bread may collapse.
Addressing Common Rising Problems
If your bread does not rise properly, the most likely causes are using dead or insufficient yeast, dough that was too dry, or yeast being exposed to excessive heat during rising. Checking that your yeast is fresh and within its expiration date is important. If the dough seems too dry, add more liquid in small amounts. If rising occurred in too warm a location, moving to a cooler spot may help maintain yeast activity. Keeping notes about temperature and rising times helps you troubleshoot problems over time.
Preventing Gummy Texture in Your Loaf
If your finished bread is gummy rather than having a proper crumb structure, the bread was likely not baked long enough or too much liquid was added to the dough. Always bake until the internal temperature reaches two hundred degrees Fahrenheit. If you find your dough is too wet, reduce the liquid slightly in your next batch. Gluten-free dough should be thick but spreadable, not runny like pancake batter. Using a kitchen scale to measure liquids accurately helps prevent this problem.
Adjusting for High Altitude Baking
If you live at high altitude, you may need to adjust your recipe because water boils at lower temperatures and evaporates more quickly. Decrease the yeast and sugar slightly to prevent over-rising. Increase the baking temperature slightly to help set the bread’s structure faster. Increase the liquid slightly as water evaporates more quickly at altitude. These adjustments require some experimentation to get right for your specific altitude and kitchen conditions.
Freezing Bread for Long-Term Storage
Slice the cooled loaf and wrap individual slices in freezer-safe wrap to preserve them for later use. Place parchment paper between slices to prevent them from sticking together. Toast slices directly from the freezer for the best texture and convenience. Frozen bread keeps for several months when properly wrapped. This method allows you to bake occasionally and have fresh bread available throughout the month.
Room Temperature Storage Guidelines
Store the bread at room temperature in an airtight container for up to two days to maintain freshness. For longer storage, freeze instead of refrigerating, as the refrigerator environment actually dries out gluten-free bread faster than room temperature does. An airtight container prevents the bread from absorbing odors from your kitchen while protecting it from moisture loss. Keeping bread in an original bakery bag or bread box also works well for short-term storage.
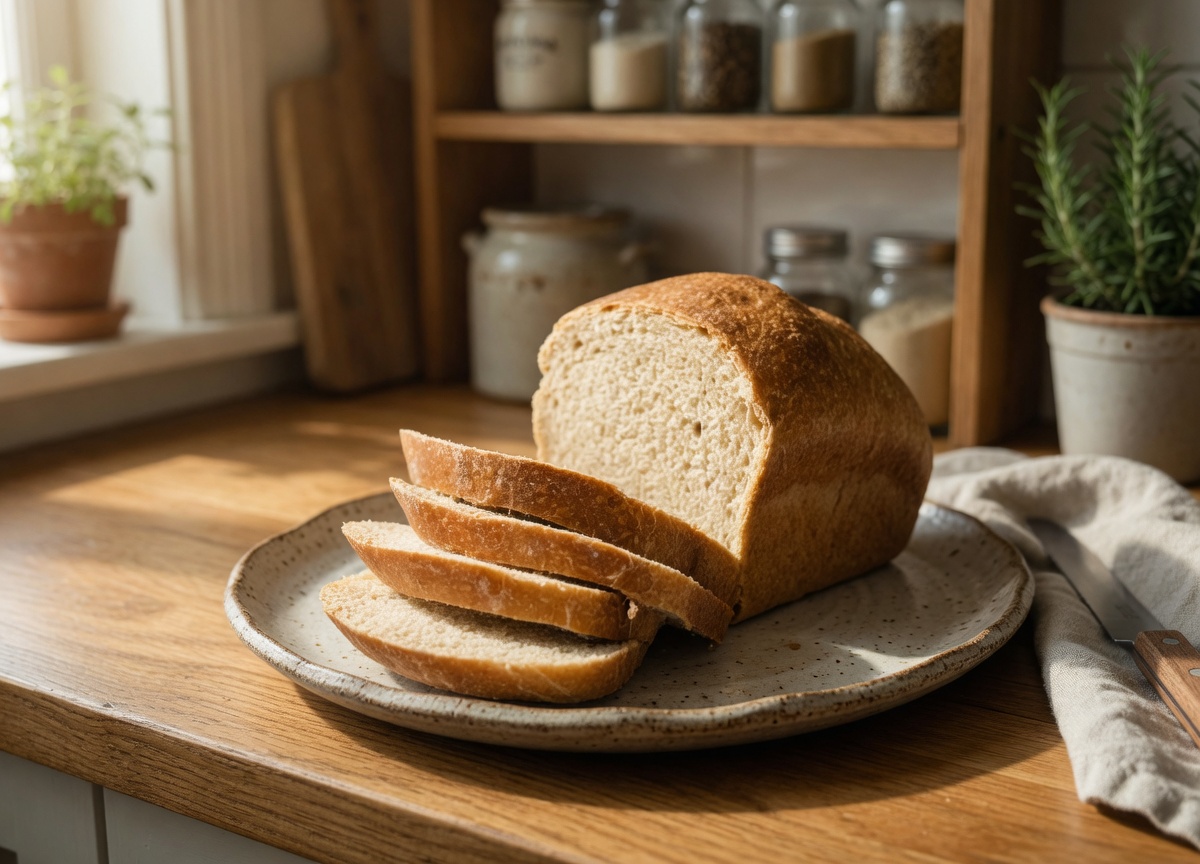
Fluffy and Soft Gluten-Free Bread Recipe
This is the best and original gluten free bread recipe for moist and tender white sandwich bread with a chewy crumb and a crisp, brown crust.
10
servings15
minutes1
hour237
kcal1
hour15
minutesIngredients
3 cups (420 g) all-purpose gluten-free flour blend (like Better Batter or a mock blend)
3 tsp xanthan gum (if not already in the flour blend)
2 1/2 tsp (8 g) instant yeast
1/4 tsp cream of tartar
2 tbsp (25 g) granulated sugar
2 tsp (12 g) kosher salt
1 1/2 cups (12 oz) warm milk (around 95°F)
4 tbsp (56 g) unsalted butter, melted and cooled
1 tsp apple cider vinegar
2 egg whites (50 g), room temperature
Optional: toasted sesame seeds for topping
Directions
- Grease or line a 9×5-inch loaf pan and set aside.
- In a stand mixer bowl, combine the flour, xanthan gum, yeast, cream of tartar, sugar, and salt. Whisk thoroughly.
- Add the milk, butter, vinegar, and egg whites. Mix on low speed, gradually increasing to medium-high, for about 3 minutes.
- Scrape the dough into the prepared loaf pan and smooth the top with a wet spatula.
- Cover and let rise in a warm, draft-free spot until 50% larger, about 1 hour.
- Preheat the oven to 375°F (190°C). Bake the loaf for about 50 minutes or until the internal temperature reaches 200°F (93°C).
- Let cool for 10 minutes in the pan, then transfer to a wire rack to cool completely.
Nutrition Facts
- Serving Size: 1 g
- Total number of serves: 1
- Calories: 237kcal
- Fat: 6g
- Saturated Fat: 4g
- Trans Fat: 0.2g
- Polyunsaturated Fat: 0.2g
- Monounsaturated Fat: 2g
- Cholesterol: 16mg
- Sodium: 533mg
- Potassium: 110mg
- Carbohydrates: 39g
- Fiber: 3g
- Sugar: 4g
- Protein: 5g
- Vitamin A: 199mcg
- Vitamin C: 0.01mg
- Calcium: 48mg
- Iron: 0.1mg