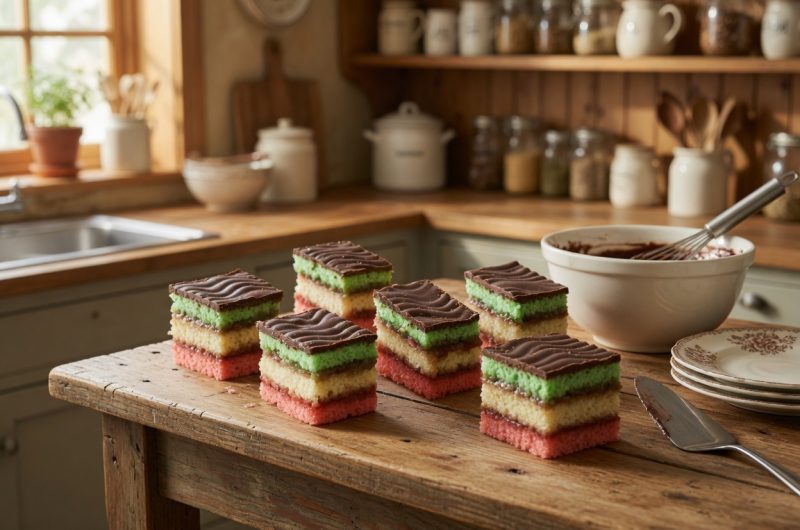
If you are searching for a visually stunning and uniquely flavored treat to enhance your holiday dessert table, look no further than Italian Rainbow Cookies. These colorful confections, sometimes called Venetian cookies, Italian flag cookies, or seven-layer cookies, are far more than just simple desserts—they are genuine works of edible art. With layers of moist almond-flavored cake, fruity jam, and a smooth chocolate coating, they promise a delightful medley of flavors and textures that dance together in every single bite. These cookies have been treasured by Italian families for generations and represent a perfect balance of sophistication and indulgence. Creating these impressive cookies at home is entirely achievable with patience, quality ingredients, and careful attention to technique.
Understanding the Appeal of Italian Rainbow Cookies
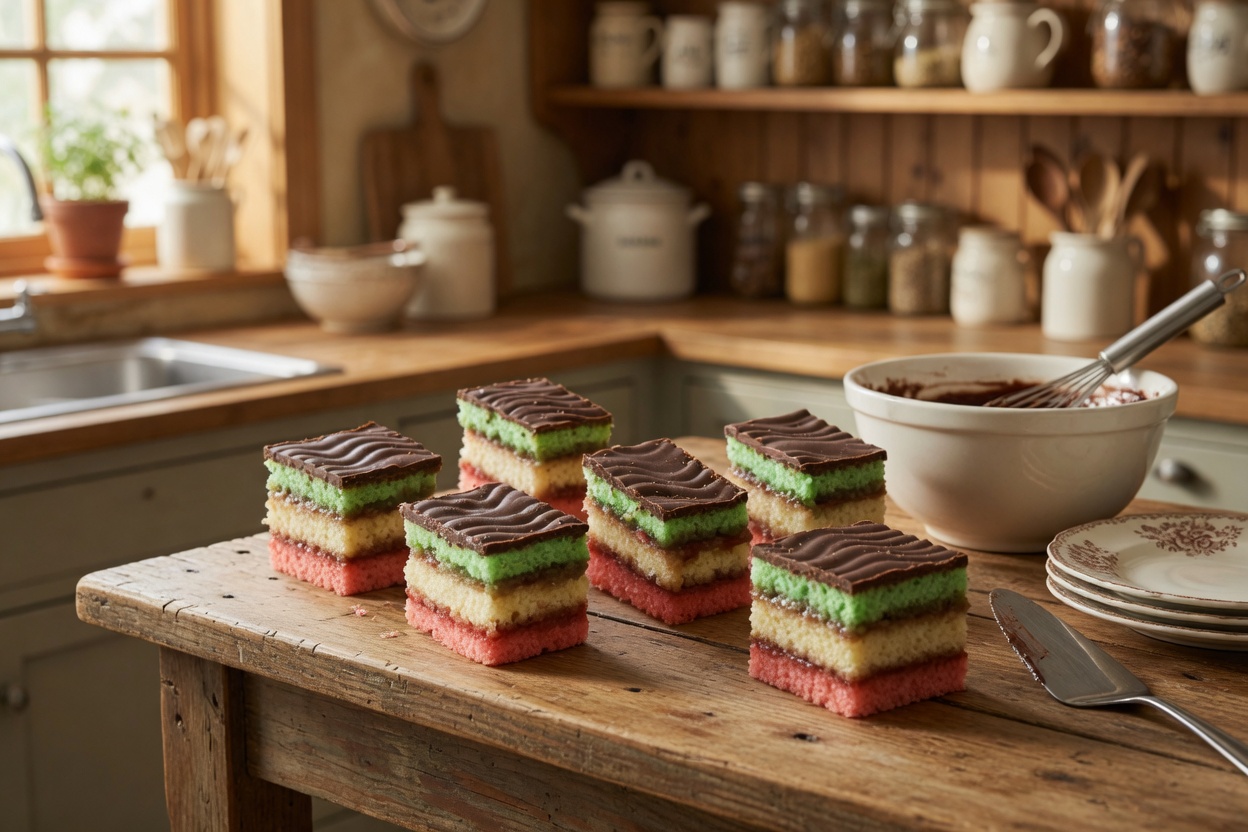
Each bite of these cookies combines the nutty essence of delicate almond cake, the subtle tartness of fruit jam, and the richness of smooth chocolate, creating a complex flavor profile. The intricate layers ensure your taste buds are always entertained with different sensations and tastes. These cookies are a genuine feast for the eyes, boasting vibrant red, white, and green layers that beautifully resemble the Italian flag. They are absolutely guaranteed to draw attention and compliments at any gathering or celebration. The contrast between the soft, tender cake layers and the crisp chocolate coating provides textural interest that makes eating them a complete experience. Whether served at Christmas, Easter, or any special occasion, these cookies elevate any dessert presentation significantly.
Recognizing Why These Cookies Are Perfect for Sharing
This recipe yields enough cookies to delight a crowd, whether you cut them into small, delicate squares or larger pieces for a more substantial dessert. The visual impact of these cookies means they work beautifully as a centerpiece on a dessert table. They are also excellent for gift-giving, as they package attractively in decorative boxes and convey effort and care. Making a large batch is only slightly more time-consuming than making a small one, so you can prepare them for multiple occasions or gatherings. The colors and appearance make them appealing to both children and adults, ensuring they disappear quickly from any dessert spread.
Ensuring Proper Mixing Techniques for Success
The batter for these cookies requires precision and attention to detail throughout the mixing process. An electric mixer does the heavy lifting of creaming butter and sugar together, but folding in ingredients by hand ensures a uniform texture and prevents overdevelopment of gluten. You should pause occasionally to scrape the sides of your mixing bowl to ensure all ingredients are evenly incorporated and no streaks remain. Overmixing can result in a dense cake rather than the light, tender texture you want. Using the proper speed on your mixer prevents incorporating too much air, which could cause uneven baking. Understanding the different roles of beating, mixing, and folding helps you achieve the perfect batter consistency.
Planning Your Timeline for Best Results
Taking your time with this recipe and dividing the process over two days yields superior results compared to rushing through everything in one day. You should prepare and assemble the cake layers on the first day, allowing them to compress overnight under weight, which helps them set properly and become more cohesive. Finishing with the chocolate coating on the second day ensures the chocolate adheres properly and creates a smooth, professional appearance. This two-day approach also prevents you from feeling rushed and allows you to work at a comfortable pace. The overnight compression period is essential for achieving the right texture and making the cookies easier to cut into neat pieces.
Understanding the Role of Almond Paste in the Base
Almond paste, found in most grocery store baking aisles, forms the essential foundation of the almond flavor that defines these cookies. This ingredient should not be confused with almond butter, as they have different textures and compositions. Quality almond paste creates a more authentic flavor than almond extract alone could achieve. When combined with butter and sugar, almond paste creates a rich, nutty base that permeates throughout the cake layers. The almond paste should be at room temperature and free from lumps before mixing to ensure even distribution. Using authentic almond paste rather than synthetic almond flavoring creates a noticeably superior final product.
Selecting the Right Eggs and Understanding Their Purpose
Using four large eggs is important for achieving the proper structure and moisture in these cookies. Eggs should be separated into yolks and whites, as each performs a distinct and important role in the recipe. The yolks contribute richness and help bind the cake layers together. The whites, when beaten separately until stiff peaks form, create volume and lightness that prevents the cake from becoming dense. Room-temperature eggs mix more easily and incorporate air more efficiently than cold eggs. The separation of eggs is a fundamental baking technique that creates a more delicate, sophisticated texture than using whole eggs would provide.
Utilizing Gel-Based Food Coloring for Vibrant Layers
Gel-based food coloring creates vibrant, saturated colors that are far superior to traditional liquid food coloring. Liquid coloring adds moisture to the batter, potentially affecting the cake’s texture and consistency. Gel coloring concentrates the pigment without adding excessive liquid, allowing you to achieve bright red and green colors without compromising the batter. The red layer should be a vibrant crimson that resembles the Italian flag, while the green should be a clear, bright shade. Adding food coloring slowly and mixing thoroughly ensures even color distribution throughout each layer. The white layer remains uncolored, representing the center stripe of the Italian flag.
Choosing Jam for the Perfect Tart Contrast
Apricot jam adds a tart, fruity contrast that balances the richness of the almond cake and chocolate coating beautifully. Apricot’s subtle flavor does not overpower the other elements but enhances them. Raspberry jam is a common and delicious substitute that provides similar tartness and complements almond equally well. Some people prefer strawberry jam for a different flavor profile. The jam should be spread evenly between layers and should be thick enough to hold the layers together without leaking out. A thin layer of jam works best, as too much can make the cookies excessively sticky.
Selecting Chocolate for the Final Coating
Semi-sweet chocolate provides a balanced sweetness that complements the almond and jam flavors without overwhelming them. Bittersweet chocolate creates a more sophisticated, less sweet final product that appeals to those preferring darker chocolate. The chocolate should be melted carefully over gentle heat or in a microwave in short intervals to prevent seizing or burning. Quality chocolate creates a smoother, glossier coating than lower-quality alternatives. The chocolate coating should be thin enough to slice through cleanly but thick enough to fully encapsulate the cake layers.
Preparing Pans for Easy Cake Removal
Preheating your oven to three hundred twenty-five degrees Fahrenheit ensures even baking of the thin cake layers. Three nine-by-thirteen-inch pans are ideal for baking even, uniform layers. Each pan should be sprayed with nonstick spray, then lined with parchment paper, then sprayed again to ensure easy removal. The parchment paper should extend up the sides of the pan, making it simple to lift the baked cake out. Proper pan preparation prevents sticking and ensures the cakes come out intact and ready to assemble.
Creaming Butter and Almond Paste for a Smooth Base
Combining almond paste, sugar, and butter in a mixing bowl and beating until smooth creates the flavor foundation for the entire cookie. The almond paste should break down completely and integrate smoothly with the butter and sugar. This creaming process takes about two to three minutes and should result in a light, fluffy mixture. Scraping the sides of the bowl ensures all ingredients are evenly incorporated. The texture should be smooth and uniform without lumps before proceeding to add other ingredients.
Incorporating Remaining Ingredients in Proper Sequence
After creaming the base, you add the remaining butter, then egg yolks, milk, and almond extract in sequence, allowing each addition to fully incorporate before adding the next. Mixing at low speed prevents overdevelopment of gluten. The milk helps create the proper batter consistency and moisture level. Almond extract amplifies the almond flavor and should not be omitted. Finally, flour is mixed in at low speed just until combined, being careful not to overmix at this stage.
Whipping Egg Whites to Stiff Peaks
In a separate bowl, beating egg whites with reserved sugar until stiff peaks form creates the volume needed for light, tender cake layers. Stiff peaks mean the egg whites stand straight up when you lift the beaters. This process takes about three to four minutes with an electric mixer. The egg whites must be completely free from any yolk or fat, or they will not whip properly. Room-temperature egg whites whip faster and achieve greater volume than cold eggs. Gently folding these whipped egg whites into the batter at the end preserves the air bubbles you worked so hard to incorporate.
Dividing and Coloring the Batter Appropriately
Splitting the batter into three bowls allows you to leave one portion uncolored for the white layer while tinting the other portions red and green. Adding food coloring gradually and mixing thoroughly ensures even color distribution without creating streaks. The portions do not need to be exactly equal, as you can adjust layer thickness during spreading. Keeping the bowls separate until ready to spread prevents colors from mixing unintentionally.
Baking the Thin Cake Layers to Perfection
Spreading each colored batter into its own prepared pan and baking at three hundred twenty-five degrees for ten to twelve minutes until just set creates thin, tender layers. The cakes should be set but still soft when removed from the oven. Overbaking makes the cakes dry and difficult to work with. You should check them at the ten-minute mark to ensure they do not bake too long. Allowing them to cool completely before assembling is essential, as warm cakes are fragile and difficult to handle.
Assembling Layers With Precision and Care
Spreading apricot jam over the red layer and placing the plain layer on top, then spreading more jam and finishing with the green layer creates the traditional color sequence. The jam acts as glue holding the layers together while adding flavor. You should spread jam evenly with an offset spatula for a professional appearance. The final assembly should result in a three-layer cake with visible color stripes.
Compressing Layers Overnight for Proper Texture
Wrapping the assembled layers in plastic wrap, topping with a sheet pan, and weighing down with heavy cans creates compression that helps the layers set and become more cohesive. Refrigerating for at least four hours or overnight allows the layers to compress and the flavors to meld. This compression period is essential for achieving the right texture and making the cookies easier to cut into neat pieces. The longer compression period also makes the cookies hold together better when cut.
Melting and Applying Chocolate Coating
Melting half of the chocolate and spreading it evenly over the top layer, then chilling for thirty minutes to set, creates the first chocolate layer. Flipping the entire assembly over and removing the parchment allows you to spread remaining chocolate over the new top. The chocolate should be smooth and even, creating a professional finish. Chilling between chocolate applications ensures proper setting.
Cutting Cookies for Perfect Presentation
After the chocolate has set completely, trimming the edges of the assembled cake and then slicing into neat squares or rectangles creates the finished cookies. A sharp knife dipped in hot water between cuts ensures clean edges and prevents chocolate from cracking. The size of the pieces depends on personal preference, with smaller squares being more elegant and larger pieces being more substantial.
Short-Term Storage Instructions
Keeping finished cookies in an airtight container at room temperature preserves them for up to two days, while refrigeration extends shelf life to five days. The cool temperature of the refrigerator helps preserve the chocolate coating and prevent softening. Cookies should be stored in a single layer or separated by parchment paper to prevent sticking together.
Long-Term Freezing for Extended Storage
Freezing Italian Rainbow Cookies for up to two months allows you to prepare them well in advance of serving. Cookies should be wrapped individually in plastic wrap and then placed in airtight freezer containers to prevent freezer burn. Thawing overnight in the refrigerator before serving ensures they return to proper texture and temperature. Frozen cookies maintain their quality and flavor remarkably well.
Finding Quality Almond Paste at Your Local Store
Almond paste is typically found in the baking aisle near nuts or in international foods sections of grocery stores. Specialty baking shops often carry multiple brands and higher quality options. Some people prefer to make their own almond paste by grinding blanched almonds with sugar, though commercial versions are convenient and reliable. Quality matters significantly, as better almond paste creates superior flavor.
Troubleshooting Egg Whites That Won’t Whip
If your egg whites are not stiffening properly, ensure no yolks or grease contaminated the bowl or beaters. Use room-temperature eggs for best results, as cold eggs take longer to whip and may not reach the same volume. Copper bowls enhance egg white whipping, though stainless steel or glass bowls also work well. Adding a small amount of cream of tartar helps stabilize egg whites and accelerates whipping.
Making These Cookies Ahead for Convenience
Yes, these cookies store well and even improve in flavor over time as the flavors meld together. You can prepare them up to a week in advance and refrigerate, or freeze them for several weeks. Making them ahead eliminates stress when preparing for special occasions or gatherings. The two-day preparation method means you can spread the work across multiple days if preferred.
Perfect Italian Rainbow Cookies
These colorful, tri-layered cookies are a delightful mix of thin almond-flavored cakes, fruity jam, and a rich chocolate topping. Their vibrant appearance makes them perfect for special occasions and holiday dessert spreads, guaranteed to impress your guests.
40
servings25
minutes15
minutes188
kcal40
minutesIngredients
1 cup granulated sugar, divided
8 oz almond paste
3 sticks unsalted butter, softened
4 large eggs, separated
¼ cup whole milk
½ teaspoon kosher salt
1 teaspoon almond extract
2¼ cups all-purpose flour
¼ teaspoon red food coloring
¼ teaspoon green food coloring
½ cup apricot jam
10 oz semi-sweet or bittersweet chocolate, chopped
Directions
- Preheat the oven to 325°F (160°C). Prepare three 9×13-inch baking pans by spraying them with nonstick baking spray and lining them with parchment paper. Spray the parchment as well.
- In a large mixing bowl, combine almond paste, 1 stick of softened butter, and all but 2 tablespoons of the sugar. Beat with a stand mixer or hand mixer at medium speed until smooth.
- Gradually add the remaining 2 sticks of butter and mix until fully incorporated. Blend in the egg yolks, milk, and almond extract until the mixture is smooth.
- Reduce the mixer speed and slowly add the flour, mixing until just combined. Scrape the sides of the bowl as needed.
- In a separate bowl, beat the egg whites with the remaining 2 tablespoons of sugar until stiff peaks form. Gently fold the whipped egg whites into the batter until smooth.
- Divide the batter evenly among three bowls. Add red food coloring to one bowl, green food coloring to another, and leave the third bowl uncolored. Mix each bowl thoroughly.
- Spread the batter from each bowl into the prepared baking pans, forming even, thin layers. Bake each layer for 10-12 minutes or until set. Allow the layers to cool completely.
- Assemble the layers: Place the red layer on a parchment-lined baking sheet. Spread half of the apricot jam evenly over it. Add the uncolored layer on top and spread with the remaining jam. Finish with the green layer on top.
- Cover the stacked layers with plastic wrap. Place another baking sheet on top and weigh it down with 4-6 heavy cans. Refrigerate for at least 4 hours or overnight to compress the layers.
- Melt the chocolate in the microwave or over low heat in a small saucepan. Remove the weight and plastic wrap from the layered cake. Spread half of the melted chocolate over the top layer. Chill for 30 minutes to allow the chocolate to set.
- Carefully flip the cake onto a cutting board and peel off the parchment paper. Spread the remaining chocolate over the new top surface. Chill until the chocolate is firm.
- Once the chocolate is set, trim the edges for clean lines, then cut the cake into small squares.
Notes
- Storage Tips:
Store the cookies in an airtight container at room temperature for up to two days.
For longer storage, refrigerate in an airtight container for up to five days.
To freeze, wrap tightly in plastic wrap and place in an airtight container or freezer bag. Freeze for up to two months. - Notes:
Gel food coloring is recommended as it provides vibrant color without diluting the batter.
If almond paste is unavailable, marzipan can be used, though it will result in a sweeter flavor.
Nutrition Facts
- Total number of serves: 40
- Calories: 188kcal
- Fat: 12g
- Saturated Fat: 6g
- Cholesterol: 37mg
- Sodium: 40mg
- Carbohydrates: 19g
- Fiber: 1g
- Sugar: 11g
- Protein: 2g
- Calcium: 23mg
- Iron: 1mg