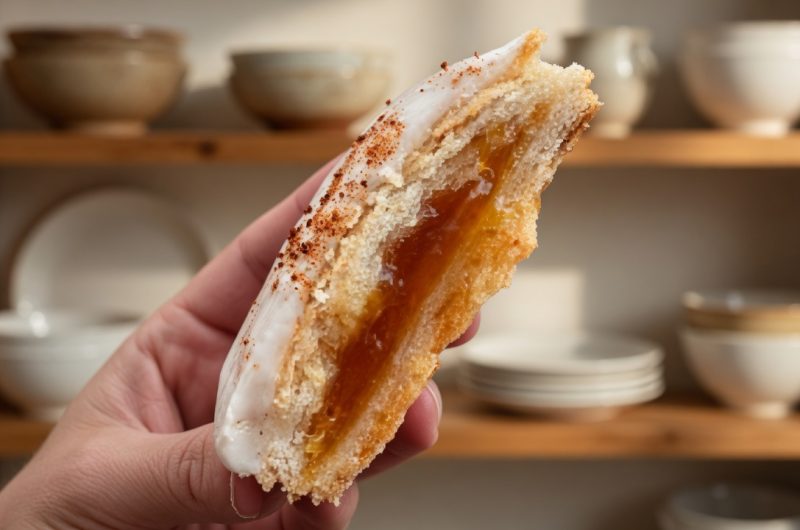
There is something deeply satisfying about pulling a tray of golden, flaky pastries out of your own oven instead of ripping open a foil packet from a cardboard box. Homemade sourdough pop tarts give you full control over the ingredients, the sweetness level, and the quality of the crust. Unlike the mass-produced version found in grocery stores, these pastries use real butter, real fruit filling, and a slow-fermented tang from sourdough discard that you simply cannot replicate with artificial flavoring. Once you try baking a batch, going back to the store-bought kind feels like a downgrade.
Turning Sourdough Discard Into Something Delicious
Anyone who maintains a sourdough starter knows the guilt that comes with tossing out discard every time you feed it. Instead of throwing away that leftover starter, this recipe puts it to excellent use in the pastry dough. The discard doesn’t need to be fed or bubbly and active, since it isn’t responsible for any rising in this recipe. Its main job here is flavor, contributing a subtle tang that balances beautifully against the sweetness of the jam filling and the sugar glaze on top, making every bite more interesting than a plain pastry crust.
Gathering Your Ingredients Before You Begin
Before you start mixing anything, it helps to have everything measured and ready to go, since pastry dough comes together quickly once you start. You will need all-purpose flour, cold unsalted butter, fine sea salt, granulated sugar, sourdough discard, and white vinegar for the crust itself. For the filling, strawberry jam and a lightly beaten egg for the egg wash are all that’s required, while the glaze needs nothing more than powdered sugar and water. Simple ingredients, when combined correctly, produce a surprisingly professional result.
Why Cold Butter Matters So Much in Pastry Dough
If there’s one rule that separates a flaky crust from a tough, dense one, it’s keeping your butter cold throughout the entire process. Cold butter creates small pockets of fat within the dough that melt during baking, releasing steam and creating those thin, flaky layers everyone loves in a good pastry. Grating the butter directly into your dry ingredients using a box grater is far more effective than cutting it in with a knife, since it distributes the butter evenly without warming it up too much from handling.
Mixing the Dry Ingredients First
Start by combining your all-purpose flour, granulated sugar, and fine sea salt together in a large mixing bowl. Whisking these dry ingredients together first ensures the salt and sugar are evenly distributed throughout the flour, rather than clumping in one area of your dough. Once combined, grate your cold butter straight into this bowl and use a pastry cutter, fork, or even your fingertips to work it into the flour mixture until it resembles coarse crumbs about the size of small peas.
Incorporating Sourdough Discard and Vinegar
With your butter worked into the flour, it’s time to add the sourdough discard along with a small amount of white vinegar. The vinegar might seem like an odd addition to a pastry recipe, but it actually helps inhibit gluten development, which keeps your finished crust tender rather than chewy or tough. Use a fork to gently mix these wet ingredients into the flour and butter mixture, stirring just until everything starts to clump together into small, shaggy pieces rather than a smooth ball.
Forming and Shaping the Dough
Once the dough starts coming together, switch to using your hands to press everything into a cohesive mass. If the mixture feels too crumbly or dry to hold together, add a teaspoon of cold water at a time until it forms a solid dough. Rather than shaping it into a round disc like a pie crust, form this dough into a small rectangle instead, since this shape will make rolling and cutting even strips much easier later in the process.
The Importance of Chilling Time
Wrap your shaped dough tightly in plastic wrap, then use a rolling pin over the top of the wrapped dough to smooth out the edges and even the thickness slightly. Place the wrapped dough in the refrigerator for a minimum of one hour, though you can leave it chilling for as long as 24 hours if you want to plan ahead. This resting period allows the gluten to relax and the butter to firm back up, both of which contribute to a flakier finished pastry.
Rolling the Chilled Dough
After your dough has chilled sufficiently, remove it from the refrigerator and place it on a lightly floured work surface. Roll it out to approximately one-eighth of an inch thick, working to keep the overall shape as rectangular as possible rather than letting it spread into an oval or irregular shape. Keeping straight edges from the start will save you time and reduce wasted scraps when you get to the cutting stage.
Cutting Even Rectangles for Your Pastries
Using a sharp knife or a pizza cutter, divide your rolled-out dough into four long, evenly sized rectangles. Try to measure roughly so that each piece matches in size, since this makes folding and sealing much simpler and gives your finished pastries a more uniform, professional appearance. Any leftover dough scraps can be gathered together, re-rolled, and cut into an extra pastry or two rather than thrown away.
Filling Each Pastry Without Overstuffing
Brush the edges of each dough rectangle lightly with your prepared egg wash, which will act as an adhesive to help seal the pastry shut during baking. Spoon roughly two tablespoons of strawberry jam onto one half of each rectangle, spreading it slightly but leaving a clear border around the edges. Resist the urge to overfill, since too much jam will ooze out during baking and prevent the edges from sealing properly.
Sealing the Edges Securely
Fold the empty half of the dough rectangle over the jam-filled half, lining up the edges as best you can. Press down firmly along all four sides using the tines of a fork, which both seals the pastry shut and creates that classic crimped edge you recognize from toaster pastries. Take your time with this step, since a poorly sealed edge is the most common reason filling leaks out during baking.
Baking Until Golden and Flaky
Preheat your oven to 350°F (177°C) and line a baking sheet with parchment paper to prevent sticking. Arrange your filled and sealed pastries on the sheet, leaving some space between each one, then brush the tops with a final layer of egg wash to encourage a rich, golden color as they bake. Bake for 25 to 30 minutes, watching closely near the end, since oven temperatures can vary and you want a deep golden brown rather than a pale or burnt crust.
Mixing Up the Simple Sugar Glaze
While your pastries are cooling on a wire rack, prepare the glaze by whisking together powdered sugar and water in a small bowl. Add the water gradually, a small splash at a time, since it’s much easier to thin a thick glaze than to fix one that has become too watery. You’re aiming for a glaze that flows smoothly off a spoon but still holds its shape somewhat when drizzled over a pastry.
Timing Your Glaze Application Correctly
Patience matters here, since applying glaze to a warm pastry will cause it to melt away and slide right off, leaving you with a sticky mess rather than a nice glossy coating. Wait until your pastries have cooled completely to room temperature before drizzling the glaze over the tops. If you’d like to add a decorative touch, sprinkle sugar crystals or colorful sprinkles over the glaze immediately after applying it, while it’s still wet enough for them to stick.
Experimenting with Different Filling Options
While strawberry jam is the classic choice and pairs wonderfully with the tangy sourdough crust, this recipe is flexible enough to work with almost any thick fruit preserve. Blueberry jam, raspberry preserves, apricot spread, or even a rich chocolate hazelnut spread all work well as substitutes. The main thing to watch for is moisture content, since fillings that are too runny or watery can cause the pastries to leak during baking or turn the crust soggy from the inside.
Storing Baked Pastries for Later Enjoyment
Once your pastries have been baked and glazed, store them in an airtight container at room temperature, where they’ll stay fresh for up to three days. If you’d like them to last a bit longer, transferring them to the refrigerator extends their freshness to about six days total. When you’re ready to eat one, a quick ten-minute reheat in a 350°F (177°C) oven will bring back that fresh-baked texture and warm, flaky crust.
Freezing Pastries for Long-Term Storage
If you’ve made a large batch or simply want to prepare some in advance, these pastries freeze remarkably well. Allow the baked, unglazed pastries to cool completely at room temperature first, then wrap each one individually and tightly in plastic wrap before placing them in the freezer, where they’ll keep well for up to three months. When you’re ready to enjoy one, let it thaw overnight in the refrigerator, then reheat in a 350°F oven and add fresh glaze just before serving.
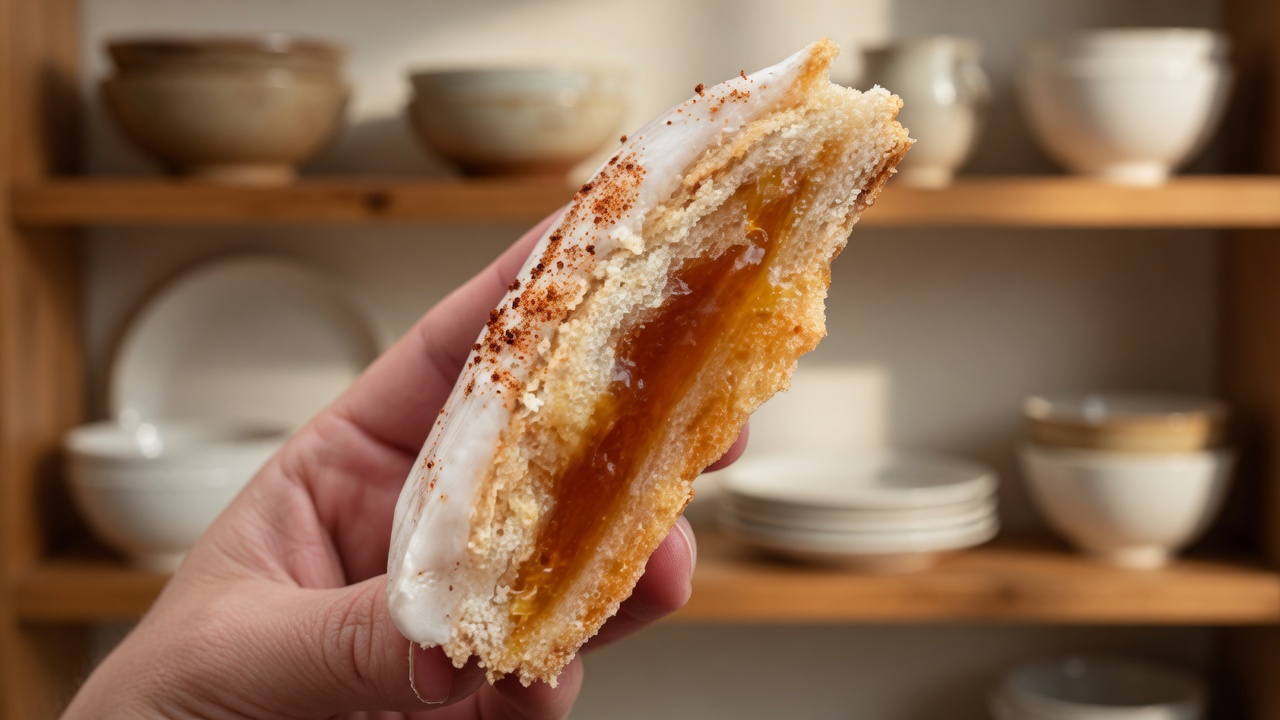
Sourdough Toaster Pastries
These homemade sourdough pop tarts have a buttery, flaky crust made with sourdough discard, filled with sweet strawberry jam, and finished with a simple powdered sugar glaze. They taste much fresher than anything from a box and give your leftover sourdough starter a tasty second purpose.
4
servings15
minutes30
minutes543
kcal45
minutesIngredients
- For the Crust:
1 cup + 1 teaspoon (125 g) all-purpose flour
8 tablespoons (113 g) cold unsalted butter
1/2 teaspoon fine sea salt
2 tablespoons (30 g) granulated sugar
1/2 cup (125 g) sourdough discard
1 teaspoon (5 g) white vinegar
- For the Filling:
1/2 cup strawberry jam (or your favorite jam)
1 lightly beaten egg for egg wash
- For the Glaze:
1/2 cup powdered sugar
1 teaspoon water
Directions
- Whisk flour, sugar, and salt together in a bowl. Grate cold butter into the mixture and work it in with a fork or pastry cutter until coarse crumbs form.
- Add sourdough discard and vinegar, mixing with a fork until the dough begins to clump together, adding cold water by the teaspoon if needed.
- Shape the dough into a rectangle, wrap in plastic, and refrigerate for at least 1 hour or up to 24 hours.
- Roll the chilled dough on a floured surface to about 1/8 inch thickness and cut into 4 even rectangles.
- Brush edges with egg wash, spoon strawberry jam onto one half of each rectangle, fold over, and seal edges firmly with a fork.
- Bake at 350°F (177°C) for 25 to 30 minutes until golden. Cool fully, then top with a glaze made from whisked powdered sugar and water.
Notes
- Keep all crust ingredients cold, including your hands if possible, for the flakiest texture.
- Warm leftover pastries in a 350°F oven for about 10 minutes to restore crispness.
Nutrition Facts
- Calories: 543kcal
- Fat: 23g
- Cholesterol: 60mg
- Sodium: 309mg
- Potassium: 66mg
- Carbohydrates: 80g
- Fiber: 2g
- Sugar: 41g
- Protein: 4g
- Calcium: 20mg
- Iron: 2mg