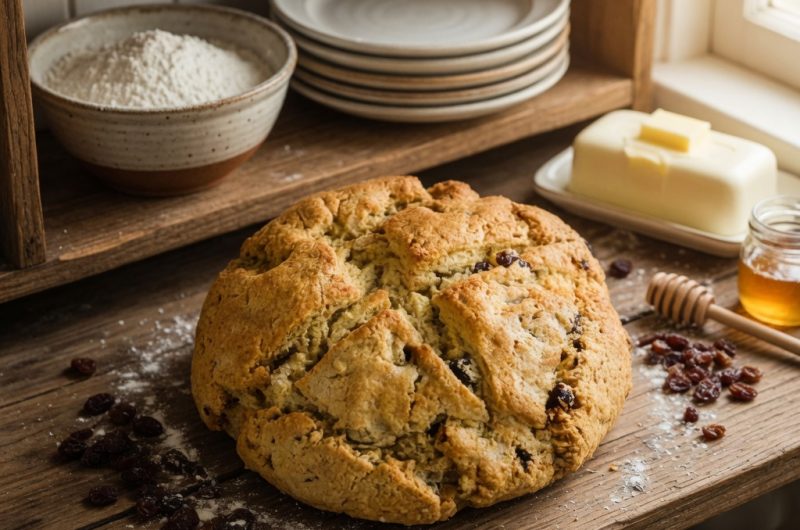
Gluten-free Irish soda bread brings traditional Irish baking into the modern kitchen for people following gluten-free diets without sacrificing authentic flavor or texture. This slightly sweet loaf captures the essence of classic Irish soda bread while using quality gluten-free flour blends that perform reliably in home baking. Traditional Irish soda bread relies on baking soda for leavening rather than yeast, making it naturally suited for gluten-free adaptation since the absence of gluten does not prevent proper rising. The addition of currants provides sweetness and chewiness that distinguishes this bread from savory versions, creating a versatile loaf suitable for breakfast, afternoon tea, or simple dessert. Unlike many gluten-free baked goods that taste dry or crumbly, this recipe produces moist, tender crumb with genuine bread texture that satisfies even people not following gluten-free diets. The straightforward ingredient list and simple preparation method make this accessible to home bakers of all skill levels. Whether you are gluten-free by necessity, choice, or simply curious about expanding your baking repertoire, this Irish soda bread recipe delivers impressive results that prove gluten-free baking can be delicious and uncomplicated.
Understanding Gluten-Free Flour Blends and Xanthan Gum
Quality gluten-free all-purpose flour blends form the foundation of successful gluten-free baking, replacing wheat flour while attempting to mimic its structure and performance. These blends typically combine white rice flour, brown rice flour, tapioca starch, and other starches in proportions designed to replicate wheat flour’s behavior in various baking applications. Different brands vary in their composition, which affects how they perform in specific recipes, making brand consistency important for reliable results. Some gluten-free flour blends already contain xanthan gum or guar gum, which provide the binding action that gluten normally provides in wheat-based baking. Adding extra xanthan gum to flour blends that already contain it creates excessive binding, resulting in tough, gluey texture rather than tender crumb. Checking flour blend packaging for gum content prevents this common mistake. Brands like Manini’s Multi-Purpose Flour Blend and King Arthur Gluten-Free Flour Blend perform reliably in this recipe because their composition creates authentic soda bread texture and flavor.
The Role of Xanthan Gum in Creating Proper Structure
Xanthan gum replaces gluten’s binding function by absorbing water and creating a network that traps air bubbles during mixing and baking. Without adequate binding agents, gluten-free dough falls apart and cannot rise properly, resulting in crumbly texture. One teaspoon of xanthan gum per three cups of gluten-free flour is the standard ratio for most baked goods, and this recipe follows that guideline. Xanthan gum must be thoroughly mixed into the flour before adding wet ingredients to prevent clumping that creates unpleasant texture. Measuring xanthan gum accurately is important because too much creates gluey, overly dense bread while insufficient amounts result in crumbly, poorly structured loaf. If your chosen gluten-free flour blend already contains gum, omitting the additional xanthan gum prevents over-binding that would compromise texture.
Combining Dry Ingredients for Even Distribution
Mixing the gluten-free flour, xanthan gum, sugar, baking soda, baking powder, and salt together in a large bowl ensures all leavening agents and flavoring components distribute evenly throughout the dough. Uneven distribution of baking soda or baking powder results in some areas of the bread rising more than others, creating inconsistent crumb structure and baking. Sugar dissolves slightly during mixing, beginning to incorporate flavor throughout the dough rather than creating sweet pockets. Salt enhances the bread’s overall flavor by balancing sweetness and bringing out subtle flavors. Combining these dry ingredients before adding butter and wet ingredients allows thorough mixing without overworking the dough, which happens more easily once liquid is introduced.
Cutting Cold Butter into Flour for Proper Texture
Using a pastry cutter or two knives to cut cold unsalted butter into the flour mixture creates pea-sized crumbs that bake into a tender, slightly flaky texture. Cold butter remains in small, separate pieces rather than melting into the flour, which is the desired result. These small butter pieces create steam pockets during baking that contribute to the bread’s light texture. If butter is warm or soft, it blends completely into the flour, resulting in denser, less textured bread. Working quickly while cutting butter prevents it from warming from your hands. The goal is visible butter pieces throughout the flour rather than a completely uniform mixture.
Adding Currants for Sweetness and Texture
Currants or raisins add natural sweetness and chewiness that makes this soda bread slightly sweet rather than savory. Currants provide more delicate texture than raisins, though either works acceptably in this recipe. The dried fruit distributes throughout the dough, ensuring each slice contains some sweetness. Some people prefer soaking currants briefly in water to plump them before adding to the dough, which creates more tender fruit in the finished bread. The two-thirds cup amount balances adding enough fruit for flavor without overwhelming the bread’s essential character.
Combining Buttermilk and Egg for Proper Hydration
Mixing buttermilk and egg together before adding to the dry ingredients allows them to combine thoroughly before encountering flour. Buttermilk provides the acidic environment that activates baking soda for leavening. The egg adds binding power and richness while helping the dough come together. Both ingredients should be at room temperature so they mix smoothly rather than creating separated or lumpy mixtures. The one cup of buttermilk plus one egg provides the specific hydration level needed for this recipe, creating dough that is wet and sticky but workable.
Mixing Dough to Achieve Proper Consistency
Starting with a spatula to gently stir the wet and dry ingredients together prevents overworking, which develops tough gluten-free dough and creates dense bread. Once partially combined, switching to using hands allows you to feel the dough’s consistency and ensure thorough mixing without gluten development that comes from vigorous stirring. The dough should be quite sticky, barely holding together in a ball shape. Sticky dough is correct for gluten-free soda bread and should not be flour-dusted or made drier. The stickiness allows proper rising and creates tender texture in the finished bread.
Forming and Preparing the Dough for Baking
Forming the sticky dough into a rough ball shape and placing it on parchment paper lined baking sheet prevents sticking while the bread bakes. The parchment paper also allows easy removal from the pan after baking. The dough does not require shaping into a perfect round; rustic, slightly rough appearance is traditional for Irish soda bread. Combining melted butter and buttermilk creates a mixture for brushing the loaf that adds richness and helps browning during baking. Brushing the entire loaf surface ensures even browning and golden exterior.
Slashing the Loaf for Traditional Appearance and Practical Benefit
Cutting an X shape in the loaf’s top serves both traditional and practical purposes. Traditionally, the cross represents a blessing on the bread. Practically, the slash allows steam to escape during baking, preventing the top from bursting at unexpected places. The slash also creates an opening where you can observe interior baking progress by looking for wet batter. If the interior is still wet batter when the loaf appears golden brown, additional baking time is needed. The slash should be approximately one-quarter inch deep, cutting through the surface without cutting all the way through the loaf.
Baking at the Correct Temperature for Golden Results
Baking at three hundred seventy-five degrees Fahrenheit for fifty to fifty-five minutes allows the exterior to brown while the interior finishes baking. The oven temperature is important for achieving the balance between golden exterior and fully cooked interior. Different ovens vary in actual temperature, so the first batch helps you understand your specific oven’s characteristics. The bread is done when golden brown throughout and no wet batter is visible in the X slash. A toothpick inserted into the center should come out clean or with just a few moist crumbs, not wet batter.
Cooling for Better Texture and Easier Slicing
Allowing the bread to cool on the pan for ten minutes begins setting the structure while the residual heat continues baking the interior slightly. Transferring to a cooling rack after ten minutes prevents the bottom from becoming soggy from contact with the warm pan. Cooling completely before slicing allows the crumb to set properly, making neat slices possible. Warm or hot bread crumbles when sliced because the structure has not fully set. The bread actually tastes better and cuts cleaner when completely cooled, making patience worthwhile.
Serving and Enjoying the Finished Bread
Gluten-free Irish soda bread works beautifully for breakfast, afternoon tea with butter and jam, or simple dessert served with tea or coffee. The slightly sweet flavor appeals to people who prefer bread with subtle sweetness without being overly sweet like cake. Toasting slices and spreading with butter enhances the bread’s natural flavors. Some people enjoy serving with clotted cream and jam for an authentic Irish tea experience. The bread keeps well at room temperature for several days and freezes excellently for longer storage.
Storing and Freezing for Extended Enjoyment
The cooled bread stores in an airtight container at room temperature for up to three days without significant quality loss. Longer storage in the refrigerator extends shelf life to one week, though texture gradually becomes drier. Freezing the whole loaf or individual slices wrapped tightly in plastic wrap and aluminum foil preserves freshness for several months. Thawing at room temperature or toasting from frozen restores the bread’s quality without requiring baking again. Proper storage ensures you can enjoy this bread across multiple days without waste.
Troubleshooting Common Gluten-Free Soda Bread Problems
If the bread is too dense, the dough may have been overmixed, developing excessive gluten from xanthan gum, or the flour blend used may have been unsuitable. Using tested flour blends and mixing gently prevents this issue. If the bread is too dry, baking time may have been excessive or the oven temperature too high. Reducing baking time by five minutes for future batches helps. If the bread did not rise adequately, insufficient xanthan gum or using flour blend already containing gum but adding more may be responsible. Checking flour blend packaging prevents this problem.
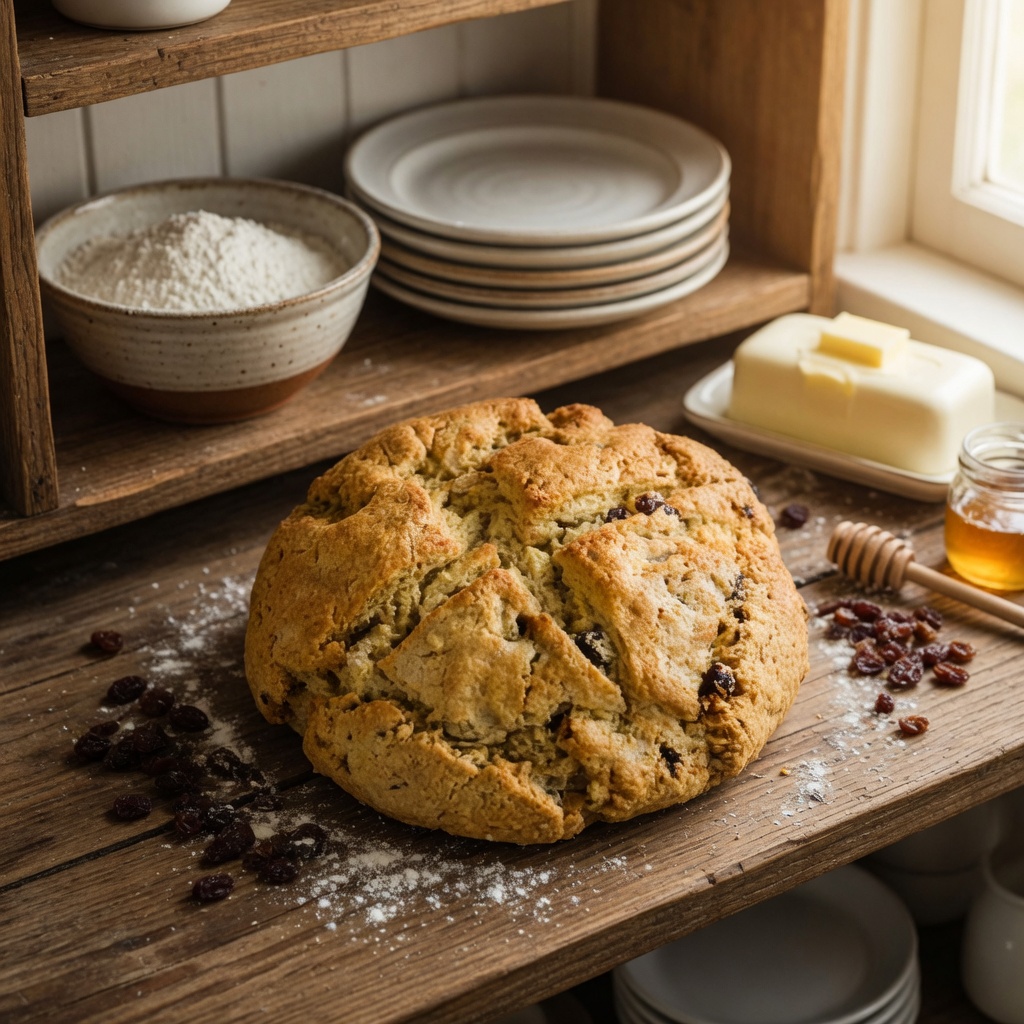
Gluten-free Irish Soda Bread
Bake a slightly sweet gluten-free Irish soda bread featuring currants, tender crumb, and authentic Irish bread character. This straightforward recipe uses quality gluten-free flour blend with xanthan gum to replicate traditional soda bread texture without requiring yeast or lengthy rising time.
15
minutes55
minutes30
minutes1
hour40
minutesIngredients
- For the Dough:
3 cups (375 grams) quality gluten-free all-purpose flour blend
1 teaspoon xanthan gum (omit if flour blend already contains gum)
1/4 cup sugar
1 teaspoon baking soda
1 tablespoon baking powder
1/2 teaspoon salt
1/2 cup (1 stick or 8 tablespoons) cold unsalted butter
2/3 cup currants or raisins
1 cup buttermilk, at room temperature
1 large egg, at room temperature
- For Brushing:
1 tablespoon melted butter
1 tablespoon buttermilk
Directions
- Preheat oven to three hundred seventy-five degrees Fahrenheit. Line a baking sheet with parchment paper. In a large bowl, combine gluten-free flour, xanthan gum (if needed), sugar, baking soda, baking powder, and salt. Mix thoroughly to distribute all ingredients evenly.
- Using a pastry cutter or two knives, cut cold butter into the flour mixture until pea-sized crumbs form. Stir in currants or raisins, distributing them evenly throughout the mixture.
- In a small bowl, mix together buttermilk and egg. Add the wet mixture to the flour-butter combination. Start with a spatula to gently stir, then switch to using your hands to mix until a wet, sticky dough forms. Do not overmix.
- Form the sticky dough into a rough ball shape and place on the parchment-lined baking sheet. In a separate bowl, combine melted butter and buttermilk. Using a pastry brush, brush the entire loaf with the butter-buttermilk mixture.
- Using a sharp knife, cut an X shape approximately one-quarter inch deep into the top of the loaf. Bake at three hundred seventy-five degrees Fahrenheit for fifty to fifty-five minutes until golden brown and no wet batter is visible in the X slash.
- Allow the bread to cool on the baking sheet for ten minutes, then transfer to a cooling rack. Cool completely before slicing, which typically takes an additional twenty minutes. The bread cuts cleaner and tastes better when completely cooled.
Notes
- Flour Blend Selection: Different gluten-free flour blends perform differently in baking. Manini’s Multi-Purpose Flour Blend and King Arthur Gluten-Free Flour Blend have been tested successfully with this recipe and produce authentic soda bread texture. Experimenting with different brands helps identify your preferred option.
- Cooling Benefits: Cooling completely before slicing allows the crumb structure to set properly. Warm bread crumbles when sliced, while cooled bread slices cleanly. The bread also tastes better when fully cooled.
- Storage Duration: Store cooled bread in an airtight container at room temperature for up to three days. Refrigerate for up to one week or freeze whole loaves or slices for several months.
- Make-Ahead Option: Bake the bread several hours or the day before serving. Wrap the cooled loaf and store at room temperature. Refresh in a warm oven before serving if desired.
- Traditional Serving: Serve with tea or coffee for an authentic Irish tea experience, optionally with clotted cream and jam.