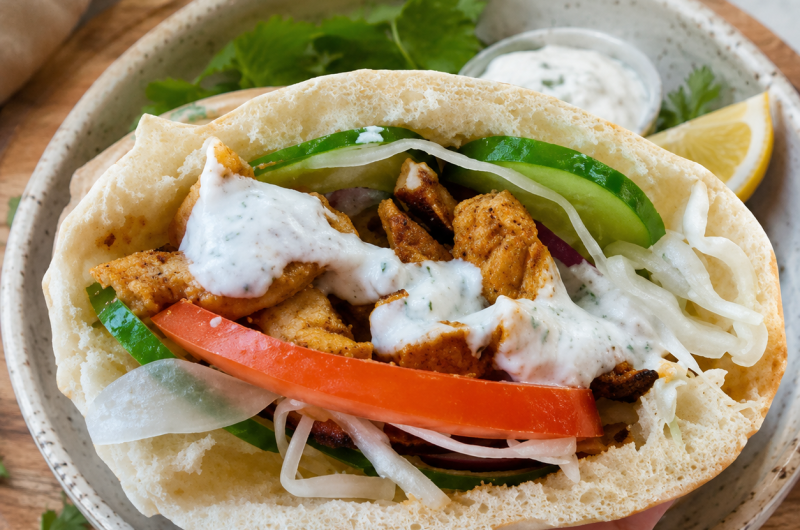
Overnight sourdough pita bread is a wonderful way to turn a simple fermented dough into soft, flexible homemade pita with the pocket everyone loves. Unlike quick pita recipes that rely on commercial yeast, this version uses active sourdough starter and a long fermentation process to build flavor naturally. The dough is prepared during the day, allowed to ferment at room temperature, chilled overnight, and then shaped into individual pita breads the following day. When baked on an extremely hot surface, the trapped steam separates the dough into two layers, creating a hollow center that is perfect for filling.
Why Overnight Fermentation Makes Better Pita
The overnight fermentation is one of the most useful features of this sourdough pita recipe. Giving the dough several hours to ferment allows the sourdough starter to work gradually while the flour develops more flavor and structure. After the initial room-temperature fermentation, the dough spends 8 to 16 hours in the refrigerator. This slower stage gives you flexibility because the dough can be prepared ahead of time rather than requiring everything to happen in a single session. The result is homemade pita with a subtle fermented flavor, soft texture, and satisfying chew.
The Key to Soft Sourdough Pita
Soft pita bread starts with a dough that is properly hydrated and not overloaded with flour. The mixture should feel soft and slightly tacky after kneading rather than dry or stiff. Adding too much flour during preparation can make the finished pita difficult to roll and less likely to develop a good pocket. Olive oil also contributes to the tender texture of the dough. When the ingredients are combined correctly, the dough becomes smooth, elastic, and flexible enough to roll into thin rounds without cracking or tearing.
Choosing the Right Sourdough Starter
An active sourdough starter is essential when making naturally leavened pita bread. The starter should have been recently fed and should show clear signs of activity before it is added to the dough. A starter that has risen well and contains visible bubbles generally has the strength needed to ferment the pita dough properly. Since sourdough activity can vary with temperature, flour, feeding schedule, and starter maturity, it is better to judge the starter by its appearance and activity than by the clock alone.
Mixing the Pita Dough
Start by combining the active sourdough starter, lukewarm water, and olive oil in a large mixing bowl. Stir the mixture until the starter is mostly dispersed throughout the water. Add the flour and fine sea salt, then mix until there are no obvious patches of dry flour remaining. At this point, the dough may look rough and uneven, which is completely normal. The next resting period gives the flour time to absorb the water and makes the dough easier to knead without requiring excessive handling.
Resting Before Kneading
Allowing the dough to rest for 20 to 30 minutes before kneading is a small step that can make the dough easier to work with. During this period, the flour absorbs moisture and begins developing its structure. After the rest, the dough should feel more cohesive than it did immediately after mixing. This short pause also means you do not have to rely on aggressive kneading to bring the dough together. A little patience at the beginning can make the rest of the sourdough pita process much smoother.
Kneading for an Elastic Dough
Knead the dough for approximately 5 to 7 minutes, working until it becomes noticeably smoother and more elastic. The finished dough should remain soft and slightly tacky but should not feel excessively sticky. Resist the temptation to keep adding flour simply because the dough feels a little tacky. A soft dough is helpful when making pita because it needs to stretch easily during rolling. Once the dough has developed a smooth, flexible consistency, return it to the bowl and prepare it for its first fermentation stage.
Room Temperature Bulk Fermentation
The first fermentation takes place at room temperature and generally lasts around 3 to 5 hours. During this stage, the sourdough starter begins fermenting the dough and gradually changes its texture and appearance. Instead of waiting for the dough to double dramatically, look for a dough that has become lighter, smoother, and approximately 40 to 50 percent larger. Fermentation time can change depending on the warmth of your kitchen, so the appearance of the dough is more useful than following a rigid schedule.
The Overnight Cold Fermentation
Once the dough has completed its initial fermentation, cover it tightly and transfer it to the refrigerator for 8 to 16 hours. This overnight cold fermentation is what makes the recipe convenient for home bakers who want fresh sourdough pita without preparing and baking everything at once. The refrigerator slows fermentation while allowing the dough to continue developing flavor. The chilled dough is also easier to divide and handle the next day because it becomes firmer and more manageable.
Preparing the Dough the Next Day
When you are ready to make the pita breads, remove the dough from the refrigerator and let it sit at room temperature for approximately 20 to 30 minutes. This brief period takes the chill off the dough and makes it easier to divide and shape. Turn the dough onto a lightly floured surface and divide it into 15 equal pieces. Each portion should weigh approximately 62 grams. Keeping the pieces similar in size helps them bake more evenly and gives you consistently sized pita breads.
Shaping Individual Dough Balls
Shape each portion into a smooth, compact ball. The surface should be reasonably taut without being torn. Arrange the dough balls on a lightly floured surface and keep them covered while working. Covering the portions is particularly important because exposed dough can develop a dry skin. That dry surface can make rolling difficult and may cause the pita to crack around the edges. Keeping the dough protected from air helps maintain the soft texture needed for easy shaping.
Why the Dough Needs Another Rest
After the dough portions have been shaped, let them rest for 30 to 45 minutes. This stage gives the gluten time to relax after dividing and shaping. If you try to roll the dough immediately, it may resist stretching and quickly shrink back toward its original shape. A proper resting period makes the dough noticeably easier to roll into thin circles. It is one of the simplest steps for improving the shape and consistency of homemade sourdough pita bread.
Creating the Perfect Pita Pocket
The famous pita pocket forms because moisture inside the thin dough rapidly turns into steam when it reaches the very hot baking surface. That steam pushes the two layers of dough apart, creating a hollow center. For this reason, even thickness is extremely important. Roll each dough ball into a circle about 5 to 6 inches wide and approximately 1/8 inch thick. If one area is much thicker than another, the pita may puff unevenly or fail to create a complete pocket.
Using a Very Hot Baking Surface
A properly heated baking surface is one of the most important details in this recipe. A cast-iron plate, baking steel, pizza stone, or heavy inverted baking sheet can all work. Place the chosen surface inside the oven and preheat it to 500°F for at least 45 minutes. Even if your oven reaches 500°F earlier, do not skip the full preheating period. The baking surface needs enough time to become thoroughly hot so that the pita dough begins cooking immediately when it touches the surface.
Rolling the Pita Dough Correctly
Roll each dough ball gently and evenly, aiming for a round approximately 5 to 6 inches across. The dough should be thin enough to puff but not so thin that it becomes fragile. Try to maintain a consistent thickness from the center toward the edges. Uneven rolling is one of the common reasons pita breads puff only partially. Before transferring the rolled dough to the oven, remove any excess flour from the surface because loose flour can burn on the extremely hot baking surface.
Baking for a Full Puff
Carefully place two or three rolled pita rounds onto the fully heated baking surface. Bake for approximately 2 to 4 minutes. During baking, the dough should begin to inflate as steam builds inside. A successful pita can balloon dramatically, sometimes becoming almost completely round and hollow. The bread does not need to become deeply brown. Once the pita has fully puffed, cooked through, and developed light color, it can be removed from the oven.
Keeping Homemade Pita Soft
Immediately after baking, transfer the pita breads to a plate or basket and cover them with a clean kitchen towel. This simple step helps retain moisture and keeps the bread soft and flexible. If the baked pitas are left uncovered for too long, their surfaces can become drier and less pliable. Covering them while they cool creates a softer texture that is ideal for slicing open and filling with your favorite ingredients.
Why Some Pitas Do Not Puff
Not every pita will necessarily form a perfect balloon, and that does not mean the bread is unusable. Incomplete puffing can happen when the dough is rolled unevenly, when the baking surface is not hot enough, or when the dough is accidentally folded, creased, or torn during transfer. Excess flour can also interfere with the contact between the dough and hot baking surface. Even a pita that does not develop a complete pocket can still be enjoyed as soft flatbread or transformed into crispy pita chips.
Filling Ideas for Sourdough Pita
One of the biggest advantages of homemade pita bread is its versatility. Once the pita has cooled enough to handle, it can be filled with cooked chicken, falafel, vegetables, eggs, or other favorite sandwich fillings. The pocket creates a convenient space for holding ingredients without requiring additional bread. You can also serve warm sourdough pita alongside hummus or other dips. Because the bread has a mild fermented flavor, it works equally well with savory breakfast foods, lunches, snacks, and Mediterranean-inspired meals.
How to Store Homemade Pita Bread
Once the pita breads have cooled, store them in an airtight container at room temperature for up to two days. Keeping them sealed helps prevent unnecessary moisture loss and keeps the bread flexible. If you have more pita than you can eat within a couple of days, freezing is a practical option. Place parchment paper between the individual pitas before freezing so they can be separated more easily later. Properly frozen pita can be stored for up to three months.
Notes for Reliable Results
Use a recently fed, visibly active sourdough starter and measure the ingredients accurately, preferably with a digital kitchen scale. Avoid adding excessive flour during kneading because the dough is supposed to remain soft and slightly tacky. Keep every dough ball covered during resting and shaping, and roll the rounds evenly so the steam can spread properly. Most importantly, give the baking surface a full 45 minutes to heat at 500°F. The high temperature is central to creating the steam needed for the pita pocket.
More Helpful Baking Notes
When transferring the rolled dough to the oven, handle it carefully and avoid folding or creasing the round. Excess flour should be shaken away before baking because flour left on a scorching surface can burn and create unwanted smoke or bitterness. Once the pita has puffed and is lightly colored, remove it rather than waiting for a deeply browned crust. Immediately covering the baked breads with a clean towel helps maintain their soft and flexible texture as they cool.
Frequently Asked Questions About Sourdough Pita
How do I get sourdough pita to puff?
The most important factors are an active starter, properly fermented dough, even rolling, and a very hot baking surface. Preheat the cast-iron plate, baking steel, pizza stone, or heavy baking sheet at 500°F for at least 45 minutes. Roll the dough evenly to about 1/8 inch thick and transfer it carefully without creating folds or tears. These conditions help steam build rapidly inside the pita and separate the layers.
Why did my pita stay flat?
Flat pita can result from several factors, including an insufficiently hot baking surface, uneven dough thickness, weak fermentation, or rough handling during transfer. Make sure the dough has fermented properly and that the baking surface is thoroughly preheated. Rolling the pita evenly is also important because areas of dramatically different thickness can prevent the steam from creating a uniform pocket.
Can I make these pitas ahead of time?
Yes. The overnight fermentation makes this recipe particularly convenient for advance preparation. After the initial room-temperature fermentation, the dough can be refrigerated for 8 to 16 hours. The baked pitas can also be stored in an airtight container for up to two days or frozen for as long as three months with parchment paper between them.
Can pita that does not puff still be eaten?
Absolutely. A pita that does not form a complete pocket can still make excellent flatbread. It can be served with dips, used as a wrap, or cut into pieces and baked into pita chips. Although a full pocket is desirable for stuffing, puffing is not the only measure of whether the bread is successful.
What temperature is best for baking sourdough pita?
This recipe uses a very high oven temperature of 500°F. The baking surface should be heated for at least 45 minutes before the dough is placed on it. The combination of high heat and a thoroughly heated surface encourages rapid steam production, which is essential for creating the characteristic hollow pita pocket.
Serving Suggestions for Homemade Pita
Warm sourdough pita can be used in countless ways. Fill the pockets with chicken and vegetables for a quick lunch, add falafel and fresh vegetables for a meat-free meal, or use scrambled or cooked eggs for a simple breakfast. The bread is also excellent served alongside hummus and other dips. Since the pita is soft and flexible, it can be folded, stuffed, or torn into pieces for dipping depending on how you plan to serve it.
What Makes This Recipe a Great Homemade Bread
This overnight sourdough pita recipe combines the convenience of advance preparation with the flavor of naturally fermented bread. There is no need to rush the dough through a short fermentation schedule. Instead, the sourdough starter has time to work gradually, while the overnight refrigeration makes the process easier to organize. The finished pitas are soft, flexible, lightly colored, and designed to develop a hollow pocket when baked correctly. They are an excellent addition to any homemade bread collection.
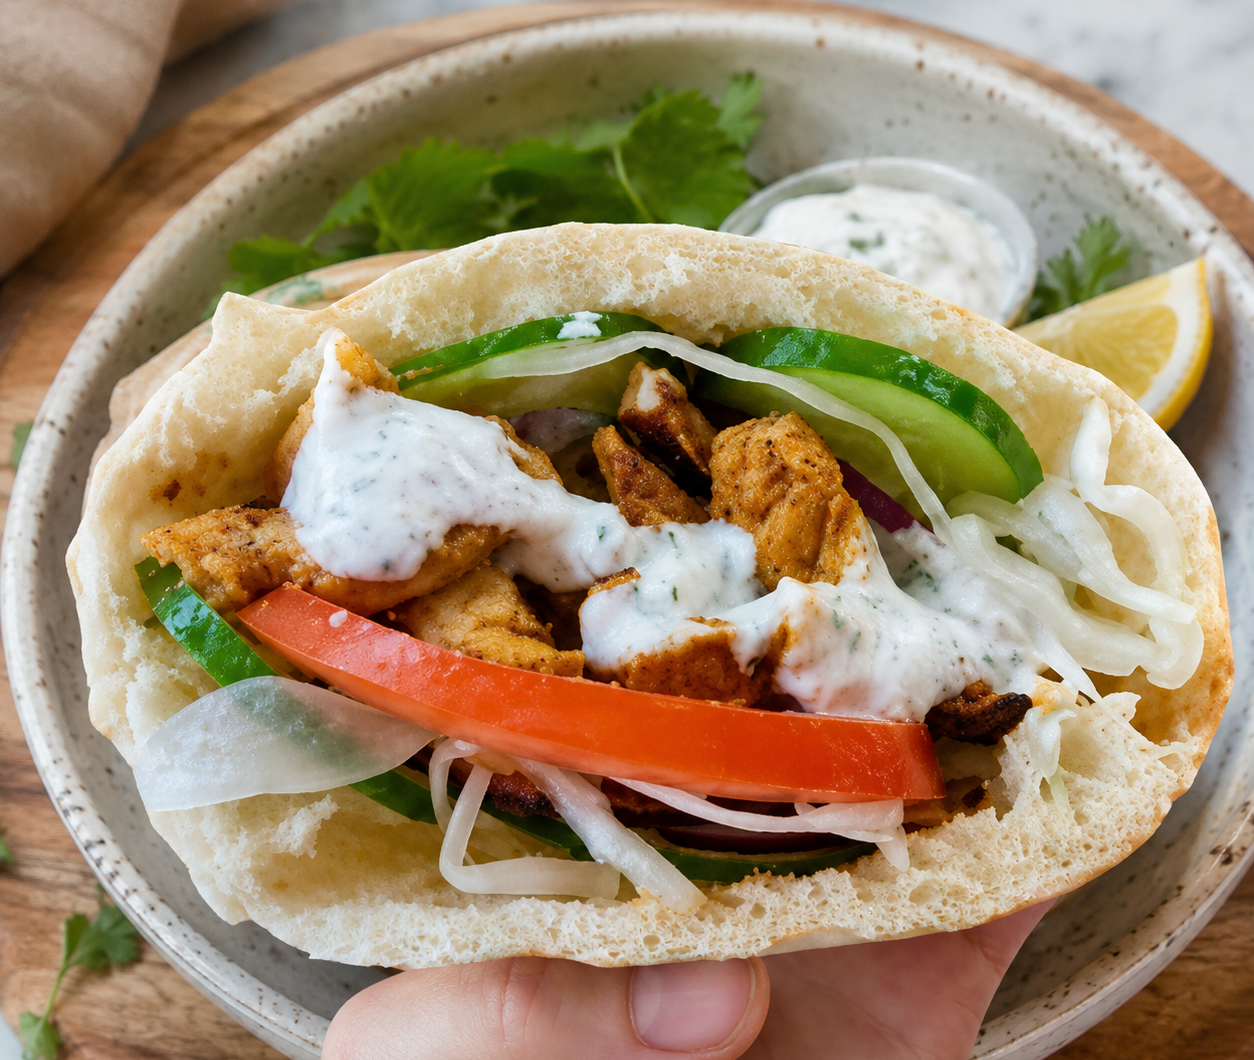
Homemade Overnight Sourdough Pita Bread
Soft, flexible homemade sourdough pita bread made with active sourdough starter, olive oil, and flour. The dough is fermented at room temperature, chilled overnight, divided into individual portions, rolled thin, and baked on a scorching-hot surface to create naturally hollow pita pockets. Serve them with chicken, falafel, vegetables, eggs, hummus, or your favorite dips.
15
servings35
minutes25
minutes300
kcalIngredients
100 grams active sourdough starter, about 1/2 cup
300 grams lukewarm water, about 1 1/4 cups
25 grams olive oil, about 2 tablespoons
500 grams bread flour or all-purpose flour, about 4 cups
10 grams fine sea salt, about 1 3/4 teaspoons
Additional flour for dusting the work surface
Directions
- Mix the liquid ingredients: Place the active sourdough starter, lukewarm water, and olive oil in a large mixing bowl. Stir until the starter is mostly dispersed.
- Add flour and salt: Add the bread flour or all-purpose flour and fine sea salt. Mix until all of the dry flour has been incorporated and a rough dough forms.
- Let the dough rest: Cover the bowl and leave the dough to rest for 20 to 30 minutes.
- Knead: Knead the dough for 5 to 7 minutes, until it becomes smoother and more elastic. The dough should remain soft and slightly tacky rather than excessively sticky.
- Start bulk fermentation: Return the dough to the bowl, cover it, and let it ferment at room temperature for approximately 3 to 5 hours. The dough should become lighter, smoother, and approximately 40 to 50 percent larger.
- Refrigerate overnight: Cover the bowl tightly and place the dough in the refrigerator for 8 to 16 hours.
- Bring the dough toward room temperature: Remove the dough from the refrigerator and allow it to sit at room temperature for approximately 20 to 30 minutes.
- Divide: Turn the dough onto a lightly floured work surface and divide it into 15 equal pieces, approximately 62 grams each.
- Shape: Form each portion into a smooth dough ball. Arrange the balls on a lightly floured surface and keep them covered.
- Rest the dough balls: Allow the covered dough portions to rest for 30 to 45 minutes so the gluten can relax.
- Heat the oven: Place a cast-iron plate, baking steel, pizza stone, or heavy inverted baking sheet inside the oven. Preheat the oven to 500°F for at least 45 minutes.
- Roll the pitas: Roll each dough ball into an even circle measuring approximately 5 to 6 inches wide and about 1/8 inch thick.
- Bake: Place two or three rounds carefully onto the fully heated baking surface. Bake for approximately 2 to 4 minutes, until the pitas puff completely and become lightly colored.
- Keep them soft: Transfer the baked pita breads to a plate or basket and immediately cover them with a clean kitchen towel.
- Finish the batch: Continue rolling and baking the remaining dough portions.
- Cool and serve: Allow the pitas to cool slightly before cutting or filling. The breads will naturally deflate as they cool, while the hollow pockets should remain inside.
Notes
- Notes
Use a recently fed sourdough starter that is visibly active and has risen well.
A digital kitchen scale provides the most reliable ingredient measurements.
Keep the dough soft and slightly tacky; avoid adding excessive flour.
Cover the dough balls during resting to prevent the surfaces from drying.
Roll each pita as evenly as possible to encourage complete puffing.
Preheat the baking surface for at least 45 minutes at 500°F.
Shake away excess flour before placing the dough on the hot surface.
Handle the rolled dough carefully so it does not fold, crease, or tear.
Remove the pita once it has puffed and is lightly colored rather than waiting for deep browning.
Cover freshly baked pitas immediately with a clean kitchen towel to help keep them soft.
A small amount of crumb remaining inside the pocket is normal.
Pitas that do not fully puff can still be served as flatbread or made into pita chips.
Store cooled pita breads in an airtight container at room temperature for up to 2 days.
Freeze the pita breads for up to 3 months, placing parchment paper between them for easier separation.
Nutrition Facts
- Serving Size: 1 g
- Total number of serves: 15
- Calories: 150kcal
- Fat: 2g
- Saturated Fat: 0.3g
- Trans Fat: 0g
- Cholesterol: 0mg
- Sodium: 265mg
- Carbohydrates: 28g
- Fiber: 1g
- Sugar: 0.2g
- Protein: 4g