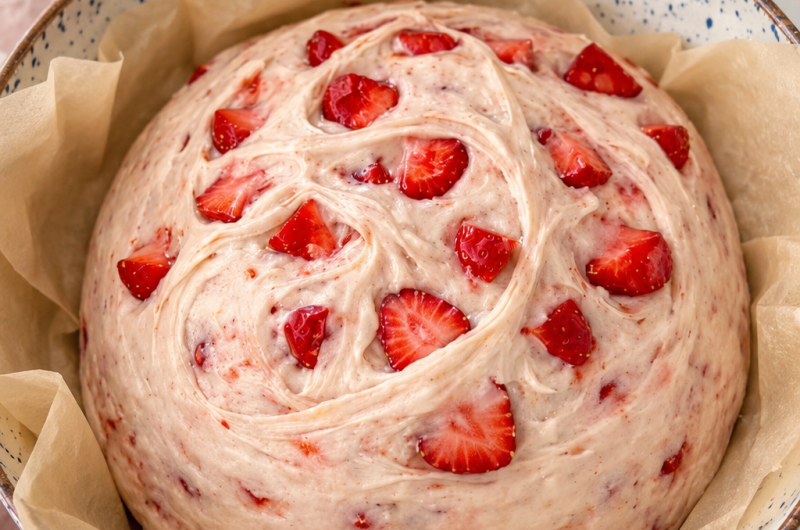
Strawberries and cream sourdough bread brings together the tangy character of naturally fermented bread with the sweet flavor of strawberries and the rich, creamy texture of cream cheese. This homemade sourdough loaf is an especially appealing choice when you want something a little different from traditional rustic bread. Freeze-dried strawberries add concentrated berry flavor without introducing excess moisture, while small portions of cream cheese create creamy pockets throughout the loaf. The result is a beautifully textured bread that works for breakfast, brunch, afternoon coffee, or a simple homemade dessert.
Why This Sourdough Recipe Works So Well
A good sourdough loaf depends on a few basic elements: an active starter, properly hydrated dough, sufficient fermentation, careful shaping, and a hot baking environment. This strawberries and cream sourdough recipe follows those principles while adding two flavorful inclusions. The dough itself remains relatively simple, using all-purpose flour, filtered water, salt, and bubbly sourdough starter. Because the flavor additions are incorporated after the dough has developed strength, the bread can maintain its structure while still holding generous amounts of strawberries and cream cheese.
The freeze-dried strawberries are particularly useful in this recipe because they contain much less moisture than fresh strawberries. Fresh berries can release liquid into sourdough dough, making it softer and more difficult to shape. Freeze-dried fruit gives you an intense strawberry taste while keeping the dough manageable. Lightly crushing the berries before adding them also helps distribute their flavor throughout the loaf without turning the entire dough into a wet mixture.
The Role of an Active Sourdough Starter
The sourdough starter is one of the most important components of this recipe. It should be bubbly, active, and close to its peak before it is mixed into the dough. A healthy starter provides the fermentation needed to help the bread rise naturally while contributing the characteristic mild tang associated with artisan sourdough bread. If the starter is sluggish or has not risen properly after feeding, the dough may take considerably longer to ferment.
Feeding the starter in the morning and using it later in the day allows you to work with a starter that has had time to become lively. Look for visible bubbles and a noticeable increase in volume. The exact timing can vary depending on room temperature, starter strength, and feeding routine, so visual activity is more useful than following a strict clock. Using an active starter is one of the simplest ways to improve the texture and rise of homemade sourdough bread.
Building the Dough Without Overworking It
Once the starter reaches its active stage, combine it with filtered water until the mixture becomes milky and evenly distributed. Adding the water before the flour makes it easier to incorporate the starter throughout the dough. Once the flour and salt are added, mix everything until a shaggy dough forms. At this point, the dough does not need to look smooth or polished. The resting period that follows gives the flour time to absorb the water and allows the dough to begin developing naturally.
The first rest is important because sourdough dough benefits from patience. Rather than trying to develop all of the gluten through intensive kneading, this recipe relies on resting and folding. After the initial rest, gently pull the sides of the dough upward and toward the center while rotating the bowl. This process gradually strengthens the dough without unnecessarily tearing it. After another period of rest, additional stretch-and-fold sessions continue building the structure needed to support the strawberry and cream cheese filling.
Stretch and Fold for Better Dough Strength
Stretch-and-fold techniques are a familiar part of many sourdough recipes because they strengthen the gluten network while keeping the dough relatively gentle. Instead of aggressively kneading the mixture, you lift and fold portions of the dough over itself. Repeating this process every hour for several rounds allows the dough to become more elastic and cohesive.
You will notice a difference as the dough develops. Early in the process, it may feel loose and somewhat rough. With each folding session, it should become smoother, stronger, and easier to handle. The dough does not need to be perfectly smooth before the overnight bulk fermentation begins. Once the required stretch-and-fold sessions are complete, cover the bowl with a damp bowl cover or tea towel so the surface does not dry out, then allow the dough to ferment on the counter overnight.
Overnight Bulk Fermentation
Overnight bulk fermentation gives the sourdough starter enough time to work through the dough and develop flavor. The dough should be covered properly during this stage because an exposed surface can form a dry skin that becomes difficult to incorporate later. Room temperature has a major influence on fermentation speed, so the dough should be observed rather than judged only by a fixed number of hours.
A warmer kitchen can cause fermentation to move faster, while a cooler environment can slow it down. The goal is a dough that has developed noticeable fermentation activity and strength. Allowing sufficient bulk fermentation contributes to the airy texture and deeper flavor associated with naturally leavened sourdough bread. Patience at this stage is especially important because rushing fermentation can result in a dense loaf.
Adding Strawberries and Cream Cheese
The following morning, gently turn the fermented dough onto a lightly floured work surface. Stretch it into a large rectangle, but avoid making it excessively thin. The dough needs to remain strong enough to support the inclusions without tearing. This is where the strawberries and cream cheese are introduced.
The cream cheese is distributed in dollops over the dough rather than spread aggressively across the entire surface. This approach helps create creamy pockets throughout the finished loaf. The freeze-dried strawberries are lightly crushed and sprinkled over the cream cheese and dough. Using the specified amount in stages makes it easier to fold the filling into the bread without losing the structure of the dough.
Folding the Filled Dough
After the first layer of cream cheese and strawberries is added, fold the shorter sides of the dough toward the middle. This begins enclosing the filling within the loaf. The remaining cream cheese and strawberries are then added before the dough is folded into the general shape of the banneton, whether you prefer a round loaf or a batard.
This folding process does more than simply contain the ingredients. It creates layers of dough, fruit, and cream cheese that eventually become part of the finished bread. Work carefully and avoid excessive pressure. The goal is to keep the dough intact while distributing the filling as evenly as possible.
Shaping and Stitching the Sourdough
Once the dough has been placed seam side up in the banneton, give it a short rest. After about 15 minutes, the dough can be strengthened through a stitching technique. This involves pinching and pulling sections of the dough toward the middle, working from the top of the banneton toward the bottom. Proper shaping helps the loaf maintain its form during its final cold fermentation and baking.
A banneton provides support while the shaped dough rests. It also helps create the attractive structure associated with artisan sourdough. Whether you shape the loaf into a round or batard, the most important consideration is creating enough surface tension to help the bread hold its shape. Avoid handling the dough more than necessary because excessive manipulation can disturb the fermentation that has already taken place.
Cold Fermentation for Flavor and Convenience
After shaping, cover the banneton with plastic wrap or a bowl cover and place it in the refrigerator. The dough can remain chilled for at least two hours or for up to four days. This cold fermentation stage offers flexibility and also gives the sourdough additional time to develop flavor.
Refrigerated dough is often easier to score and transfer to a hot Dutch oven because it becomes firmer. The chilled environment also slows fermentation, giving you more control over when the bread is baked. This makes the recipe convenient when you want to prepare sourdough in advance and bake it later.
Baking Sourdough in a Dutch Oven
A preheated Dutch oven provides an excellent environment for baking sourdough. Heating it at 475°F for at least 20 minutes ensures that the dough enters a properly hot baking chamber. The covered Dutch oven traps steam released from the dough, helping the crust remain flexible during the early part of baking. This encourages the loaf to expand before the crust becomes firm.
Turn the chilled dough onto parchment paper or a bread mat and score the surface before transferring it carefully into the hot Dutch oven. Scoring gives the expanding bread a controlled place to open during oven spring. Bake with the lid on for 25 minutes, then remove the lid, reduce the oven temperature to 450°F, and continue baking for another 23 to 25 minutes.
Getting a Beautifully Baked Crust
The second stage of baking allows the crust to develop deeper color and a firmer texture. Once the lid is removed, moisture escapes and the exterior can brown properly. The exact appearance of the finished crust may vary depending on your oven, Dutch oven, and baking environment, so use the recommended time as a guide while observing the bread.
When the loaf is finished, remove it from the Dutch oven and transfer it to a wire cooling rack. Although the aroma may make it tempting to slice immediately, cooling is an essential part of the baking process. Cutting sourdough while it is still very hot can affect the internal crumb and make the texture appear gummy. Allowing the loaf to cool completely gives the interior time to finish setting.
What the Finished Loaf Should Be Like
A successful strawberries and cream sourdough loaf should have a well-developed crust with a soft, flavorful interior. The freeze-dried strawberries provide sweet berry flavor throughout the bread, while the cream cheese offers creamy richness. Because the fruit is freeze-dried rather than fresh, the strawberry flavor can remain concentrated without making the dough excessively wet.
The bread is naturally suited to breakfast and brunch, but it can also be served as an afternoon treat. A slice pairs particularly well with butter and coffee, as the richness of the dairy complements the sweet-tart strawberry flavor. The loaf can also be served as part of a spring-inspired brunch spread or enjoyed on its own when you want something more indulgent than ordinary sourdough toast.
How to Serve Strawberry Cream Sourdough
There are several simple ways to enjoy this homemade sourdough bread. A warm slice with butter is an easy choice, especially for breakfast. Coffee makes a natural pairing because its roasted flavor contrasts nicely with the sweet strawberry notes. The bread can also be served during brunch alongside other breakfast favorites.
For a sweeter presentation, slices can be enjoyed as a dessert-style bread. Because cream cheese and strawberries are already built into the loaf, additional toppings are not necessary. Keeping the serving simple allows the flavors incorporated into the dough to remain the focus.
Keeping the Bread Fresh
Like most homemade sourdough bread, this loaf is best enjoyed while it is fresh. Once completely cooled, store it appropriately to help maintain its texture. Cutting only the amount you plan to eat can also help preserve the remaining loaf. A clean bread knife is useful for creating even slices without excessively compressing the crumb.
If the bread is being served later, allowing it to cool completely before storage is important. Storing warm bread can trap condensation and affect the crust. For the best eating experience, slice the loaf as needed and gently warm individual portions when desired.
Notes for Better Results
The condition of your sourdough starter has a major impact on the final loaf, so use it when it is bubbly and active. Keep in mind that fermentation times can vary according to kitchen temperature. The dough should be given enough time to develop rather than being forced to follow an exact schedule. During stretch-and-fold sessions, handle the dough gently and avoid tearing it.
When adding the cream cheese, distribute it in dollops rather than attempting to mash it deeply into the dough. Lightly crushing the freeze-dried strawberries makes them easier to distribute. Avoid stretching the dough so thin that it becomes fragile when the inclusions are added. During shaping, maintain enough tension to create a stable loaf without pressing all of the fermentation out of the dough.
The refrigerator stage is also useful when your schedule changes. The dough can remain cold for two hours or as long as four days according to the original recipe. Before baking, make sure the Dutch oven has been thoroughly preheated. A properly heated baking vessel helps the loaf achieve better oven spring and contributes to a crisp, well-developed crust.
Common Questions About This Sourdough Bread
Can fresh strawberries be used instead of freeze-dried strawberries? Fresh strawberries are not a direct substitute in this recipe because they contain substantially more moisture. That extra liquid can change the dough consistency and make shaping more difficult. The specified freeze-dried strawberries are designed to provide concentrated strawberry flavor while keeping the dough structure manageable.
Why does the dough need several stretch-and-fold sessions? Stretching and folding helps develop strength in the dough without relying on intensive kneading. The repeated folds gradually improve elasticity and structure, allowing the dough to hold its shape and support the cream cheese and strawberry inclusions.
Can the dough stay in the refrigerator overnight? Yes. The recipe includes a refrigerated fermentation stage of at least two hours and allows the shaped dough to remain refrigerated for up to four days. This makes the bread easier to schedule around your day while also allowing the dough to continue developing flavor slowly.
Why should the bread cool completely before slicing? Sourdough continues to settle internally after it leaves the oven. Cutting it too soon can interfere with the crumb structure and may produce a softer or gummy interior. Cooling the loaf completely gives the crumb time to stabilize.
What makes this recipe different from ordinary sourdough bread? The base dough follows a classic naturally leavened bread method, but freeze-dried strawberries and cream cheese transform it into a sweet, fruit-filled sourdough loaf. The combination creates a distinctive strawberries-and-cream flavor while keeping the bread versatile enough for breakfast, brunch, or an afternoon treat.
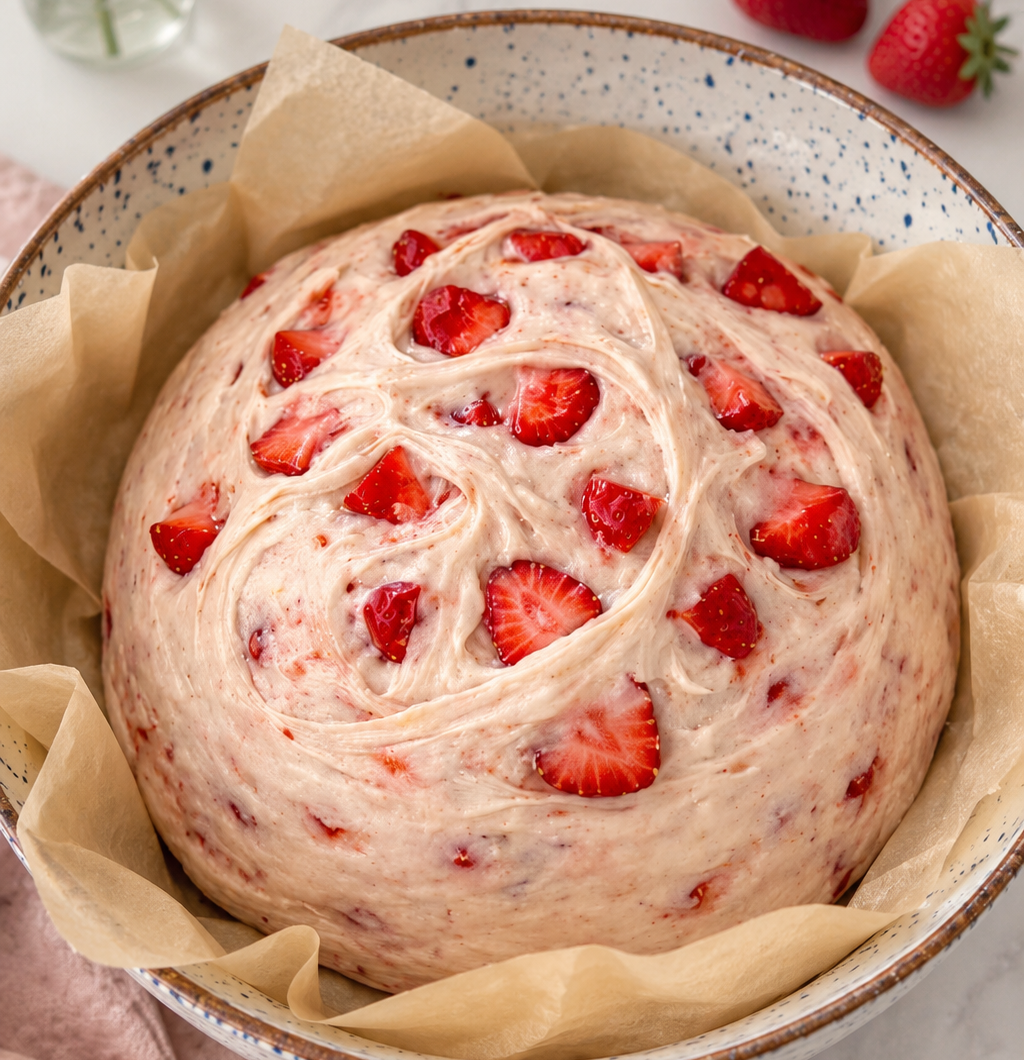
Strawberries and Cream Sourdough Bread
A sweet and flavorful homemade sourdough bread made with bubbly active sourdough starter, all-purpose flour, freeze-dried strawberries, and cream cheese. This artisan-style loaf combines the naturally tangy flavor of sourdough with a creamy strawberry filling and is ideal for breakfast, brunch, afternoon coffee, or a special spring table.
9
servings3
hours50
minutes3
hours50
minutesIngredients
55 grams bubbly, active sourdough starter
360 grams filtered water
500 grams all-purpose flour
10 grams salt
1 oz bag of freeze-dried strawberries, about 1 cup
4 oz cream cheese, half of a block
Directions
- Activate the starter: Feed the sourdough starter in the morning and allow it to become bubbly and active.
- Mix starter and water: When the starter reaches its peak activity, combine the starter and filtered water in a mixing bowl. Stir until the mixture becomes evenly milky.
- Add flour and salt: Add the all-purpose flour and salt. Mix until a shaggy dough forms. Cover and let it rest for 45 minutes to 1 hour.
- Begin strengthening the dough: Pull the dough upward from the sides and fold it toward the center while rotating the bowl. Continue until the dough becomes somewhat smoother. Cover and rest for another 45 minutes to 1 hour.
- Complete the stretch-and-folds: Perform 2 to 4 additional sets of stretch-and-folds, leaving approximately 1 hour between each set. Afterward, cover the dough with a damp bowl cover or tea towel and allow it to bulk ferment overnight at room temperature.
- Prepare the dough for filling: The following morning, turn the dough onto a lightly floured work surface. Gently stretch it into a large rectangle without making it thin enough to tear.
- Add cream cheese: Place about 8 to 10 tablespoons of cream cheese in dollops across the surface.
- Add strawberries: Lightly crush the freeze-dried strawberries and sprinkle about two-thirds of the cup over the cream cheese and dough.
- Fold in the filling: Fold the shorter sides of the dough toward the center. Add the remaining cream cheese and strawberries, then fold the dough into the shape of your banneton, either round or batard.
- Rest the shaped dough: Place the dough seam side up in the banneton and let it rest for 15 minutes.
- Strengthen the shape: Stitch the dough by pinching and pulling the sides toward the center, working from the top of the banneton toward the bottom.
- Cold ferment: Cover the banneton with plastic wrap or a bowl cover. Refrigerate for at least 2 hours or up to 4 days.
- Preheat the oven: Place the Dutch oven in the oven and preheat to 475°F for at least 20 minutes.
- Score the loaf: Turn the chilled dough onto parchment paper or a bread mat. Score the surface using a bread lame.
- Bake covered: Carefully transfer the dough into the hot Dutch oven. Cover with the lid and bake for 25 minutes.
- Finish baking uncovered: Remove the lid, reduce the oven temperature to 450°F, and continue baking for another 23 to 25 minutes.
- Cool completely: Remove the finished loaf from the Dutch oven and place it on a wire cooling rack. Allow it to cool completely before slicing.
Notes
- Notes
Use a bubbly, active sourdough starter for the best fermentation and rise.
Fermentation time can vary depending on the temperature of your kitchen.
Avoid stretching the dough too thin when preparing it for the cream cheese and strawberry filling.
Lightly crush the freeze-dried strawberries before adding them to the dough.
Add the cream cheese in dollops to help distribute it throughout the loaf.
The shaped dough can remain refrigerated for up to 4 days before baking.
Always preheat the Dutch oven thoroughly before transferring the dough.
Let the finished sourdough loaf cool completely before cutting to allow the crumb to set.
Serve with butter and coffee for a simple breakfast or afternoon treat.
Nutrition Facts
- Serving Size: 1 g
- Total number of serves: 1
- Fat: 5g
- Saturated Fat: 3g
- Polyunsaturated Fat: 0.4g
- Monounsaturated Fat: 1g
- Cholesterol: 13mg
- Sodium: 473mg
- Carbohydrates: 66g
- Fiber: 4g
- Sugar: 18g
- Protein: 7g
- Calcium: 28mg
- Iron: 8mg