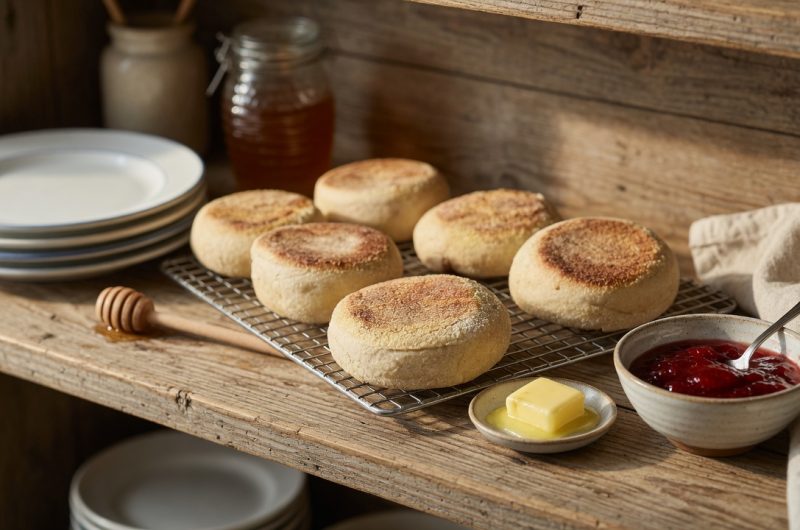
Making English muffins at home gives you control over ingredients and freshness that store-bought versions cannot match. These sourdough English muffins have a tangy flavor and chewy texture that comes from natural fermentation. The process is simpler than most people think and does not require an oven. You cook them on a stovetop in a regular skillet, which makes them accessible even if you have limited kitchen equipment. The taste of a fresh homemade muffin split open and toasted is something everyone should experience at least once.
Understanding Sourdough Starter Basics
A healthy sourdough starter is the foundation of this recipe. Your starter should be active, bubbly, and doubled in size within a few hours of feeding. If your starter has been in the refrigerator, feed it at least once or twice before using it in this recipe. The starter provides the rise and creates that distinctive tangy flavor people love in sourdough baked goods. An active starter means your dough will ferment properly overnight and develop the right texture and taste. Keep your starter at room temperature and feed it regularly for best baking results.
Overnight Fermentation Process
This recipe requires planning ahead because the dough ferments overnight. Mix your flour, water, and active sourdough starter in a glass bowl the evening before you want to eat the muffins. Cover the bowl with a clean kitchen towel or plastic wrap and leave it at room temperature. During the night, the sourdough starter works its magic, breaking down the flour and creating air bubbles throughout the dough. This long fermentation develops flavor and makes the muffins easier to digest. The next morning, your dough should look bubbly and smell pleasantly sour.
Choosing Between Milk and Water
You can use either water or milk in this recipe depending on the flavor you prefer. Water creates a lighter, more traditional English muffin with pronounced sourdough tang. Milk makes the muffins richer and slightly sweeter with a softer crumb. Whole milk works best for the richest flavor, but you can use whatever milk you have available. Some people even use buttermilk for extra tang. The liquid you choose does not affect the cooking method, only the final taste and texture. Try both versions to see which one your family prefers.
Flour Adjustments and Consistency
Different types of flour absorb liquid at different rates, so you may need to adjust the amount you use. Humidity levels in your kitchen also affect how much flour the dough needs. Start with the amount listed in the recipe, then add more flour one tablespoon at a time if the dough seems too sticky to handle. The dough should be soft but not wet, and you should be able to shape it without it sticking excessively to your hands. Too much flour makes dense, dry muffins, while too little makes them hard to work with. Trust your judgment and adjust as needed.
The Role of Baking Soda
Adding baking soda to the fermented dough serves two purposes. First, it neutralizes some of the acidity from the sourdough, creating a milder flavor. Second, it provides extra lift and creates those characteristic nooks and crannies inside the muffins. The baking soda reacts with the acids in the sourdough to produce carbon dioxide bubbles. Mix it in gently just before you shape and cook the muffins. This ingredient is what gives these muffins their light, airy texture even without a second long rise time.
Skillet Temperature Control
Getting the skillet temperature right is crucial for cooking these muffins properly. Start by preheating your cast iron skillet or griddle over medium-high heat. Once hot, reduce the heat to medium-low before adding the muffins. If the heat stays too high, the outside burns before the inside cooks through. If the heat is too low, the muffins do not rise properly and end up dense. Watch the first batch carefully and adjust your heat as needed. Each stovetop is different, so you may need to experiment to find the perfect setting for your equipment.
Shaping and Sizing the Dough
Divide your dough into twelve equal portions for standard-sized English muffins. You can weigh each piece on a kitchen scale if you want them exactly the same size. Shape each portion into a round disk about half an inch thick. The dough will puff up as it cooks, so do not make them too thick initially. Handle the dough gently to preserve the air bubbles created during fermentation. You can dust your hands lightly with flour to prevent sticking, but try not to work in too much extra flour during shaping.
Cooking Time and Visual Cues
Place the shaped muffins in your preheated, greased skillet with space between each one. Cover the skillet with a lid to trap heat and steam, which helps the muffins cook evenly. Let them cook undisturbed until they have doubled in height, which usually takes about ten to fifteen minutes. The bottom should be golden brown when you peek underneath. Flip each muffin carefully and cook the other side until it matches the first. The muffins should feel firm when you press them gently, not soft or doughy. Total cooking time is usually twenty to thirty minutes per batch.
Why Cast Iron Works Best
Cast iron skillets are ideal for cooking English muffins because they distribute heat evenly and maintain steady temperature. The heavy material prevents hot spots that can burn the muffins in some places while leaving others undercooked. Cast iron also develops a natural nonstick surface over time with proper seasoning. If you do not have cast iron, a heavy-bottomed regular skillet or electric griddle works too. Just be extra careful about temperature control with thinner pans that heat up and cool down more quickly than cast iron does.
How Temperature Affects Rising Time
Room temperature significantly impacts how long your dough takes to ferment overnight. In a warm kitchen, the fermentation happens faster and the dough may be ready in just eight hours. In a cooler environment, you might need twelve hours or more for proper fermentation. During summer months, you can shorten the overnight rise or even move the bowl to a cooler spot. In winter, make sure the dough stays in a warm area of your kitchen. If your house is very cold, you can put the bowl in an oven with just the light on for gentle warmth.
Storing and Reheating Tips
These sourdough English muffins keep well for several days at room temperature in an airtight container or plastic bag. For longer storage, freeze them for up to three months. Let them cool completely before freezing, and place parchment paper between layers to prevent sticking. To use frozen muffins, thaw them at room temperature or toast them directly from frozen. The best way to eat these muffins is to split them with a fork rather than cutting with a knife. This preserves those nooks and crannies that hold butter and jam so well.
Common Problems and Solutions
If your muffins turn out dense instead of light and airy, your starter may not have been active enough or the dough did not ferment long enough. Dense muffins can also result from cooking at too low a temperature for too long. If the bottoms burn before the insides cook, your heat is too high. Reduce it and be patient. If muffins do not rise much in the pan, make sure you are using a lid to trap steam and heat. Sometimes the dough is too stiff, which prevents rising, so add a bit more liquid next time.
Ways to Use English Muffins
These muffins work for any meal, not just breakfast. Split and toast them for a base for eggs benedict or breakfast sandwiches. Use them for burgers or sandwiches at lunch. They make great pizza bases when topped with sauce and cheese. Spread them with butter and jam for a simple snack. The tangy sourdough flavor pairs well with both sweet and savory toppings. Some people even use them to make bread pudding or stuffing. Keep a batch in your freezer so you always have fresh muffins ready whenever you need them.
Customizing Your Muffins
Once you master the basic recipe, you can add different ingredients to change the flavor. Mix in herbs like rosemary or thyme for savory muffins. Add cinnamon and raisins for a sweet version. Whole wheat flour can replace part of the white flour for more fiber and nutrition. Some people add seeds like sesame, poppy, or flax on top before cooking. You can also make them larger or smaller depending on how you plan to use them. Small muffins work well for appetizers, while larger ones make hearty sandwich bases.
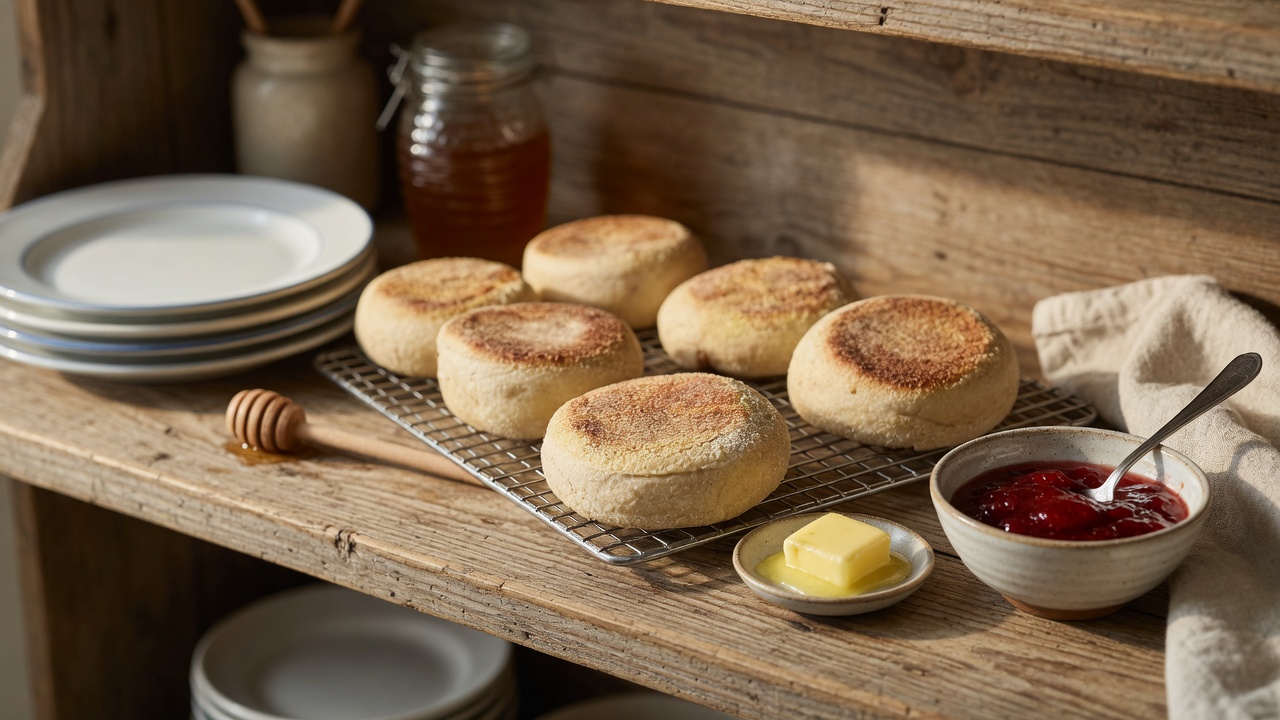
Sourdough English Muffins
Tangy sourdough English muffins cooked on the stovetop with crispy outsides and soft, airy insides. These homemade muffins use overnight fermentation for deep flavor and require no oven. Perfect for breakfast sandwiches, toast, or any meal.
15
minutes15
minutes110
kcal12
hours12
hours30
minutesIngredients
2 1/2 cups all-purpose flour
1 cup water
1/2 cup active sourdough starter
1 tablespoon honey
1 teaspoon salt
1 teaspoon baking soda (optional)
Coconut oil (for greasing)
Directions
- Begin your sourdough journey by combining flour, water, and active sourdough starter in a glass bowl. Cover and allow to ferment overnight.
- After fermentation, incorporate honey, salt, and baking soda into the mixture.
- Preheat a cast iron skillet over high heat, adding a touch of coconut oil for a non-stick surface.
- Mix the ingredients until fully integrated, adjusting flour as needed for optimal consistency.
- Divide the dough into twelve portions and place them in the hot skillet.
- Reduce the heat to facilitate a gentle rise, allowing the muffins to double in size.
- Once golden-brown on the bottom, carefully flip and cook until thoroughly done.
- Transfer to a cooling rack and savor the irresistible allure of homemade sourdough English muffins.
Nutrition Facts
- Calories: 110kcal
- Carbohydrates: 23g
- Fiber: 1g
- Sugar: 2g
- Protein: 3g