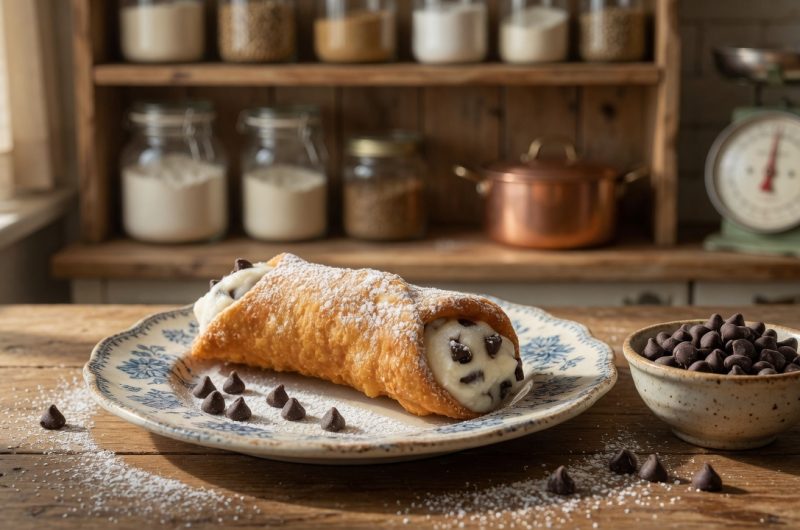
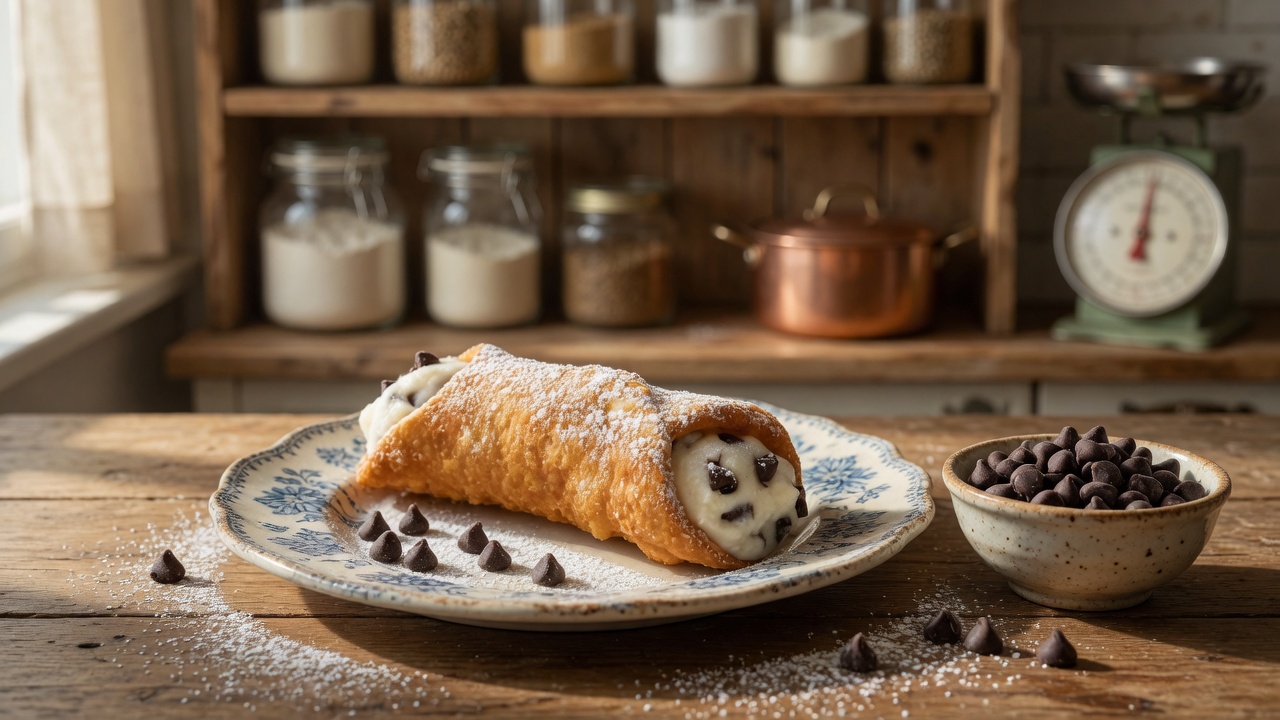
Italian cannoli represent one of Sicily’s most beloved desserts, with a history that stretches back centuries through Sicilian tradition and culture. These iconic pastries consist of crispy fried shells filled with creamy ricotta cheese mixed with chocolate and other delightful ingredients. The name “cannoli” comes from the Italian word meaning small tubes, referring to the cylindrical shape created by wrapping pastry around metal molds before frying. Understanding the cultural significance of cannoli helps you appreciate why they remain popular across Italy and Italian communities worldwide. The dessert embodies Sicilian values of quality ingredients, careful preparation, and celebration of simple flavors combined in sophisticated ways. Making authentic cannoli at home requires patience and attention to detail, but the results transport you directly to Sicily with every bite.
Why Authentic Cannoli Require Quality Ingredients
Creating truly exceptional cannoli begins with selecting the best quality ingredients you can find, as cannoli have such simple components that inferior products become immediately apparent. Ricotta cheese forms the foundation of the filling and should be fresh, creamy, and mild-flavored rather than watery or overly sharp. Fresh ricotta from Italian markets or specialty cheese shops produces noticeably better results than mass-produced supermarket varieties. The flour used in the pastry shell should be all-purpose flour with good protein content to develop proper texture. Dark chocolate drops or chopped dark chocolate provide richness and slight bitterness that balances sweetness. Lard, while less commonly used in modern cooking, contributes authentic flavor and creates the properly crispy exterior that distinguishes homemade cannoli from lesser versions. Even the powdered sugar used for dusting should be high-quality confectioner’s sugar that dissolves smoothly without grittiness.
Preparing Ricotta Cheese for Smooth Filling Consistency
The texture of your cannoli filling depends significantly on how thoroughly you drain and process the ricotta cheese. Fresh ricotta often contains excess whey that needs to be removed before using in filling. Draining ricotta overnight in a fine mesh sieve lined with cheesecloth removes moisture while maintaining the cheese’s creamy texture. After draining, some recipes call for pushing the ricotta through a fine mesh sieve, which breaks down any lumps and creates an exceptionally smooth consistency. This step might seem tedious, but it prevents grainy texture in your filling that would detract from the eating experience. If you cannot access a fine mesh sieve, pressing the ricotta through a potato ricer achieves similar results. The goal is achieving a consistency that spreads smoothly into the shells without being soupy or watery.
Creating the Pastry Dough Foundation
The pastry dough for cannoli shells requires careful mixing and proper ingredient proportions to achieve the right texture. Combining flour, salt, cinnamon, powdered coffee, and cocoa in a large mixing bowl creates the dry base that forms the shell structure. Adding confectioner’s sugar provides sweetness that balances the savory elements. Introducing lard, egg, and a mixture of vinegar and Marsala wine creates a dough that’s flavorful and develops the proper texture when fried. The vinegar provides slight tang that keeps the dough from becoming too rich, while Marsala wine adds subtle sweetness and depth. Kneading the dough develops gluten, creating elasticity that allows you to roll it thin without tearing. The dough should become soft and elastic rather than stiff or brittle—if it feels too dry, add small amounts of water; if too wet, add flour gradually.
Understanding the Importance of Dough Resting Time
Allowing cannoli dough to rest in the refrigerator for one hour before rolling serves multiple important purposes. The resting period allows the gluten to relax, making the dough easier to roll out without constant shrinking. The cold temperature stiffens the dough, making it easier to handle when rolling and cutting. The resting time also allows flavors to meld and develop fully, improving the taste of the finished shells. Some bakers prefer overnight refrigeration, which develops flavors even more while making the dough easier to work with. The dough becomes firmer and less likely to tear when you’re shaping it around the molds. Taking time for proper resting results in superior texture and flavor compared to attempting to fry shells from freshly made dough.
Perfecting the Ricotta Filling Mixture
Creating the filling requires blending ricotta cheese with sugar until smooth and creamy, then folding in chocolate to create a filling that’s rich without being overwhelming. Some recipes call for chilling the ricotta and sugar mixture for an hour before passing through a sieve, which helps create a smoother final consistency. Folding dark chocolate drops or chunks into the finished filling preserves the chocolate pieces rather than breaking them down into the mixture. The amount of chocolate can be adjusted based on preference—more chocolate creates richer filling while less allows ricotta flavor to predominate. Some recipes include candied orange peel or pistachios in the filling for additional flavor and texture variation. Refrigerating the finished filling until you’re ready to fill the shells prevents it from becoming too soft while the chocolate maintains its distinct pieces throughout.
Rolling and Shaping Pastry Shells Properly
Rolling cannoli pastry requires thinness and uniformity to create shells that fry evenly without burning on edges or remaining undercooked in centers. Rolling the dough between two sheets of parchment paper prevents sticking and allows you to achieve consistent thickness without excessive flour dusting. The dough should be thin enough to become crispy when fried but thick enough to maintain structural integrity. Using pastry rings or cookie cutters to cut circles ensures uniform size that bakes evenly. Wrapping each circle around a cannoli mold—a metal tube specifically designed for this purpose—creates the characteristic cylindrical shape. Sealing the overlapping ends with egg white ensures they stay sealed during frying rather than separating. Working efficiently after shaping prevents the dough from drying out, which would cause it to crack or become brittle when fried.
Frying Cannoli Shells to Crispy Perfection
Frying cannoli requires careful temperature control and attention to ensure golden, crispy shells without burning. Heating lard to the proper temperature—approximately three hundred fifty degrees Fahrenheit—creates shells that crisp quickly without absorbing excessive oil. Using a thermometer ensures accurate temperature rather than guessing. Frying only a few shells at a time prevents temperature from dropping excessively, which would result in greasy rather than crispy shells. The shells should turn golden brown in approximately one to two minutes, at which point you remove them using tongs or a slotted spoon. Draining on paper towels removes excess oil while the shells are still warm and pliable. Allowing shells to cool completely before removing from molds prevents breakage that would occur if you attempted to remove them while still warm and soft.
Filling and Assembling Finished Cannoli
Once the shells have cooled completely, filling them represents the final step before serving. Using a pastry bag fitted with a large tip allows you to pipe the ricotta mixture into the shells efficiently while maintaining control. Filling from both ends ensures the filling reaches the entire length of the shell and creates an attractive presentation. Some people use a small spoon to fill cannoli instead, which works fine though is less elegant. Once filled, the cannoli should be served within a few hours to prevent the shells from absorbing moisture from the filling and becoming soft. The contrast between crispy shell and creamy filling is one of the defining characteristics of proper cannoli, making timing important.
Garnishing for Visual Appeal and Authentic Presentation
The garnish transforms finished cannoli from simple to impressive and signals authentic preparation. Placing a halved candied cherry at each end of the cannoli creates traditional appearance and adds burst of sweetness in every bite. Some recipes substitute candied orange peel or chopped pistachios for visual interest and flavor variation. Dusting the entire cannoli generously with powdered sugar creates the white appearance associated with traditional cannoli while adding final sweetness. The powdered sugar should be fine confectioner’s sugar that dissolves smoothly rather than granulated sugar that would feel gritty. Applying garnish just before serving maintains the appearance and prevents candied fruit from discoloring.
Storage and Serving Considerations
Properly stored, unfilled cannoli shells keep for several days in an airtight container at room temperature, allowing you to fill them closer to serving time. Filled cannoli are best consumed within a few hours of assembly while shells remain crispy and distinct from the filling. Refrigerating filled cannoli causes the shells to absorb moisture and become soft, losing the textural contrast that makes them special. If you must store filled cannoli, place them in a single layer on a plate covered loosely with plastic wrap, and consume within a few hours. The shells and filling can be prepared separately in advance, then assembled just before serving to maintain optimal texture. Some bakers freeze unfilled shells for several weeks, then thaw and fill them as needed for last-minute entertaining.
Why Making Cannoli at Home Creates Superior Results
Homemade cannoli surpass store-bought versions in texture, flavor, and freshness because commercially produced cannoli have sat in packaging for extended periods before reaching you. The shells in store-bought cannoli often become soft rather than remaining crispy because moisture migrates from filling to shell during storage. Homemade versions made just before serving maintain the contrast between crispy shell and creamy filling that makes cannoli special. The quality of ingredients in homemade versions typically exceeds what commercial producers use, creating noticeably better flavor. The satisfaction of creating something authentically Sicilian in your own kitchen adds emotional dimension that commercial products cannot provide. Learning the techniques required for proper cannoli making develops baking skills applicable to other pastries and desserts.
Italian Cannoli
Perfect for special occasions, Italian gatherings, or anytime you want to impress with homemade desserts that showcase traditional techniques. Each cannoli delivers authentic Sicilian flavor that transports you to Italy with every bite.
4
servings20
minutes1
hour198
kcal1
hour20
minutesIngredients
2 cups flour
1 tablespoon bitter cocoa powder
4 tablespoons confectioners sugar
4 tablespoons lard (optional)
1 pinch salt
1 teaspoon cinnamon powder
1 teaspoon instant coffee
1 egg
1 oz white wine vinegar
1 oz Marsala wine
- For the Cannoli Filling:
3 cups ricotta cheese
1/2 cup dark chocolate drops
1.5 cups sugar
- For Garnish:
24 Candied cherries
Powdered sugar as required
- For the Egg Wash:
1 egg white
- For Frying:
1 liter lard
Directions
- Begin by draining the ricotta cheese in a colander placed over a bowl and store it in the refrigerator.
- In a large mixing bowl, combine flour, salt, cinnamon, powdered coffee, cocoa, and sifted confectioner’s sugar.
- Add lard, egg, white wine vinegar, and Marsala wine gradually, kneading the mixture until it forms a soft, elastic dough. Wrap the dough in plastic and refrigerate for at least an hour.
- For the cannoli filling, mix the drained ricotta cheese with sugar and refrigerate for an hour. Afterward, strain the mixture through a fine mesh sieve to achieve a smooth consistency. Fold in dark chocolate drops and refrigerate until ready to use.
- Roll out the dough thinly and cut into circles using pastry rings. Wrap each circle around cannoli molds, sealing the ends with egg white.
- Heat lard to 170-180°C (338-356°F) and fry the cannoli shells until golden brown. Drain excess oil on absorbent paper and let cool before removing the molds.
- Fill the cooled cannoli shells with the prepared ricotta mixture using a pastry bag fitted with a smooth nozzle.
- Garnish each cannoli with a halved candied cherry at each end and dust with powdered sugar before serving.
Nutrition Facts
- Calories: 198kcal
- Fat: 5g
- Cholesterol: 22mg
- Sodium: 41mg
- Carbohydrates: 30g
- Fiber: 2g
- Sugar: 17g
- Protein: 6g
- Calcium: 174mg