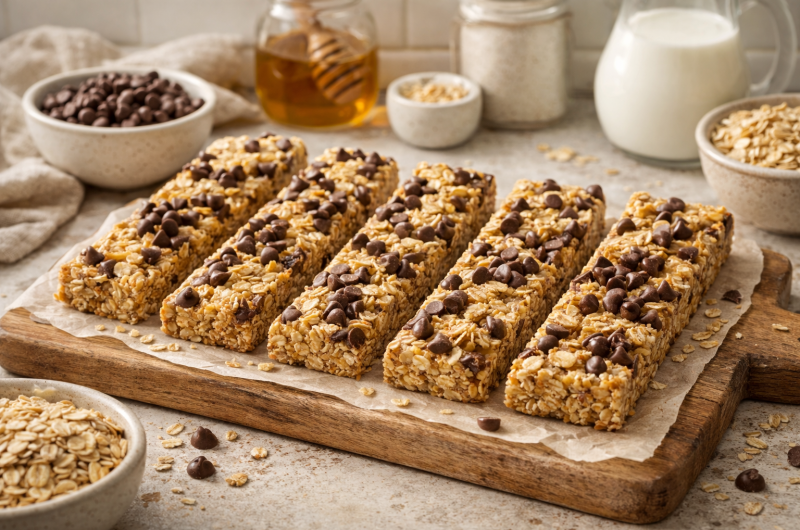
Homemade protein granola bars represent a smart alternative to store-bought options that often contain mysterious additives, preservatives, and excessive sweeteners. These bars appeal to health-conscious individuals seeking convenient snacks that don’t compromise on nutrition or taste. Making your own granola bars gives you complete control over ingredients, allowing you to customize them for specific dietary needs whether you’re avoiding gluten, dairy, or processed foods. The satisfaction of creating something delicious and nutritious from simple ingredients builds confidence and supports sustainable eating habits. Unlike commercial granola bars that may taste artificial or stale, homemade versions deliver fresh flavor and optimal texture. Understanding why homemade bars outperform store-bought alternatives motivates people to invest time in making their own snacks regularly.
Why Homemade Granola Bars Cost Less Than Store-Bought Options
The financial benefits of making granola bars at home become apparent when comparing prices per bar to commercially produced versions. A single store-bought protein bar often costs three to five dollars, while homemade bars typically cost less than one dollar each when accounting for ingredient costs. Making a batch of twelve to sixteen bars from simple pantry ingredients costs significantly less than purchasing the same number from retail stores. The bulk purchasing of basic ingredients further reduces per-bar costs compared to specialty health food shops. Over time, these savings accumulate substantially, making homemade bars a budget-friendly choice for regular snackers. The initial investment in basic ingredients like oats, protein powder, and nut butter pays for itself within a few batches. Understanding the financial advantage motivates people to make granola bars regularly rather than viewing homemade snacks as occasional treats.
Selecting Quality Rolled Oats for Ideal Texture
Old-fashioned rolled oats form the foundation of these granola bars, providing both structure and satisfying chewiness. Using quality rolled oats ensures better texture and flavor compared to budget alternatives that may contain debris or dust. Rolled oats can be certified gluten-free if you need to accommodate that dietary requirement. The size and quality of oat flakes affect how the finished bars hold together and their mouthfeel. Crushing some oats slightly before mixing helps them bind together more effectively while maintaining desired texture. Avoiding instant oats ensures you get the hearty, chewy texture that defines quality granola bars. The oats should smell fresh and pleasant, indicating proper storage and handling by the manufacturer.
Choosing Protein Powder for Nutritional Value
Vanilla-flavored protein powder provides the protein content that makes these bars nutritionally complete and satisfying. Selecting protein powder without artificial sweeteners ensures clean ingredients that align with homemade bar philosophy. Vanilla flavor complements the sweetness of honey and chocolate without overwhelming other flavors. The protein powder quality affects final taste significantly—investing in better brands prevents artificial aftertaste. Different protein sources including whey, plant-based, and collagen offer various nutritional profiles. Starting with vanilla flavor allows you to experiment with additional flavoring without competing tastes. Understanding how protein powder affects texture and moisture helps you adjust recipes based on your specific brand.
Understanding Chia Seeds’ Role in Nutrition and Texture
Chia seeds contribute nutritional density and unique texture to granola bars while serving important functional purposes. These tiny seeds expand when combined with moisture, helping bind ingredients together naturally. Chia seeds provide omega-three fatty acids, fiber, and minerals that enhance nutritional value significantly. They create a slightly gelatinous quality that helps bars hold together without requiring excessive binding agents. The mild, slightly nutty flavor of chia seeds complements other ingredients without dominating the taste profile. Including chia seeds increases satiety, helping you feel full longer after eating the bars. The nutritional benefits of chia seeds justify their inclusion despite their higher cost compared to some ingredients.
Selecting Sunflower Butter as a Nut-Free Binder
Sunflower butter serves as an excellent alternative to traditional nut butters, making these bars suitable for people with nut allergies. This ingredient acts as the primary binder, holding all components together while adding subtle nutty flavor. Sunflower butter creates the sticky consistency necessary for bars to maintain shape during storage and consumption. The creamy texture of quality sunflower butter blends smoothly with other ingredients without creating clumps. Selecting natural sunflower butter without added oils or sugars aligns with the homemade bar philosophy. The mild flavor of sunflower butter allows other ingredients to shine while contributing necessary binding properties. Starting with sunflower butter establishes a nut-free foundation that accommodates common allergies.
Using Honey as a Natural Sweetener
Pure honey provides natural sweetness that appeals to people avoiding artificial sweeteners or refined sugar. The honey flavor slightly caramelizes during baking, creating depth that enhances the overall taste. Raw honey contains enzymes and nutrients that refined sugar lacks, making it a superior sweetening choice. Adjusting honey amounts lets you control sweetness based on personal preference and other ingredients’ natural sweetness. Honey helps bind ingredients together while also contributing moisture that affects bar texture. The thickness of honey varies by brand and storage conditions, affecting how much you need to add. Understanding honey’s functional role beyond sweetness helps you appreciate its importance in bar formulation.
Incorporating Milk for Proper Consistency
Milk serves as the liquid component that helps all dry ingredients absorb moisture and blend together smoothly. Choosing between dairy and plant-based milk depends on dietary preferences and restrictions. The amount of milk affects bar consistency—too little creates dry bars that crumble, while too much creates mushy texture. Different milk types have varying fat and protein content that affects binding and texture. Adding milk gradually and checking consistency prevents overshooting and needing to adjust with dry ingredients. The quality and temperature of milk don’t significantly affect results, making this ingredient flexible and forgiving.
Selecting Mini Chocolate Chips for Even Distribution
Mini chocolate chips distribute more evenly throughout bars compared to standard-size chips, ensuring chocolate in every bite. The smaller size prevents large pockets of melted chocolate that can create uneven texture. Quality chocolate chips with real cocoa butter melt smoothly and taste noticeably better than budget alternatives containing waxy substitutes. Dark chocolate chips offer less sweetness and more sophisticated flavor compared to milk chocolate varieties. Adding chocolate chips after other ingredients are combined prevents them from being crushed during mixing. The amount of chocolate chips can be adjusted based on chocolate preference without affecting bar structure.
Creating Variations While Maintaining Core Formula
The basic granola bar recipe serves as a foundation that accommodates endless flavor variations. Adding unsweetened coconut creates tropical flavor without significantly altering the base recipe. Dried fruits like raisins, cherries, or blueberries add chewiness and natural sweetness. Chopped nuts including walnuts or almonds add crunch and nutritional value for those without nut allergies. Dark chocolate pieces or a chocolate drizzle after baking creates extra indulgence. Experimenting with variations keeps granola bars interesting and allows you to discover personal preferences.
Proper Baking Pan Preparation and Pressing Technique
Generously greasing an eight-by-eight-inch baking pan prevents sticking that would damage bars during removal. Alternative preparation methods include lining the pan with parchment paper, which makes removal even easier. Pressing the bar mixture evenly and firmly into the pan ensures consistent thickness throughout. Even pressure creates bars with uniform baking times and similar texture. Using a glass or metal spatula helps distribute the mixture without compacting it excessively. Proper preparation at this stage prevents frustration during removal and affects the final bar appearance.
Monitoring Baking Progress to Avoid Overcooking
Watching the bars carefully during baking ensures they achieve the perfect texture with golden edges and soft centers. Removing bars when edges turn golden but the center still appears slightly soft prevents overbaking. Overbaked bars become hard and brittle, losing the desirable chewy texture. Different ovens may bake at slightly different rates, so relying on visual cues rather than time alone provides better results. The bars continue cooking slightly from residual heat after removal, so underbaking prevents them from becoming rock-hard.
Storage Methods for Extended Shelf Life
Storing granola bars properly maintains freshness and prevents them from drying out or becoming stale. Refrigerated bars last approximately one week in airtight containers, making this suitable for small households. Freezing extends shelf life to six months, allowing batch cooking for long-term snacking. Individual bar wrapping in parchment or wax paper prevents them from sticking together. Removing bars from the freezer thirty minutes before eating allows proper thawing while maintaining cool temperature. Understanding storage options helps you choose methods that match your consumption patterns.
Why Homemade Granola Bars Support Health Goals
Including homemade granola bars in your snacking routine supports various health objectives from weight management to athletic performance. The protein content keeps you satisfied between meals without excessive calorie intake. The fiber from oats and seeds promotes digestive health and sustained energy. The lack of artificial ingredients eliminates concerns about chemical additives and excess preservatives. Knowing exactly what goes into your snack provides peace of mind and control over your nutrition. These bars fit into various dietary approaches from flexible dieting to strict nutrition protocols.
Building Consistency Through Regular Homemade Snacking
Making granola bars regularly develops kitchen skills and builds confidence in food preparation. The straightforward process with minimal ingredients creates success for beginner cooks. Regular batch making establishes routines that support healthy eating habits. The convenience of having homemade bars available prevents reaching for less nutritious options. Building consistency through regular preparation creates sustainable healthy eating patterns.
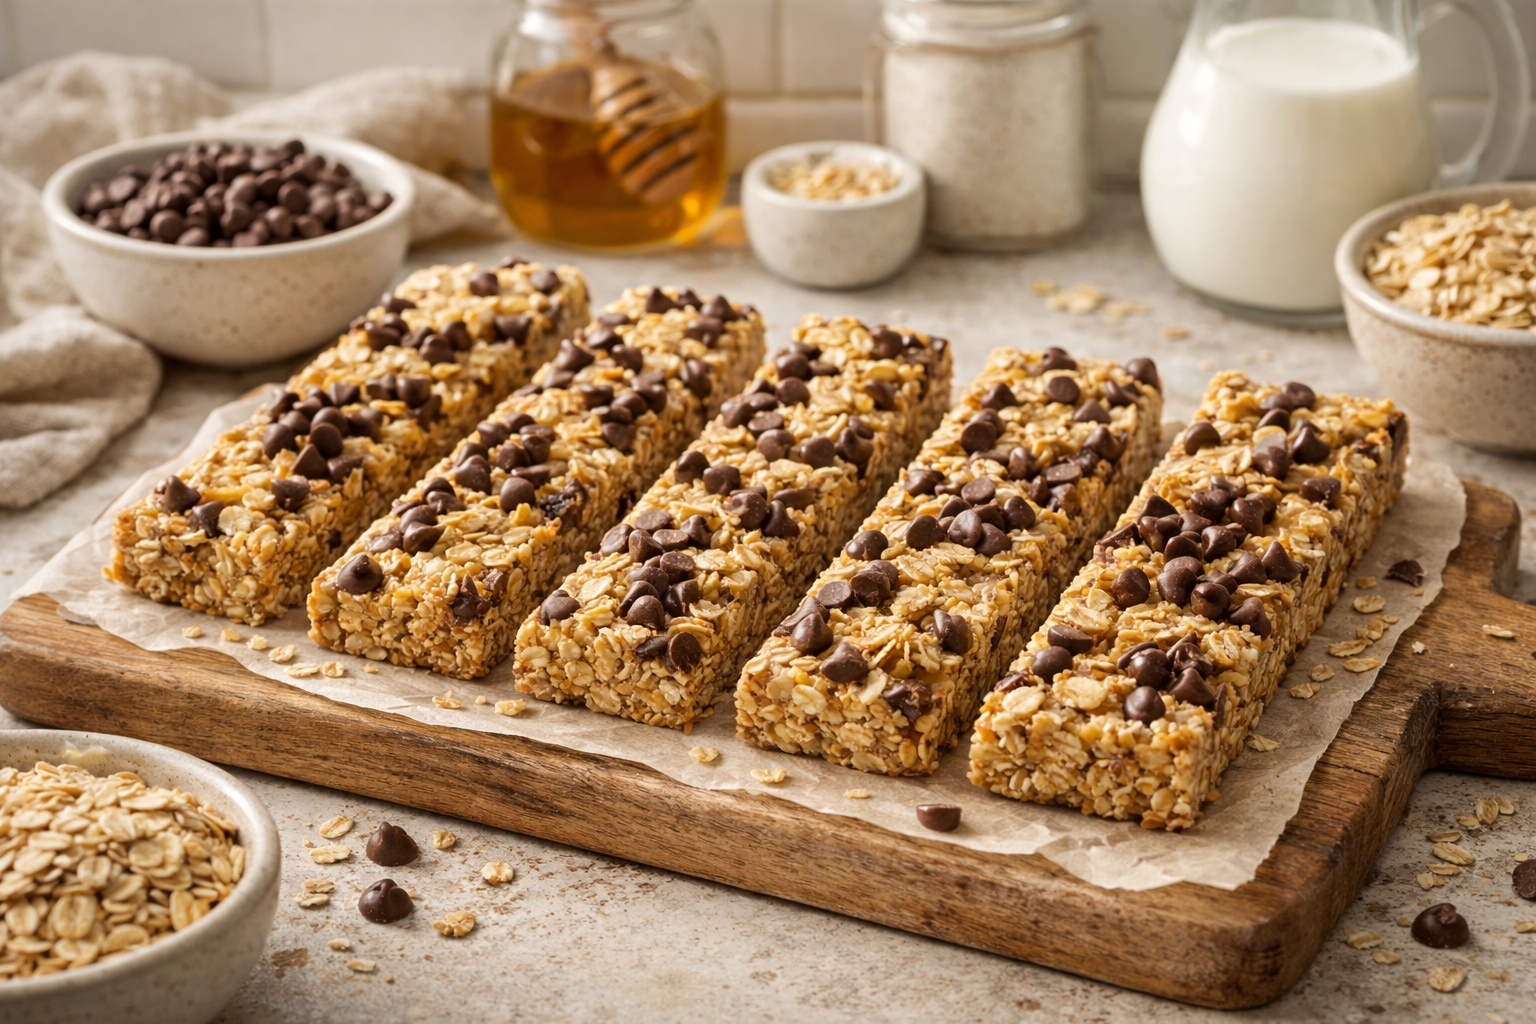
Protein Granola Bars
If you’re craving a quick and nutritious snack that’s ready in a snap, these no-bake protein granola bars are your answer. With just four simple ingredients, you’ll have a batch of delicious bars in under 30 minutes. Not only are they easy to make, but they also serve as a versatile canvas for your favorite mix-ins.
12
servings10
minutes18
minutes209
kcal28
minutesIngredients
2 cups old-fashioned rolled oats
½ cup protein powder (vanilla recommended)
2 tablespoons chia seeds
½ cup mini chocolate chips
Directions
- In a large bowl, combine oats, protein powder, chia seeds, and mini chocolate chips. Mix well.
- In a separate bowl, warm up sunflower butter and honey until well blended.
- Pour the wet mixture into the dry ingredients. Stir until fully combined.
- Press the mixture into a greased 8×8 baking pan using firm pressure for the desired bar thickness.
- Refrigerate for at least 2 hours to set.
- Slice into bars and store in an airtight container in the fridge for up to 1 week.
Nutrition Facts
- Calories: 209kcal
- Fiber: 2g
- Sugar: 17g
- Protein: 20g